EasyManuals Logo

Epson Stylus Pro 9000 - Print Engine User Manual

Epson Stylus Pro 9000 - Print Engine
198 pages
To Next Page IconTo Next Page
To Previous Page IconTo Previous Page
Page #68 background imageLoading...
Page #68 background image
EPSON Stylus Pro 9000
Disassembly & Assembly 68
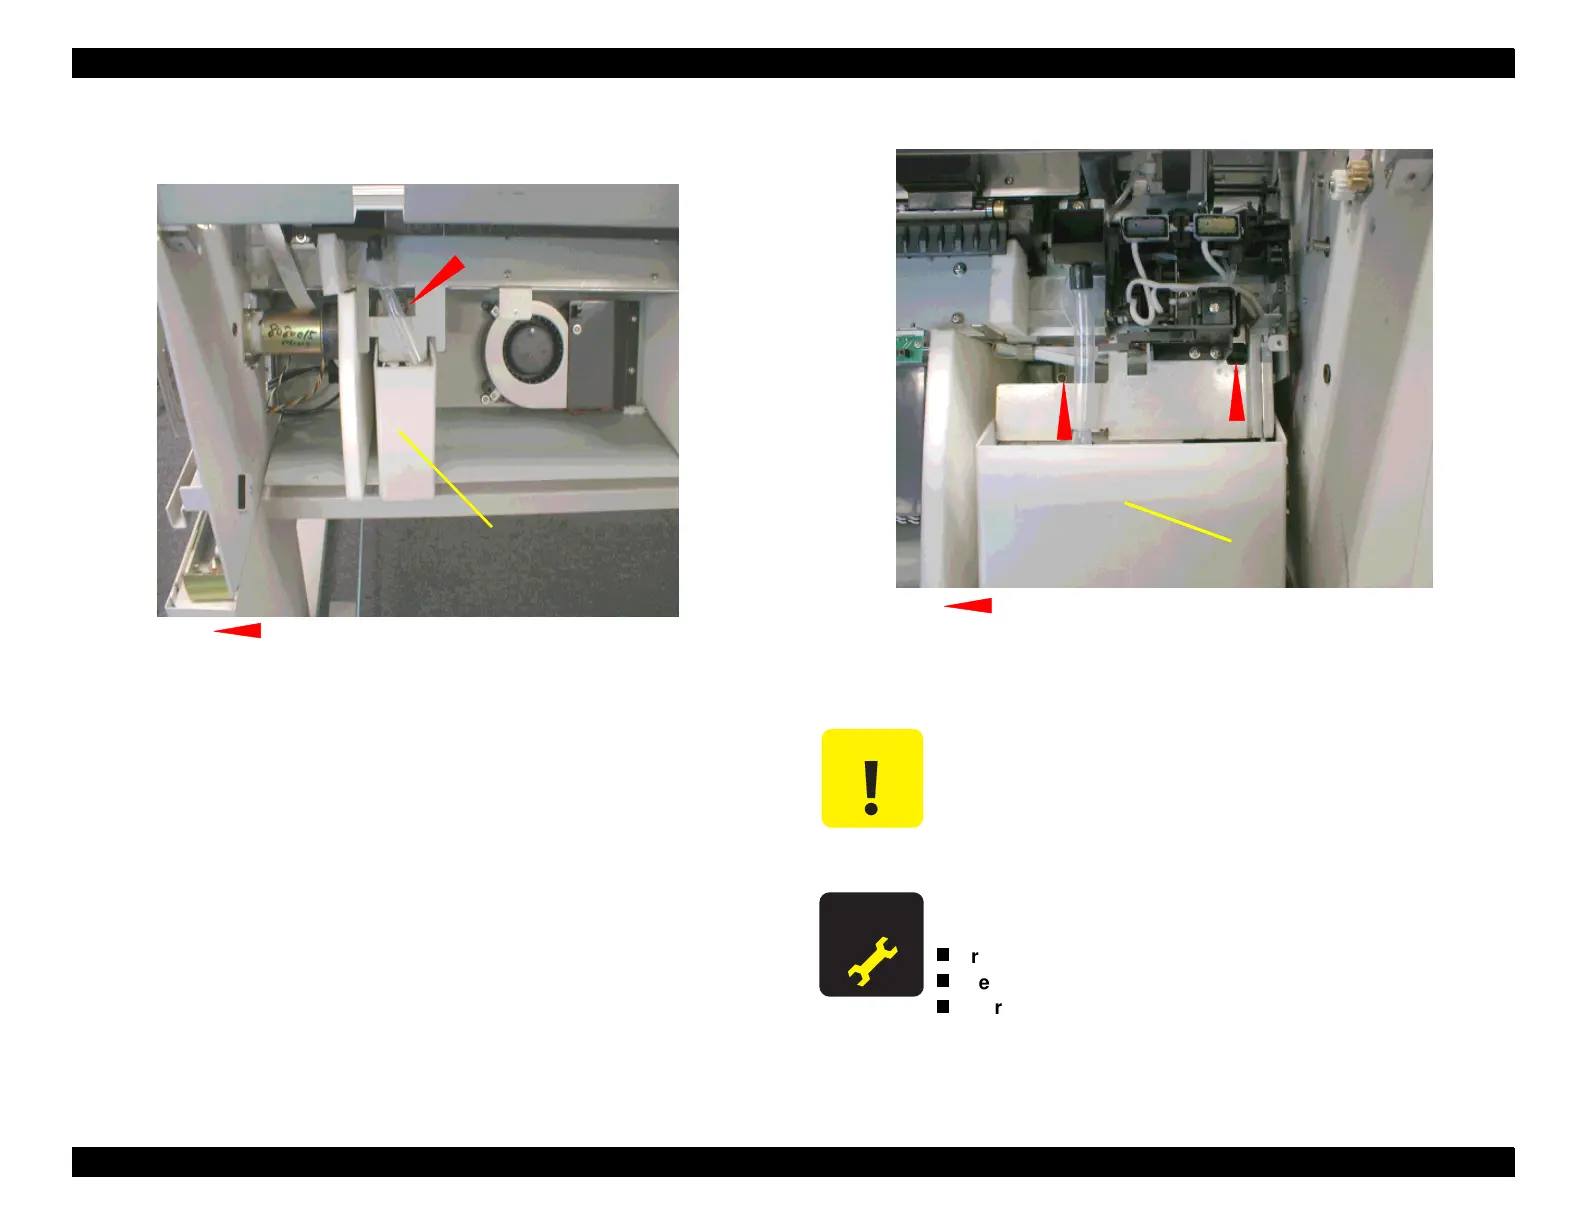
1. Remove the screws that secure the Waste Ink Boxes to the printer (see the
figures below), and then remove the Waste Ink Boxes.
Figure 4-18. Left Waste Ink Box
Figure 4-19. Right Waste Ink Box
2. Remove the Waste Ink Pads from the left and right Waste Ink Boxes.
Waste Ink Box L
CP(W2) M4x8
CAUTION
Prepare a vinyl bag beforehand for disposing of the pads.
ADJUSTM ENT
REQUIRED
After replacing the Waste Ink Pads, perform the following
adjustments:
reset the waste ink counter
reset the initial cleaning flag [???right name???]
perform the Cutter Position Adjustment
CP(W2) M4x8 screws
Waste Ink Box R

Table of Contents

Questions and Answers:

Question and Answer IconNeed help?

Do you have a question about the Epson Stylus Pro 9000 - Print Engine and is the answer not in the manual?

Epson Stylus Pro 9000 - Print Engine Specifications

General IconGeneral
BrandEpson
ModelStylus Pro 9000 - Print Engine
CategoryPrinter
LanguageEnglish

Related product manuals