Operating Procedures: Stage Control
C O N F I D E N T I A L – FEI Limited Rights Data5-40
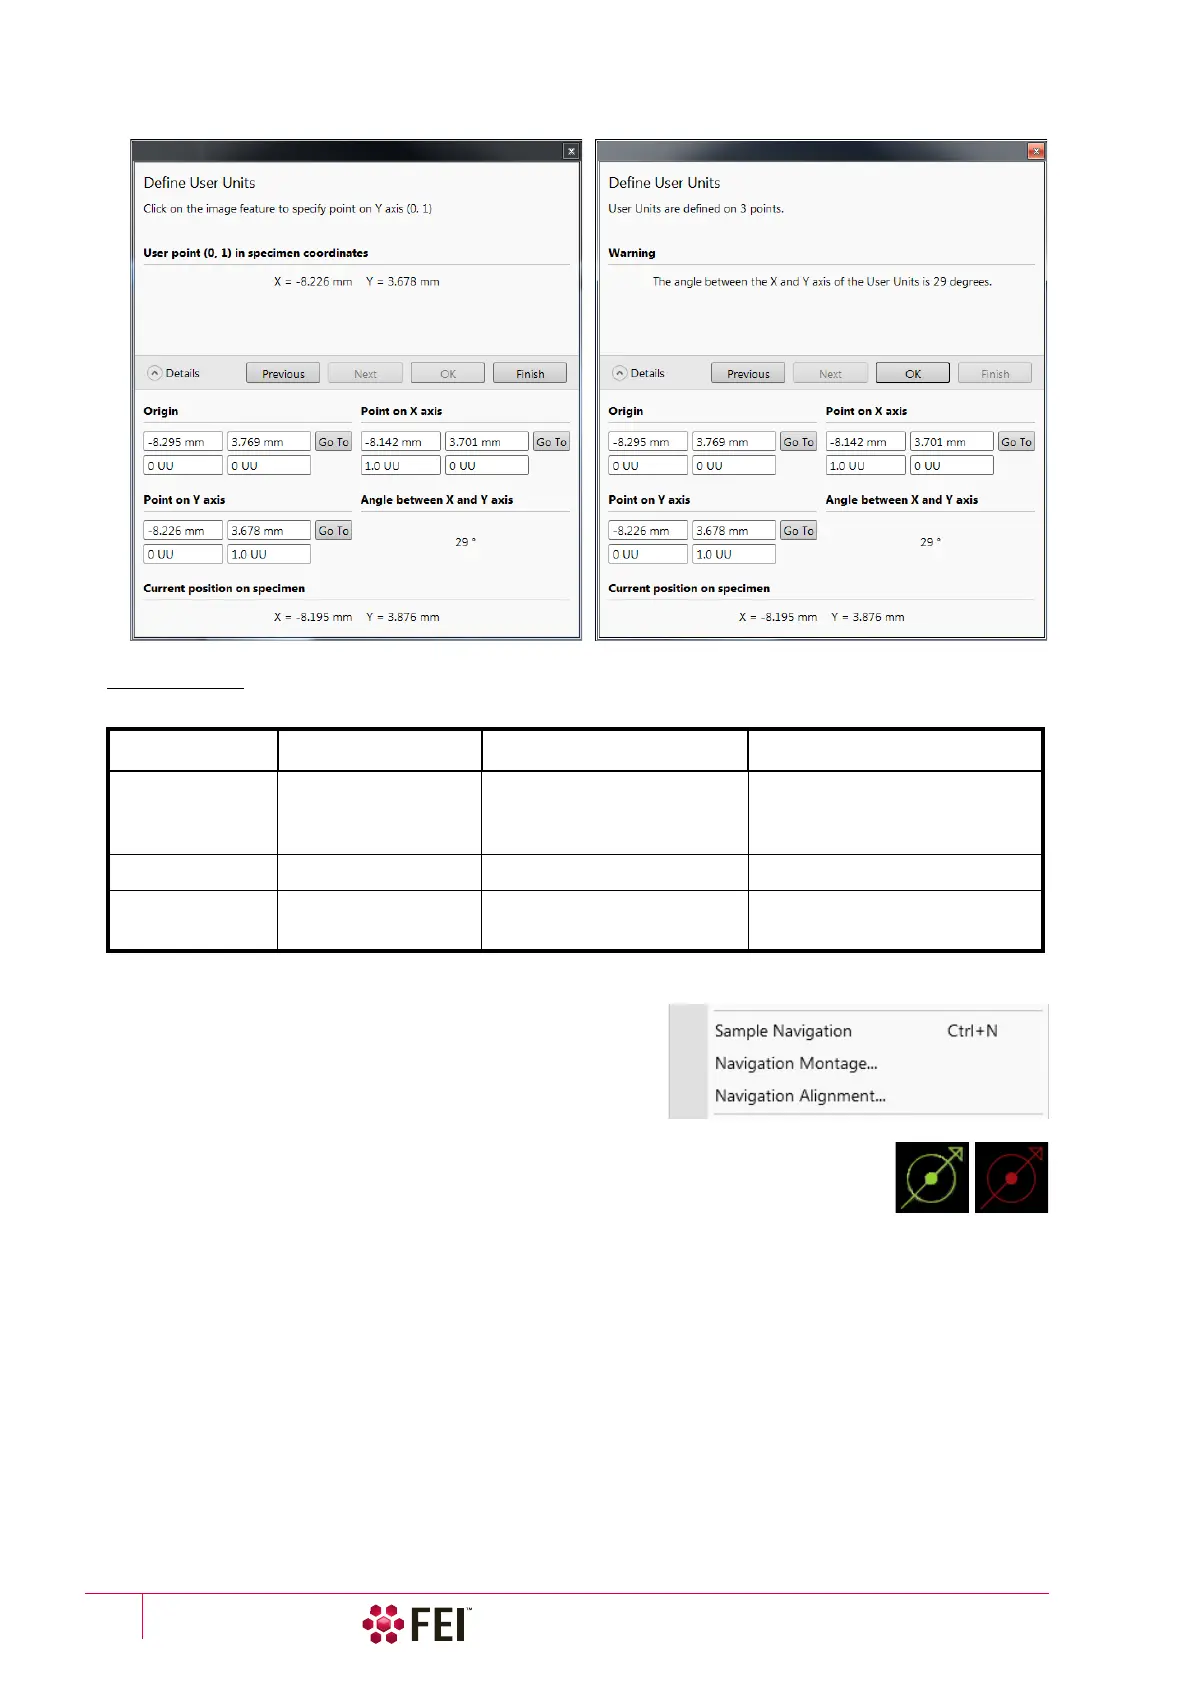
Using 1 / 2 / 3 Point(s) Alignments
Sample Navigation
The
Stage
menu /
Sample Navigation
(Ctrl + N) software feature
enables to navigate along the sample surface when the field of view
is smaller than desired (limited by an aperture for instance). For
this purpose various sample navigation images can be dynamically
and independently selected, regardless of its actual content and
status (paused, saved, loaded).
As soon as the selected imaging is paused, the Sample Navigation icon appears in the upper
right display corner to indicate the functionality. This indicator is green and the paused
imaging can be used to navigate along the live one. Otherwise it turns red and indicates no
functionality in the respective display.
A green rectangle showing the actually selected field of view (in the selected display) appears with the size
corresponding to the magnification. In display(s) using Sample Navigation the Selected Area Zooming and the Get
features can be used.
To employ the Sample Navigation there are three possible techniques to acquire (or to use) a Navigation image:
• Navigation Montage
• Navigation Alignment
• Nav-Cam (option)
Table 5-6
Alignment Type Differences
Use 1 Point Alignment 2 Points Alignment 3 Points Alignment
Major Use Aligning to new point
directly offset from
the existing location
Aligning the stage axes with
the specimen X–Y orientation
to correct any distortion
Transforming to nonstandard
units on dies or RAM arrays;
to correct any distortion
Change in Scale None Scales the axes together
X can be scaled differently from Y
Change in
Orientation
None
Rotates both axes with a fixed
90° angle between axes
X and Y orientation
can be different