IP8820/IP8830/IP8840
Installer Guide
32
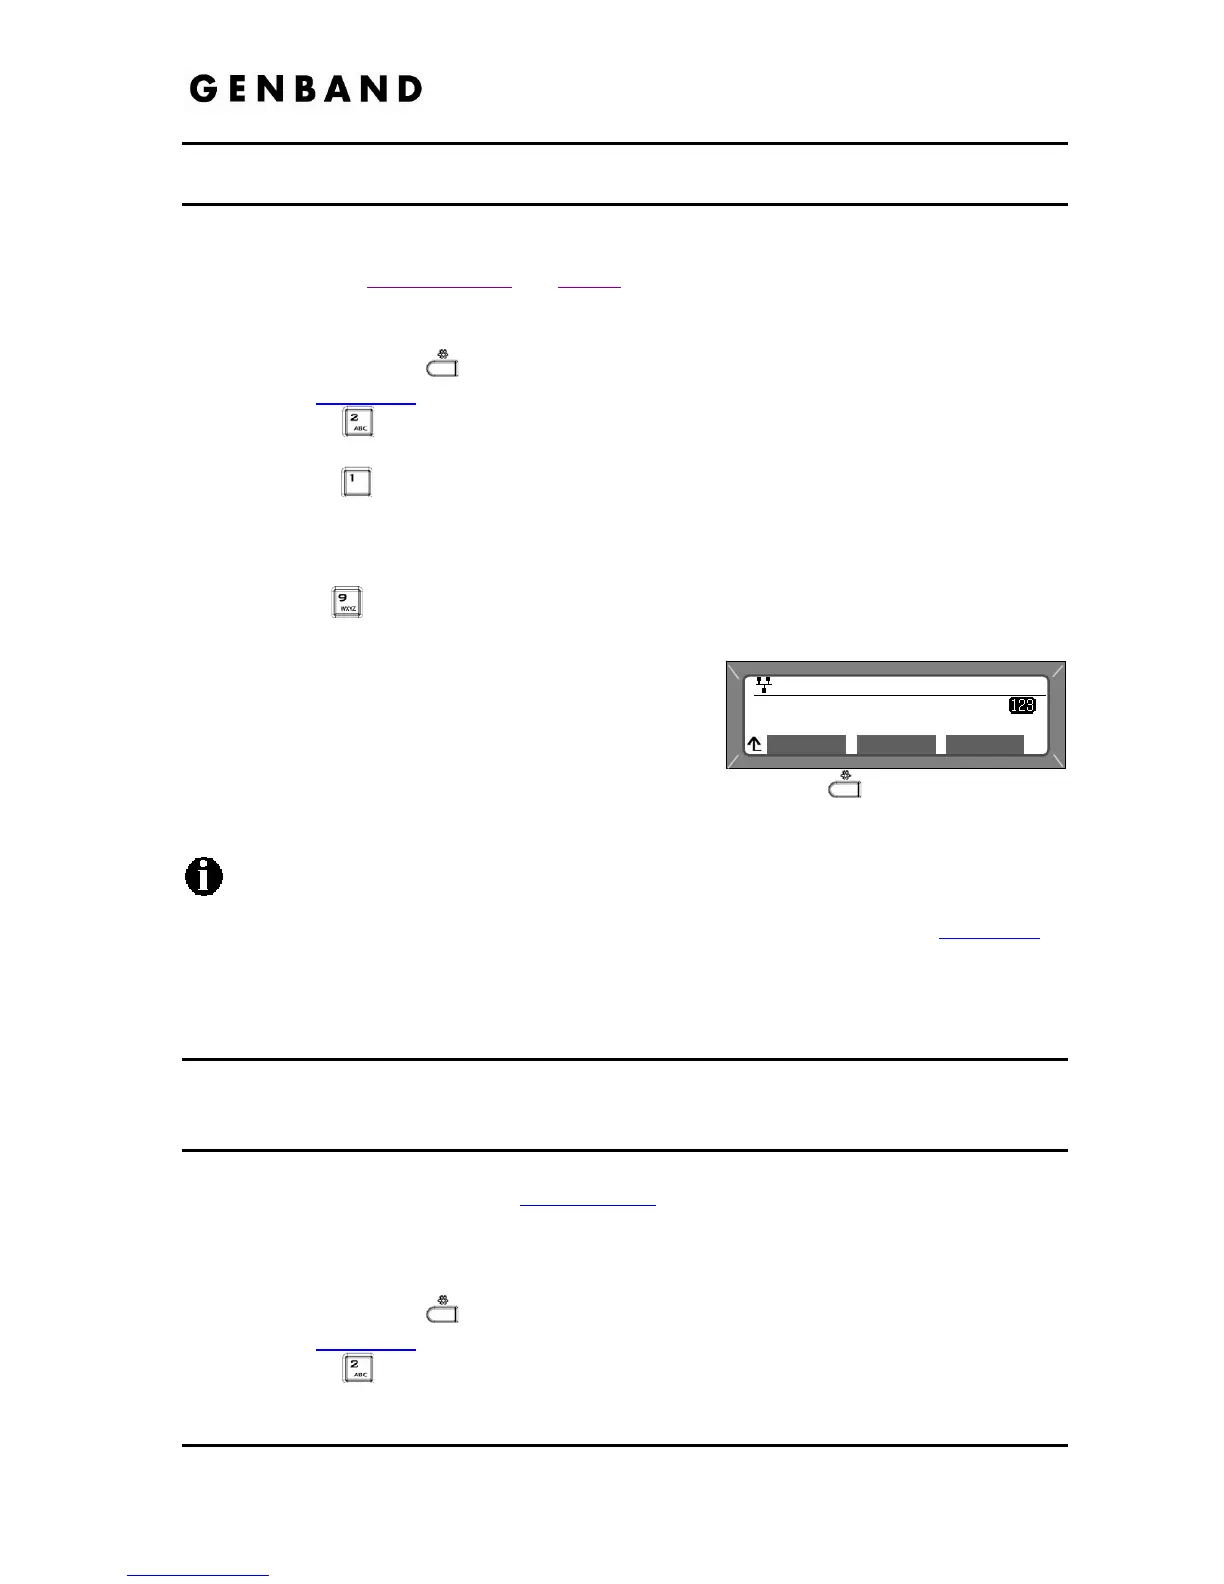
Jan 17 4:32
Extension For DSS
1234
Mode OK
3.5.1.10 Extension for DSS Line
A DSS/BLF Line requires entry of the associated extension number. Note do not assign a DSS
extension number for a private or shared line type. Also, do not assign an Authorization Name
and Password, see sections 3.5.1.5
and 3.5.1.6.
To assign an extension number for a DSS line,
Press the Settings (
) button. If the LCD Menu is locked, use the unlock procedure.
Refer to section 3.3
.
Press the
digit, or move the cursor to 2.SIP Configuration using the [Next]-
[Previous] softkeys and press the [OK] softkey.
Press the
digit, or move the cursor to 1.Line Configuration using the [Next]-
[Previous] softkeys and press the [OK] softkey.
Enter the line button number or move the cursor using the [Next]-[Previous] softkeys and
press the [OK] softkey to select a line button.
Press the
digit, or move the cursor to 9.Extension for DSS using [Next]-[Previous]
softkeys and press the [OK] softkey.
Input the extension number for the DSS line using
the dial pad and press the [OK] softkey to save
your entry.
Move to another parameter with the navigation
buttons and continue the session or press the Settings (
) button to exit the
configuration session.
Assign an extension number only for a DSS/BLF line. Do not assign an extension
number for a private or shared line.
For BLF operation, Presence must be enabled in the Web Manager, see section 4.2
or
configuration file for the phone.
3.5.2 SIP Configuration, General Parameters
Parameters in this section assign the overall SIP operation.
3.5.2.1 Outbound Proxy Address
With the Outbound Proxy Address defined, the IP Phone sends all requests to the proxy instead
of the SIP call server configured in section 3.5.1.1
. The address may be in the form of an IP
address or a FQDN.
To assign an Outbound Proxy Address
Press the Settings (
) button. If the LCD Menu is locked, use the unlock procedure.
Refer to section 3.3
.
Press the
digit, or move the cursor to 2.SIP Configuration using the [Next]-
[Previous] softkeys and press the [OK] softkey.