IP8820/IP8830/IP8840
Installer Guide
61
Jan 17 4:32
Phone Book : Name
Tom
Mode OK
Jan 17 4:32
Phone Book : Number
5556
Mode OK
Jan 17 4:32
Phone Book : Speed Num
0
Clear OK
Jan 17 4:32
Phone Book (Page 1)
>(01) Tom, 5555598
Next Dial
Previous
Jan 17 4:32
Phone Book : Ring Type
Ring Type 3
Next OK
Play
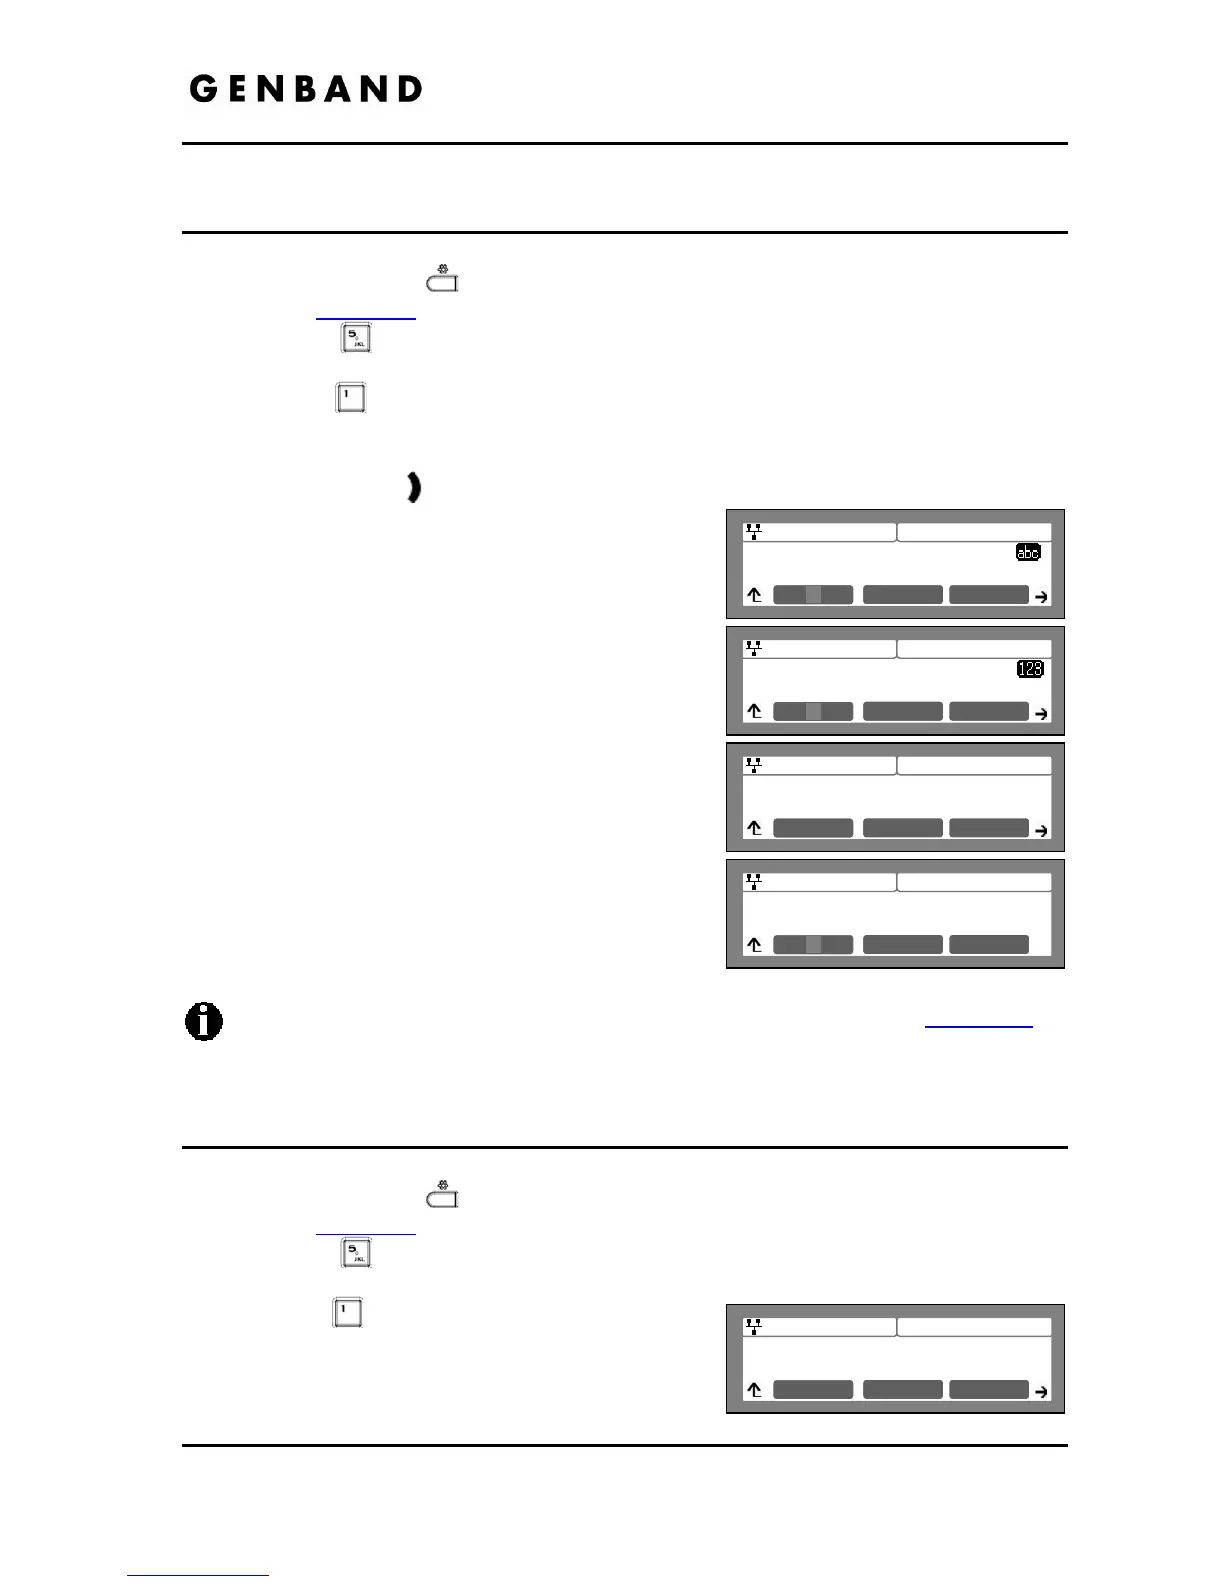
3.8.1 Adding a Phone Book Record
To add a new contact:
Press the Settings (
) button. If the LCD Menu is locked, use the unlock procedure.
Refer to section 3.3
.
Press the
digit, or move the cursor to 5.Directory using the [Next]-[Previous]
softkeys and press the [OK] softkey.
Press the
digit, or move the cursor to 1.Phone Book using the [Next]-[Previous]
softkeys and press the [OK] softkey.
Press the [Add] softkey after moving to the next group of softkeys using the right
navigation button,
.
Enter a Name for the new contact and press the
[OK] softkey.
Enter a Number or SIP user id for the contact and
press the [OK] softkey.
Select the Ring type to use when receiving a call
from this contact.
Enter a Speed Number (00 - 99) for the new
contact and press the [OK] softkey.
The IP Phone adds the new contact to the Phone
Book and returns to the Phone Book list.
To enter alphanumeric characters select the [Mode] softkey. Refer to Appendix E
for
the character mapping of dial pad digits.
If no Ring type is defined for a Phone Book entry, the Default Ring Type is used.
3.8.2 Editing a record
To edit a Phone Book record:
Press the Settings (
) button. If the LCD Menu is locked, use the unlock procedure.
Refer to section 3.3
.
Press the
digit, or move the cursor to 5.Directory using the [Next]-[Previous]
softkeys and press the [OK] softkey.
Press the
digit, or move the cursor to 1.Phone
Book using the [Next]-[Previous] softkeys and
press the [OK] softkey.
Select a contact to edit using the [Next]-[Previous]