3-55
Chapter 3 Settings and Measurement
Contents General Description
Checks and Preparation
Settings and Measurement
Example of Use Specification
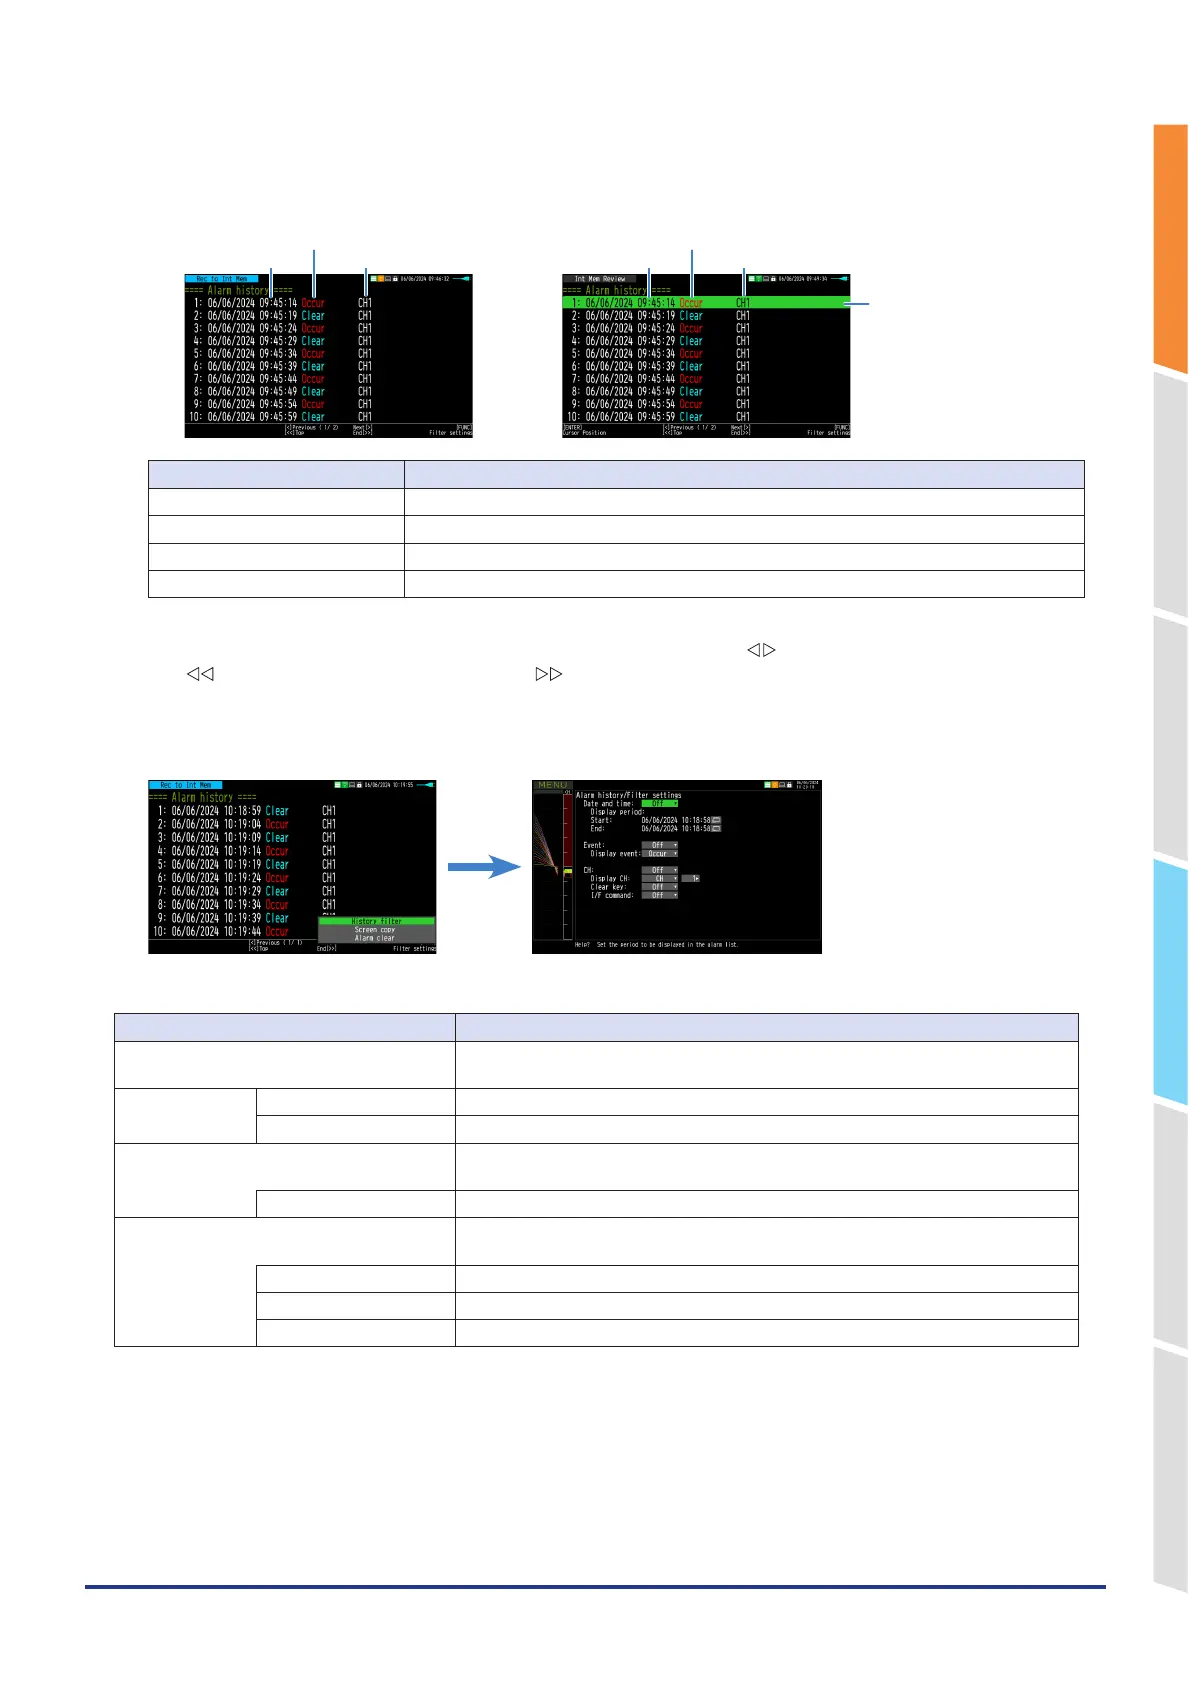
Description of the alarm history screen
<Capturing>
<When replaying data>
Event date and time
Alarm occurrence/clearing
Cause of event
Selection cursor
Event date and time
Alarm occurrence/clearing
Cause of event
Display Description
Event date and time Date and time when the alarm event occurred.
Alarm occurrence/clearing The alarm occurrence/clearing status is displayed.
Cause of event The cause of the event is displayed.
Selection cursor A cursor that selects an event. (Only during replaying)
The Alarm History screen can display 10 alarm events at once.
If there are more than 10 alarm events, you can switch pages by pressing the " " key.
Use the " " key to move to the first page, and the " " key to move to the last page.
Alarm History filter
Press the "FUNC" key on the Alarm History screen to open the Alarm History filter setting screen.
The Alarm History filter allow you to narrow down the alarm events you want to display.
Select items Setting items
Date and Time Off, On
Enables filtering on the displayed alarm event duration.
Display period Start Set the date and time to start displaying alarm events.
Stop Set the date and time to stop displaying alarm events.
Event Off, On
Enables filtering according to the event types to display.
Display event Occurrence, Clearing
CH Off, On
Enables filtering by factors such as the channel of events to be displayed.
Display CH CH1-10, LP1-4, CALC1-10
Clear key Off, On
I/F command Off, On
Move to alarm event position during replaying
During replaying, you can move the A/B cursor to the selected position by selecting an alarm event in the Alarm History
display and pressing the [ENTER] key.
You can quickly move to the alarm event position, which is useful for understanding the cause of the alarm.