3-4
Chapter 3 Settings and Measurement
Contents General Description
Checks and Preparation
Settings and Measurement
Example of Use Specification
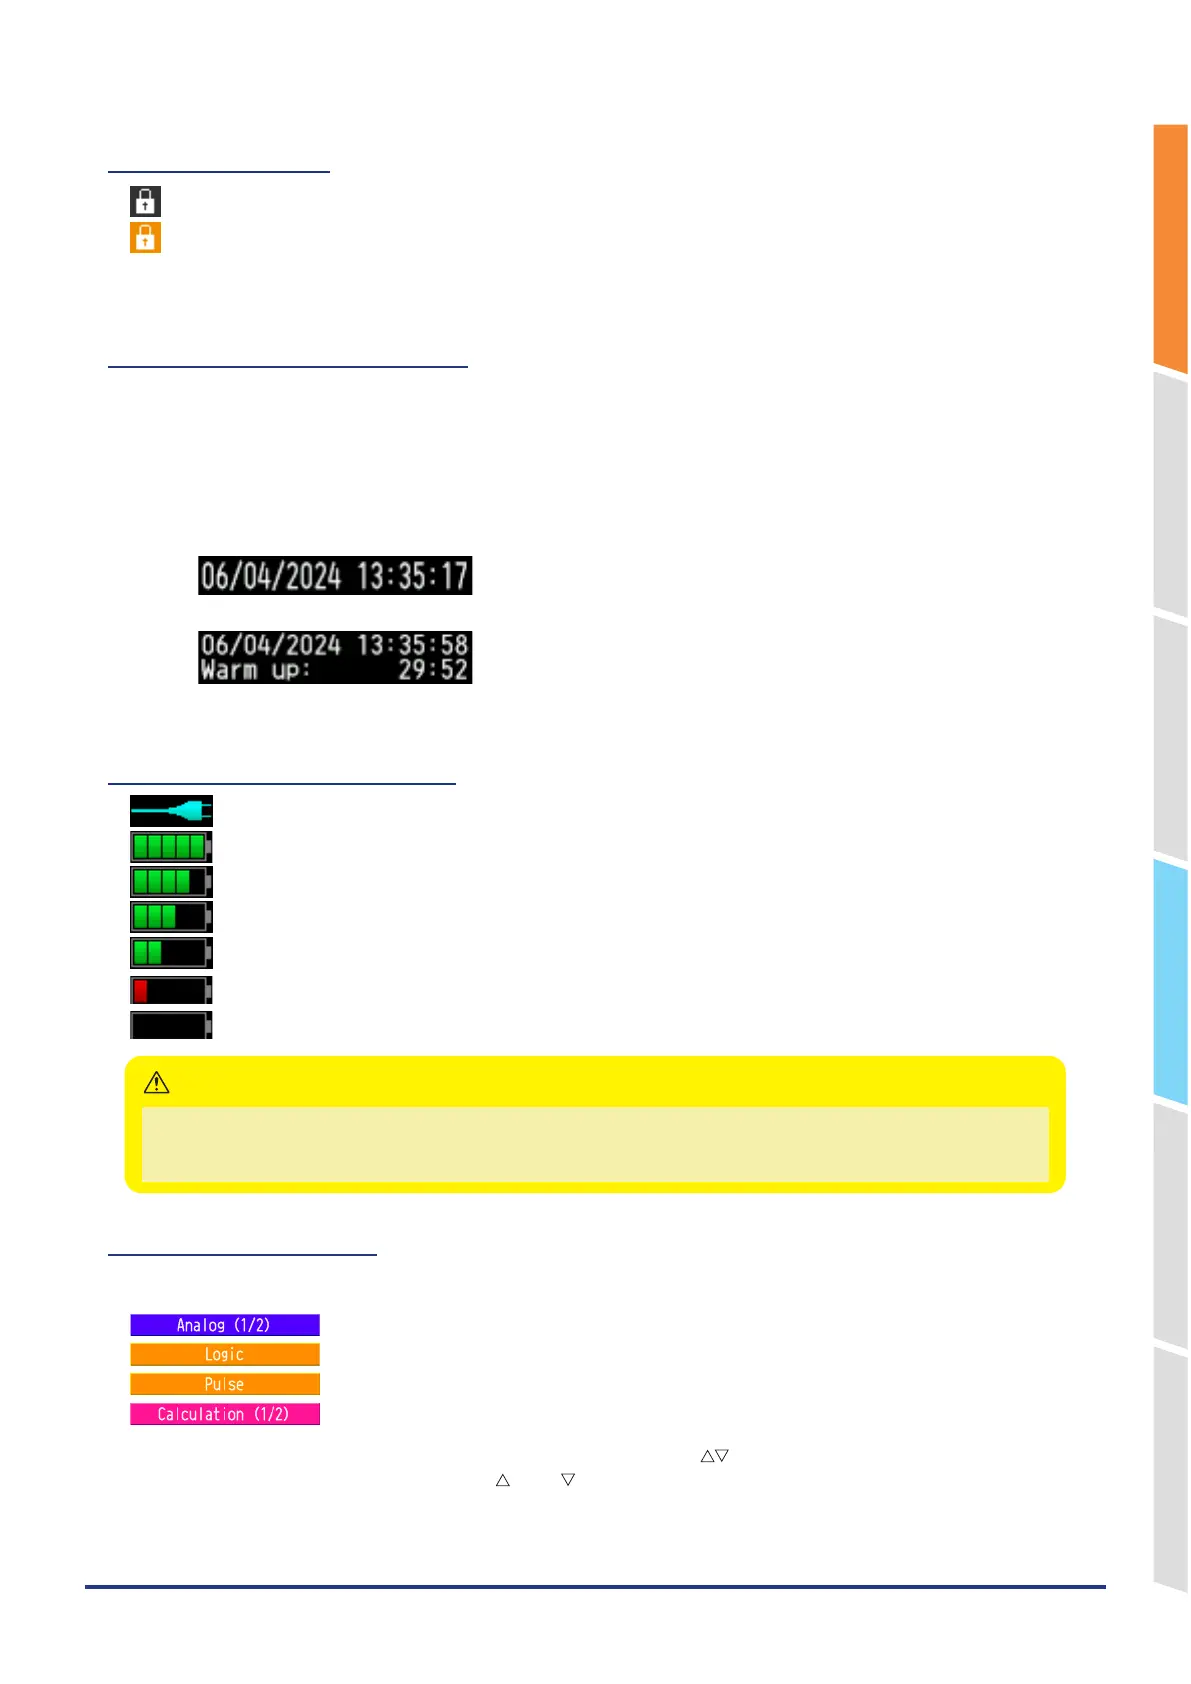
7. Key lock display
: Not in key lock status. Normal operations are enabled.
: Key lock status. All the keys are locked.
Refer to "13. To cancel key lock by password" in "3.4 Setting Menus" for details on the key lock.
8. Clock display/Warm-up time
Displays the current date and time.
Refer to "6. OTHER settings" in "3.4 Setting Menus" for details on date and time settings.
From the time the power is turned on until the time set in the warm-up setting, the current date and time are displayed
in the upper row, and the remaining warm-up time is displayed in the lower row.
Use this as a guide when measuring temperature with a thermocouple.
The warm-up time display disappears when the time set in the warm-up setting has passed.
Refer to "6. OTHER settings" in "3.4 Setting Menus" for warm-up time settings.
:Normal time display
:Warm-up time display.
9. AC/Battery status indicator
: Running on AC or DC power supply.
: Running on the battery. The remaining battery power is 100 to 90%.
: Running on the battery. The remaining battery power is 89 to 70%.
: Running on the battery. The remaining battery power is 69 to 50%.
: Running on the battery. The remaining battery power is 49 to 30%.
: Running on the battery. The remaining battery power is 29 to 10%.
: Running on the battery. The remaining battery power is 10% or below.
•
Data capture automatically stops when the remaining battery power drops to 10% or below.
•
The power is automatically turned off when the remaining battery power is 0%.
•
Please use the remaining battery display as a guide. This indicator does not guarantee the operating time with the battery.
CAUTION
10. Digital display area
The input value of each CH is displayed. Use the "CH SELECT" key to switch display categories.
: Analog CH measurement value is displayed.
: Logic CH measurement value is displayed.
: Pulse CH measurement value is displayed.
: Calculation CH calculation results are displayed.
The ON or OFF of the active channel display can be changed using the " " keys.
You can select the CH to be activated with the " " and " " keys. Also, for the active CH, the waveform display is
displayed at the top.
CHs whose Input or Setting is set to Off are not displayed.
Refer to "1. CH GROUP" and “2. SELECT”in "3.2 Key Operation" for details.