9 Servicing
RCI-(1.0-6.0)FSN4 - 4-way cassette
SMGB0099 rev.0 - 12/2016
249
9
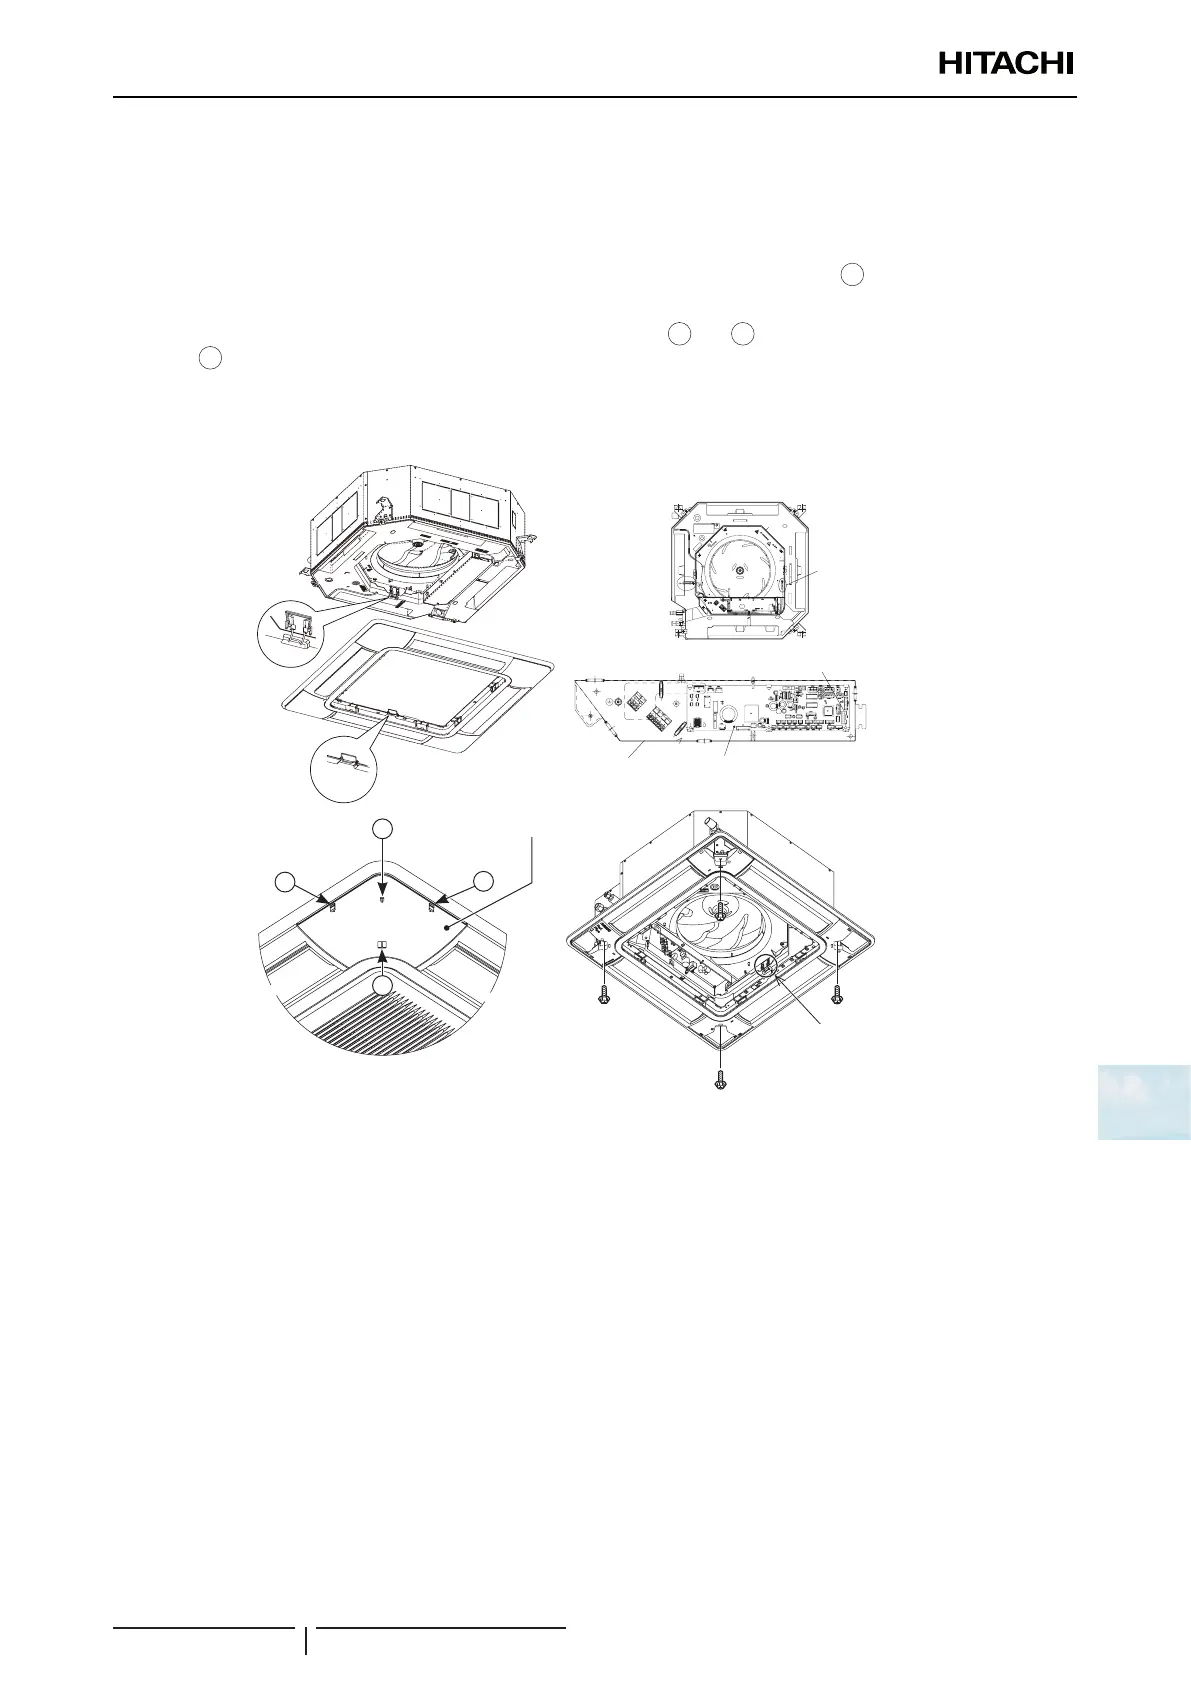
9.1.3 Removing Optional Air Panel
1 Open the air inlet grille. Remove the connector (CN36) at the air panel from the connector for auto louver (CN17) on
the indoor unit PCB1.
2 Remove the air inlet grille from the air panel.
3 Remove four (4) corner pocket covers from the air panel. They can be removed pulling “
A
” part toward the arrow
direction in the gure below.
* To attach the corner pocket covers again, insert the xing hooks (
1
and
2
) to the air panel and insert the xing
hook (
3
) to the air panel.
4 Remove four (4) long screws from the air panel. Remove them with attention to temporally hook hinges of air panel (2
portions) onto hooks of unit (2 portions). Then, remove the air panel after unhooking two (2) hinges from the two (2)
hooks.
Hook
Hinge
Unit
Air Panel
Unit
Air panel
Hinge
Hook
>PS<
HS-HB
HITACHI AIR( / )CONDITIONER
Model
THM5
THM3
CN11
CN2
CN1
PCN6
CN17
THM1
THM2
PCN4
S/N
R/L1
2
1
B
A
K
DRAIN
>PS<
OA
OA INLET
D
N112
CN36
Electrical box
Indoor unit PCB1
Connector for auto louver (CN17)
A
1
2
3
Corner pocket cover
(2 Portions)
Long Screw
(4 pcs.)
Long screw
(4 pcs.)
C-shaped hinge
(2 portions)
 Loading...


