9 Servicing
RPK-FSN(H)3M - Wall mounted
SMGB0099 rev.0 - 12/2016
320
9.9.10 Removing Heat Exchanger
! DANGER
TURN OFF all power source switches.
! CAUTION
• Recover the refrigerant from the unit before the work. After all the refrigerant is recovered, turn OFF all power source switches.
• Make sure that the unit will not be damaged. If having difculty in performing the work alone, the work shall be taken by two people.
• Take special care not to be injured by the heat exchanger ns.
For RPK-(0.6-1.5)FSN(H)3M
1 Remove the power source wiring, the transmission wiring and the wiring for the remote control switch.
2 Push the portion indicated by “PUSH” on the underside of the unit to release the catches at the lower part of the unit.
3 Remove the are nuts attached to the rear piping of the heat exchanger to disconnect the pipings. Then lift the indoor
unit up and draw it frontward to remove it.
4 Remove the front panel according to the “9.9.2 Removal of the front panel” chapter.
5 Remove the electrical box according to the “9.9.7 Removing Electrical Box” chapter.
6 Remove the drain pan according to the “9.9.9 Removing Drain Pan” chapter.
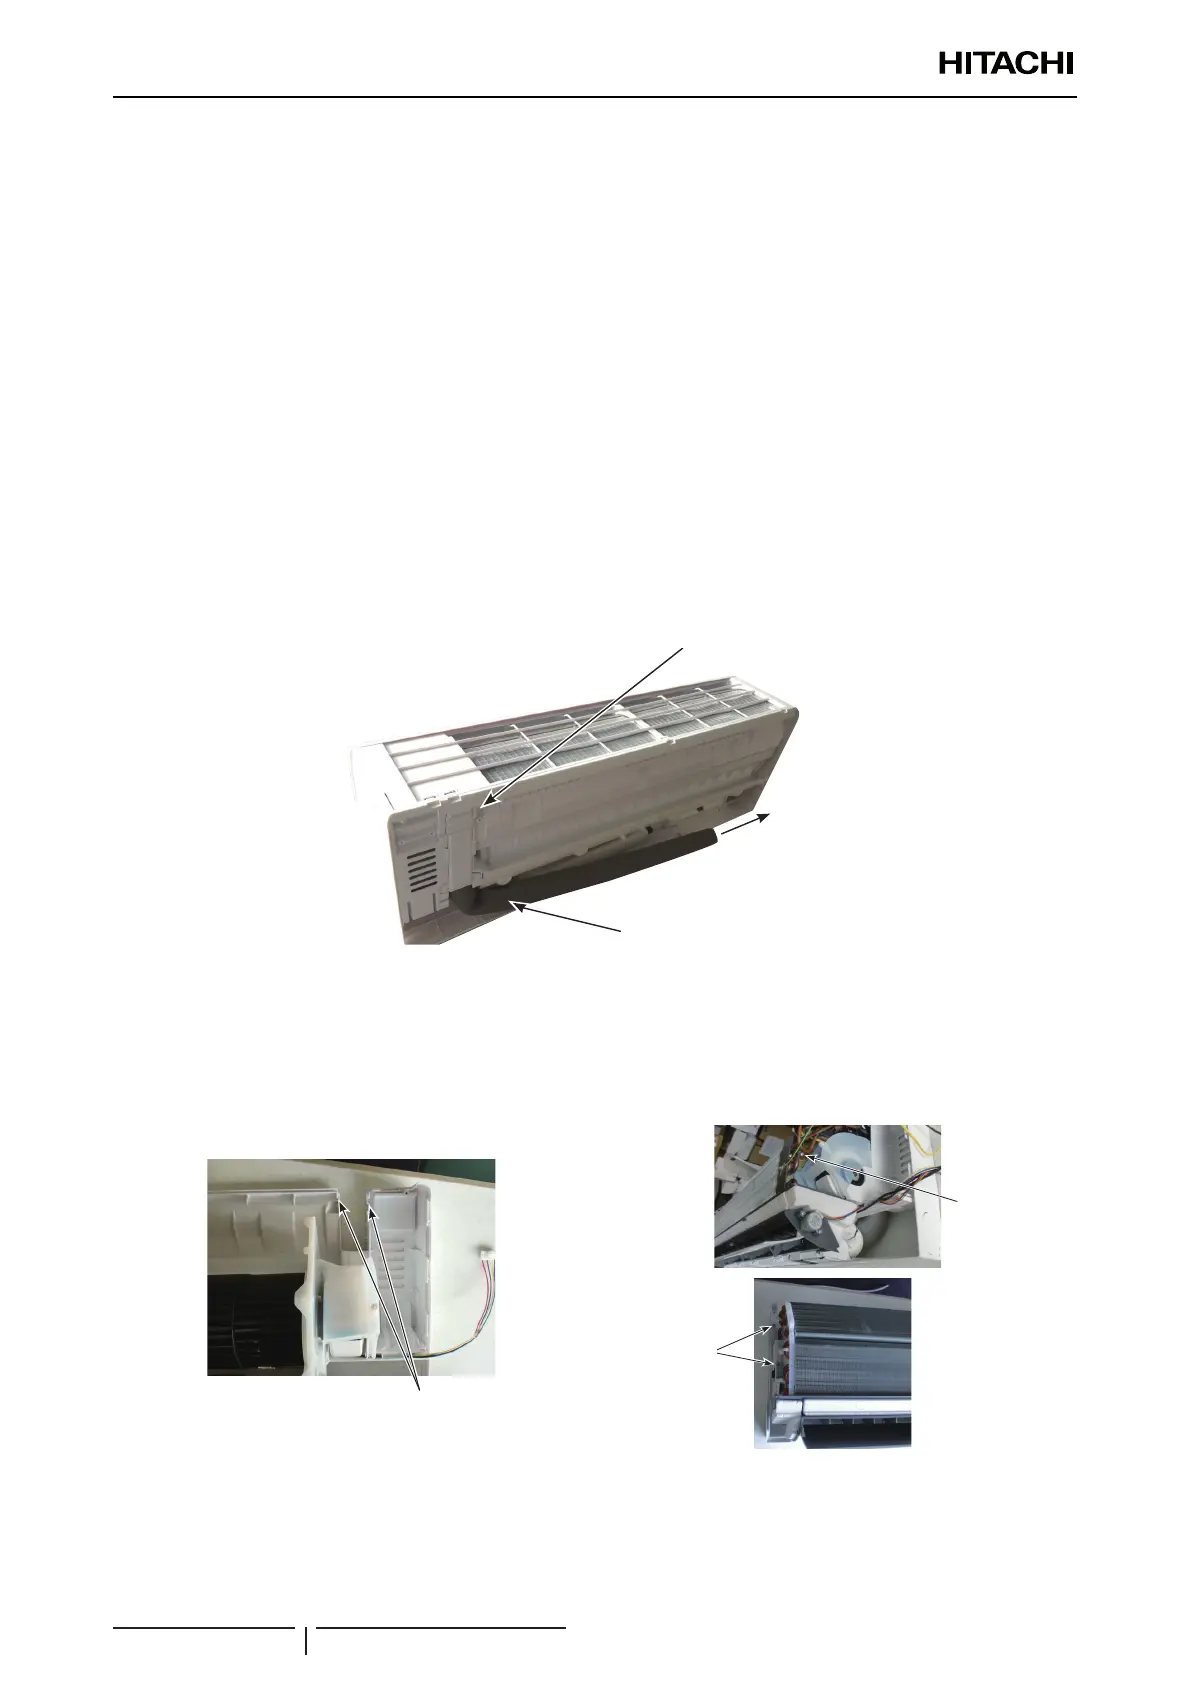
Rear side of indoor unit
Piping holder
Connected
pipings
Rear piping of heat exchanger
7 Release 2 catches on the inside of the piping holder at the rear side of the indoor unit and remove the piping holder.
8 Remove 1 screw xing the right side of the heat exchanger. Then remove 2 screws xing the left side of the heat
exchanger.
Front Side of Indoor Unit (The gures above show the examples with the piping for heat exchanger removed.)
Catches for Piping Holder
Catches for piping holder
Fixing Screw
for Heat Exchanger
Fixing screw for
heat exchanger
Fixing Screw
for Heat Exchanger
Fixing screw for
heat exchanger

 Loading...


