9 Servicing
RPC-(1.5-6.0)FSN3 - Ceiling type
SMGB0099 rev.0 - 12/2016
287
9
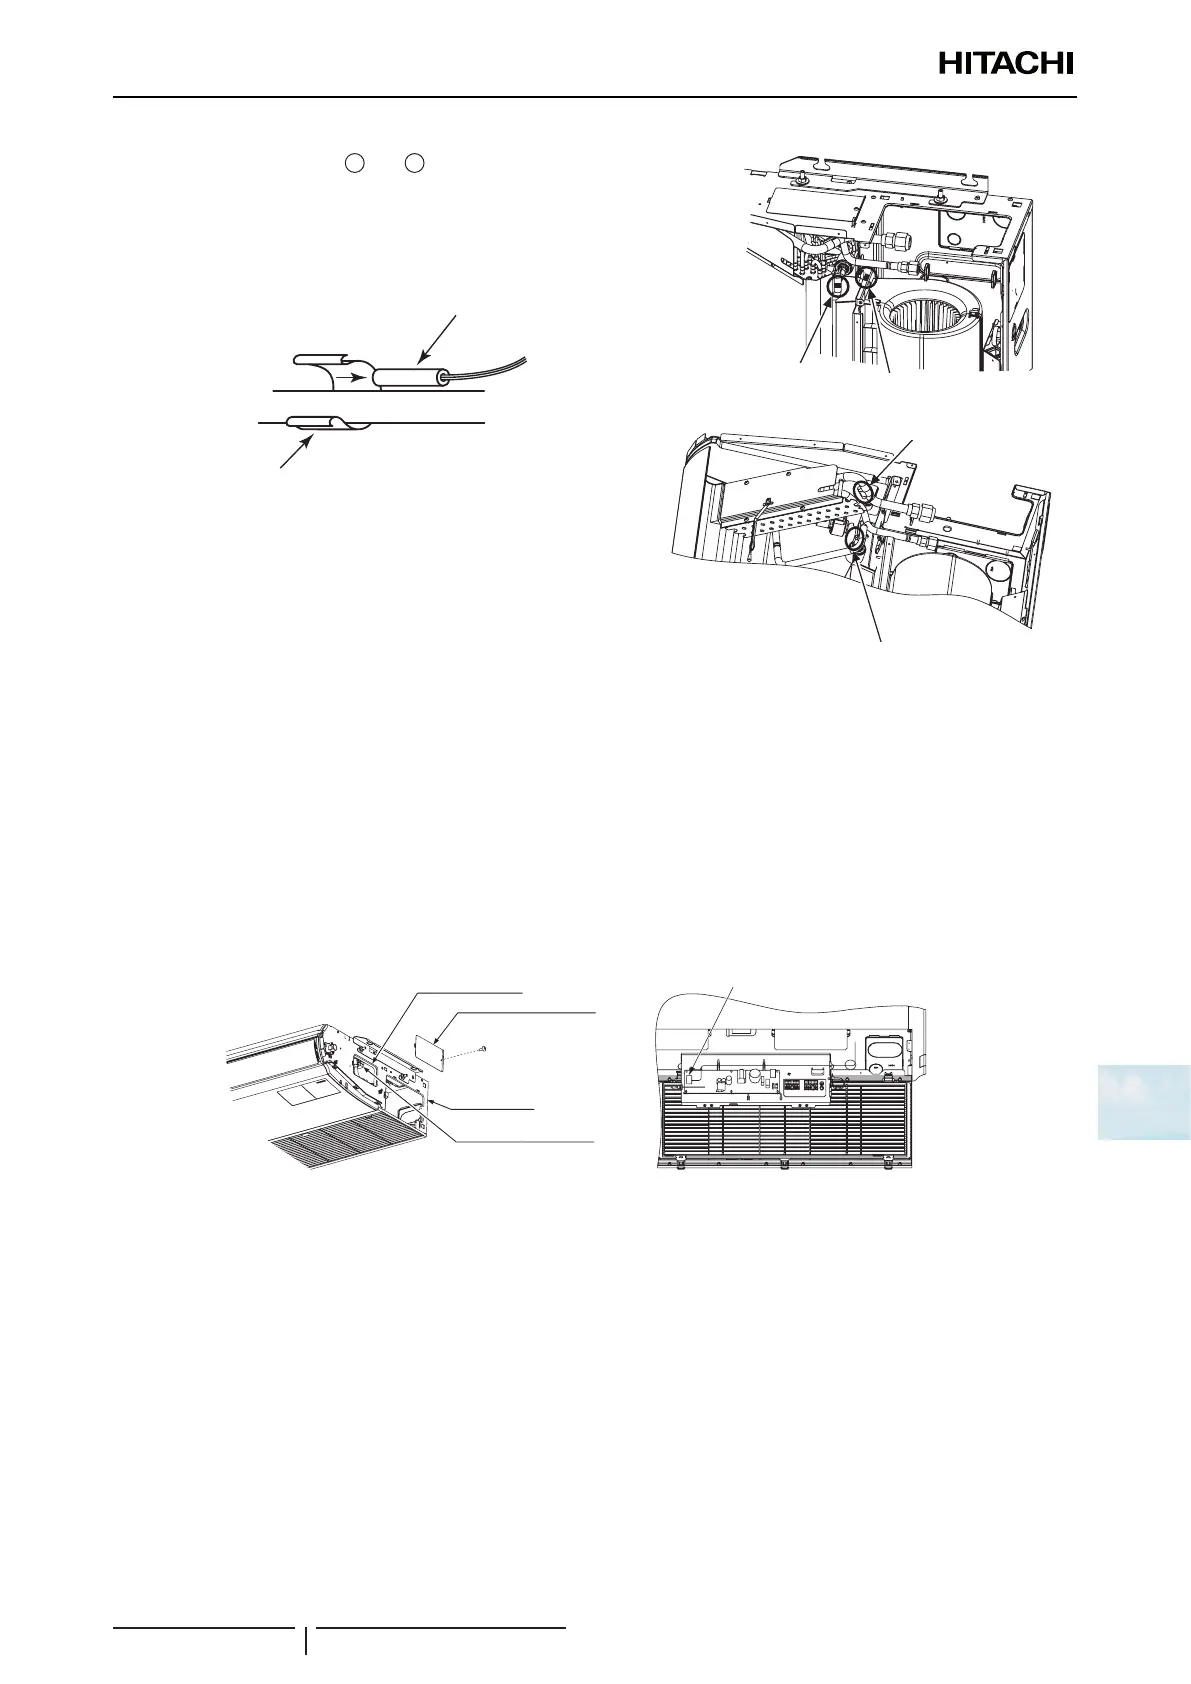
8 Remove 2 plastic bands (
1
and
2
) tying the lead wires for the
thermistors in a bundle.
9 Remove the butyl sheets attached to the thermistors.
10 Remove the thermistors for the liquid pipe and gas pipe from the
unit.
Thermistor
Thermistor Holder
Thermistor
Thermistor holder
? CAUTION
Take special care not to be injured by the heat exchanger ns.
Plastic Band 1
2Plastic Band
Plastic band
Plastic band
Thermistor for Gas Pipe (THM5)
Thermistor for Liquid Pipe (THM3)
Thermistor for gas pipe (THM5)
Thermistor for liquid pipe (THM3)
9.5.9 Removing Electronic Expansion Valve Coil
1 Remove the right side cover according to “9.5.2 Removing Side Cover”.
2 Remove the service access door cover from the right side plate. Then the electronic expansion valve can be seen
from the service access door.
3 Check the motion of the electronic expansion valve by hand.
4 Remove the electrical box and hook it on the ame at the lower part of the unit according to “9.5.4 Removal of the fan
motor”.
5 Open the electrical box cover and disconnect the connector (CN11) for the electronic expansion valve coil from the
indoor unit PCB.
Service Access Door Cover
Electronic Expansion Valve
Right Side Plate
Service access door
Service access door cover
Right side plate
Electronic expansion valve
Connector for
Electronic Expansion Valve Coil (CN11)
Connector for electronic
expansion valve coil (CN11)
6 Remove the gas and liquid pipe thermistors according to “9.5.8 Removal of the thermistors from the liquid and gas
pipes”.
7 Remove 2 plastic bands tying the lead wires for the thermistors in a bundle according to “9.5.8 Removal of the
thermistors from the liquid and gas pipes”.
8 Rotate the expansion valve coil. After releasing the detents for the expansion valve coil from the projection portions of
the expansion valve body, pull up the coil frontward to remove it.
? NOTE
Take care not to twist the piping.

 Loading...

