11 Maintenance notes
Indoor cleaning
SMGB0099 rev.0 - 12/2016
353
11
Equipment
Equipment Remarks
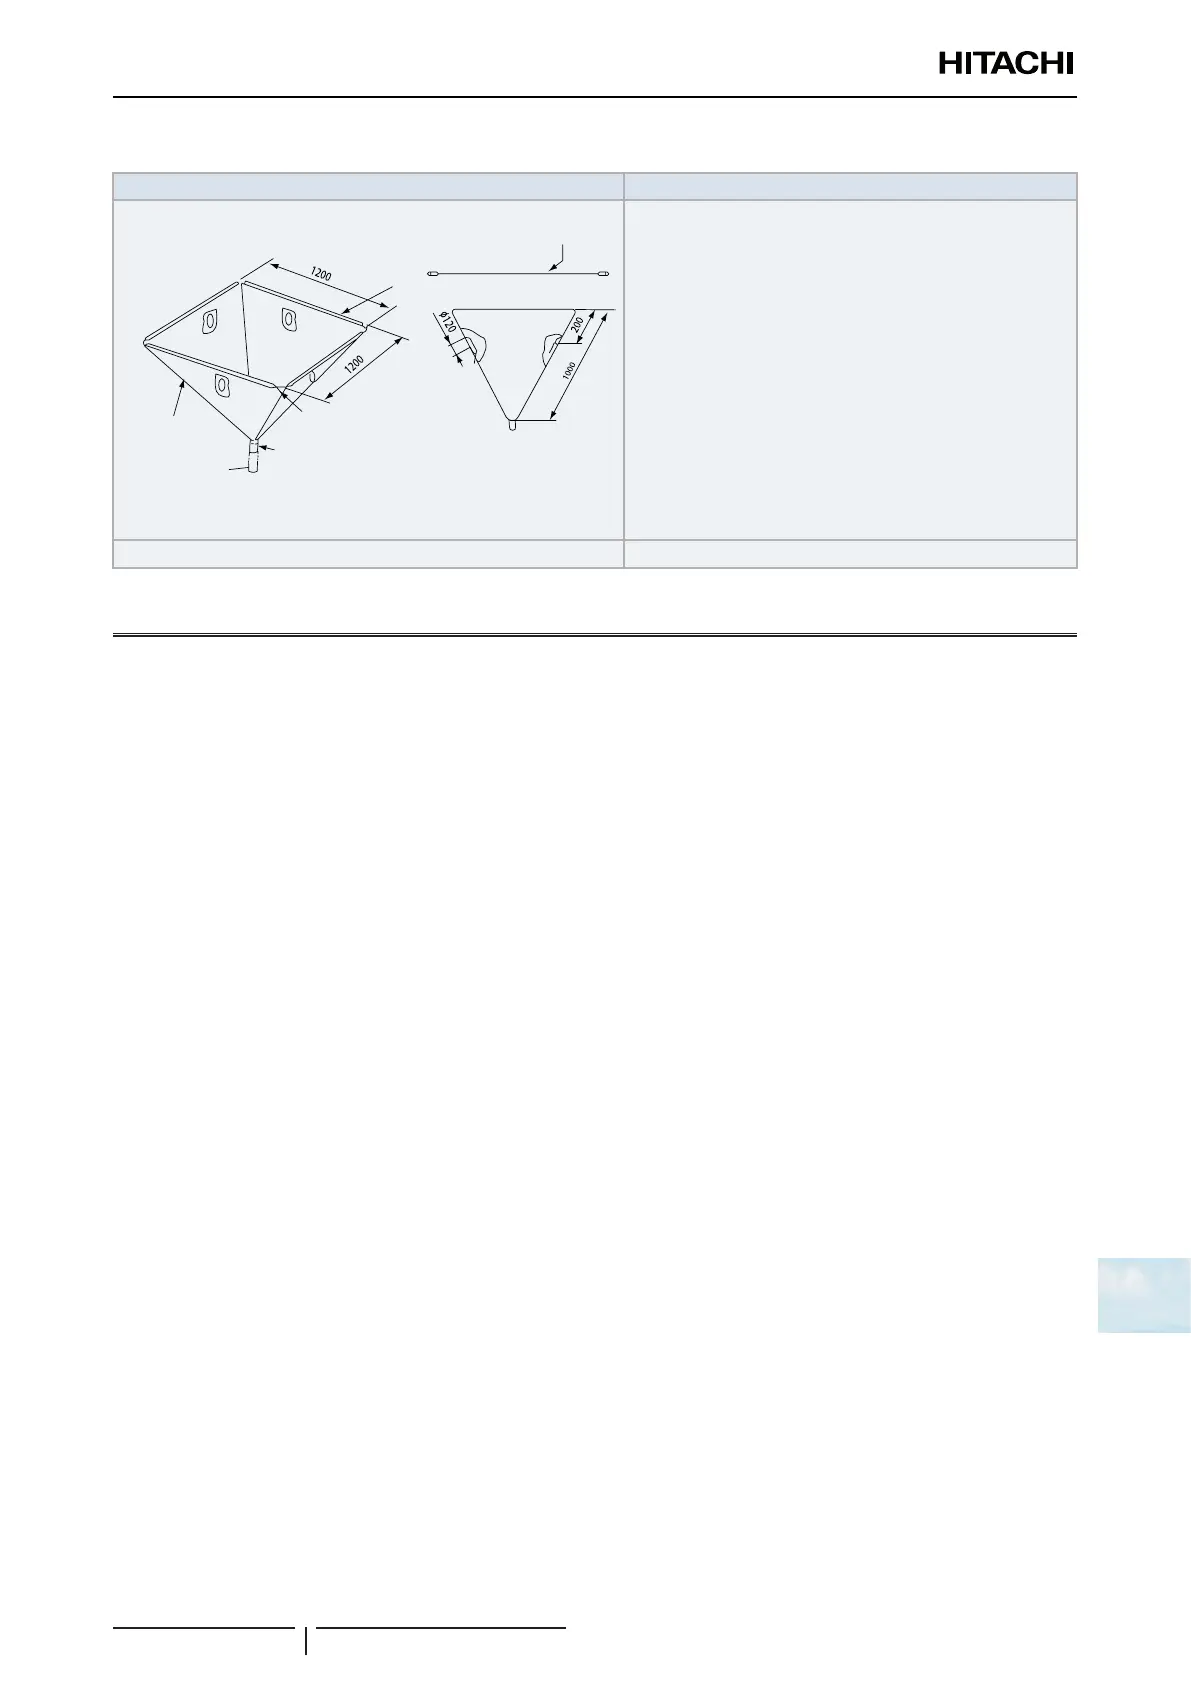
Cleaning water manifold
Transparent
vinyl sheet
Hose
Boss
Insert the bar
Insert the bar
Bar
Inner side of Ø120 should be covered with felt sheet in order to insert
the spray nozzle
Depending on the type of unit to be cleaned, use a duct-type,
built-in 2-way type, wall type or ceiling type manifold. The
lower part of the Ø120 hole must be covered with a piece of
felt to insert the nozzle of the gun
Cleaning water manifold kit Built-in 4-way
11.2 Indoor cleaning
11.2.1 Cleaning the built-in 4-way indoor unit RCI(M)
Preliminary procedure
1 Place a vinyl sheet on the oor to protect the furniture and other items from the cleaning water before starting this
work.
2 Remove the optional air panel as indicated in section “9.2.4 Removal of the optional air panel”.
3 Remove the electrical box after opening the corresponding panel and then disconnect the connectors located
between the indoor and outdoor units and other connectors, as indicated in sections “9.2.3 Removal of the electrical
box cover” and “9.2.5 Removal of the fan runner and the fan motor”.
4 Remove the bell mouth and fan as indicated in section “9.2.6 Removal of the printed circuit board (PCB)”.
5 Remove the drain pan, according to “9.2.7 Removal of the drain pan”.
6 Remove the oat switch as indicated in sections “9.2.8 Removal of the drain mechanism”.
7 Remove the drain-up mechanism.
Also carry out the following tasks:
1 Remove the drain pan after emptying it of water.
2 Empty the drain pan of water by removing the rubber plug. Make sure the water ows easily through the hole by
inserting a pencil into it.
3 Once the drain pan has been removed, check that there is no water in the drainage at the bottom of the pan.
4 Clean and dry the pan before removing it. Handle the pan carefully.

 Loading...


