9 Servicing
RPI-(8.0-20.0)FSN3(P)E(-f) - Ducted indoor unit
SMGB0099 rev.0 - 12/2016
295
9
9.7 RPI-(8.0-20.0)FSN3(P)E(-f) - Ducted indoor unit
? NOTE
In the following general illustrations are examples for RPI-(8.0/10.0)FSN3E(-f), but they are applicable for RPI-(16.0/20.0)FSN3PE(-f) as
well. In the specic cases where there are differences between both units, the illustrations are shown separately for each one.
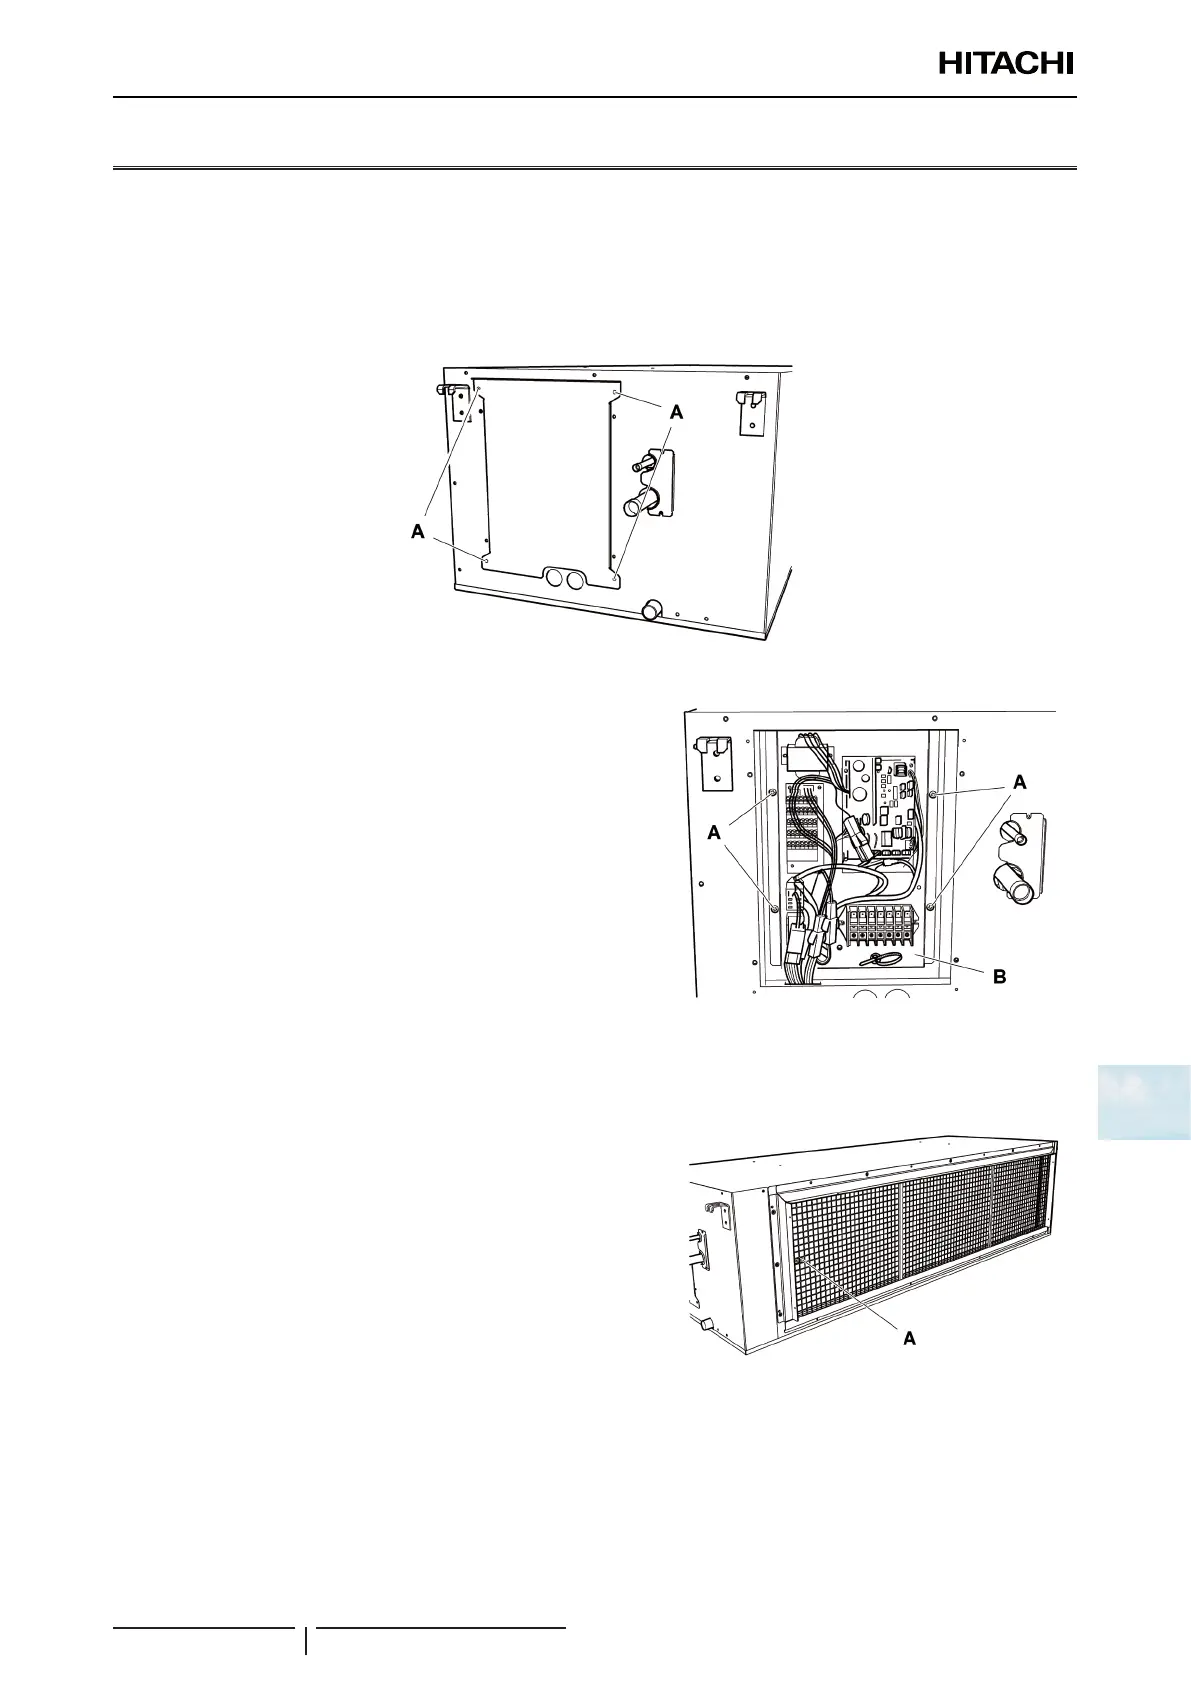
9.7.1 Removal of the electrical box cover
1 Remove the set screws -A- from the electrical box cover to access the electrical components.
9.7.2 Removal of electrical components
1 Remove the electrical box cover as indicated in chapter “9.7.1
Removal of the electrical box cover”.
2 Separate the connections of all electrical components.
3 Remove the set screws -A- and separate the full electrical
component support -B-.
! CAUTION
Handle the support carefully to avoid damaging the electrical components.
9.7.3 Removal of the inlet and outlet air thermistors
Inlet air thermistor
1 Remove the air lter as indicated in chapter “9.7.8 Removal of
the air lter”.
? NOTE
The inlet air thermistor -A- is located on the left-hand side of the air inlet
to the unit.
2 Remove the electrical box cover as indicated in chapter “9.7.1
Removal of the electrical box cover”.
3 Disconnect and remove the thermistor (x2 thermistors in
RPI-(16.0/20.0)FSN3PE(-f))

 Loading...


