9 Servicing
RCI-(1.0-6.0)FSN4 - 4-way cassette
SMGB0099 rev.0 - 12/2016
255
9
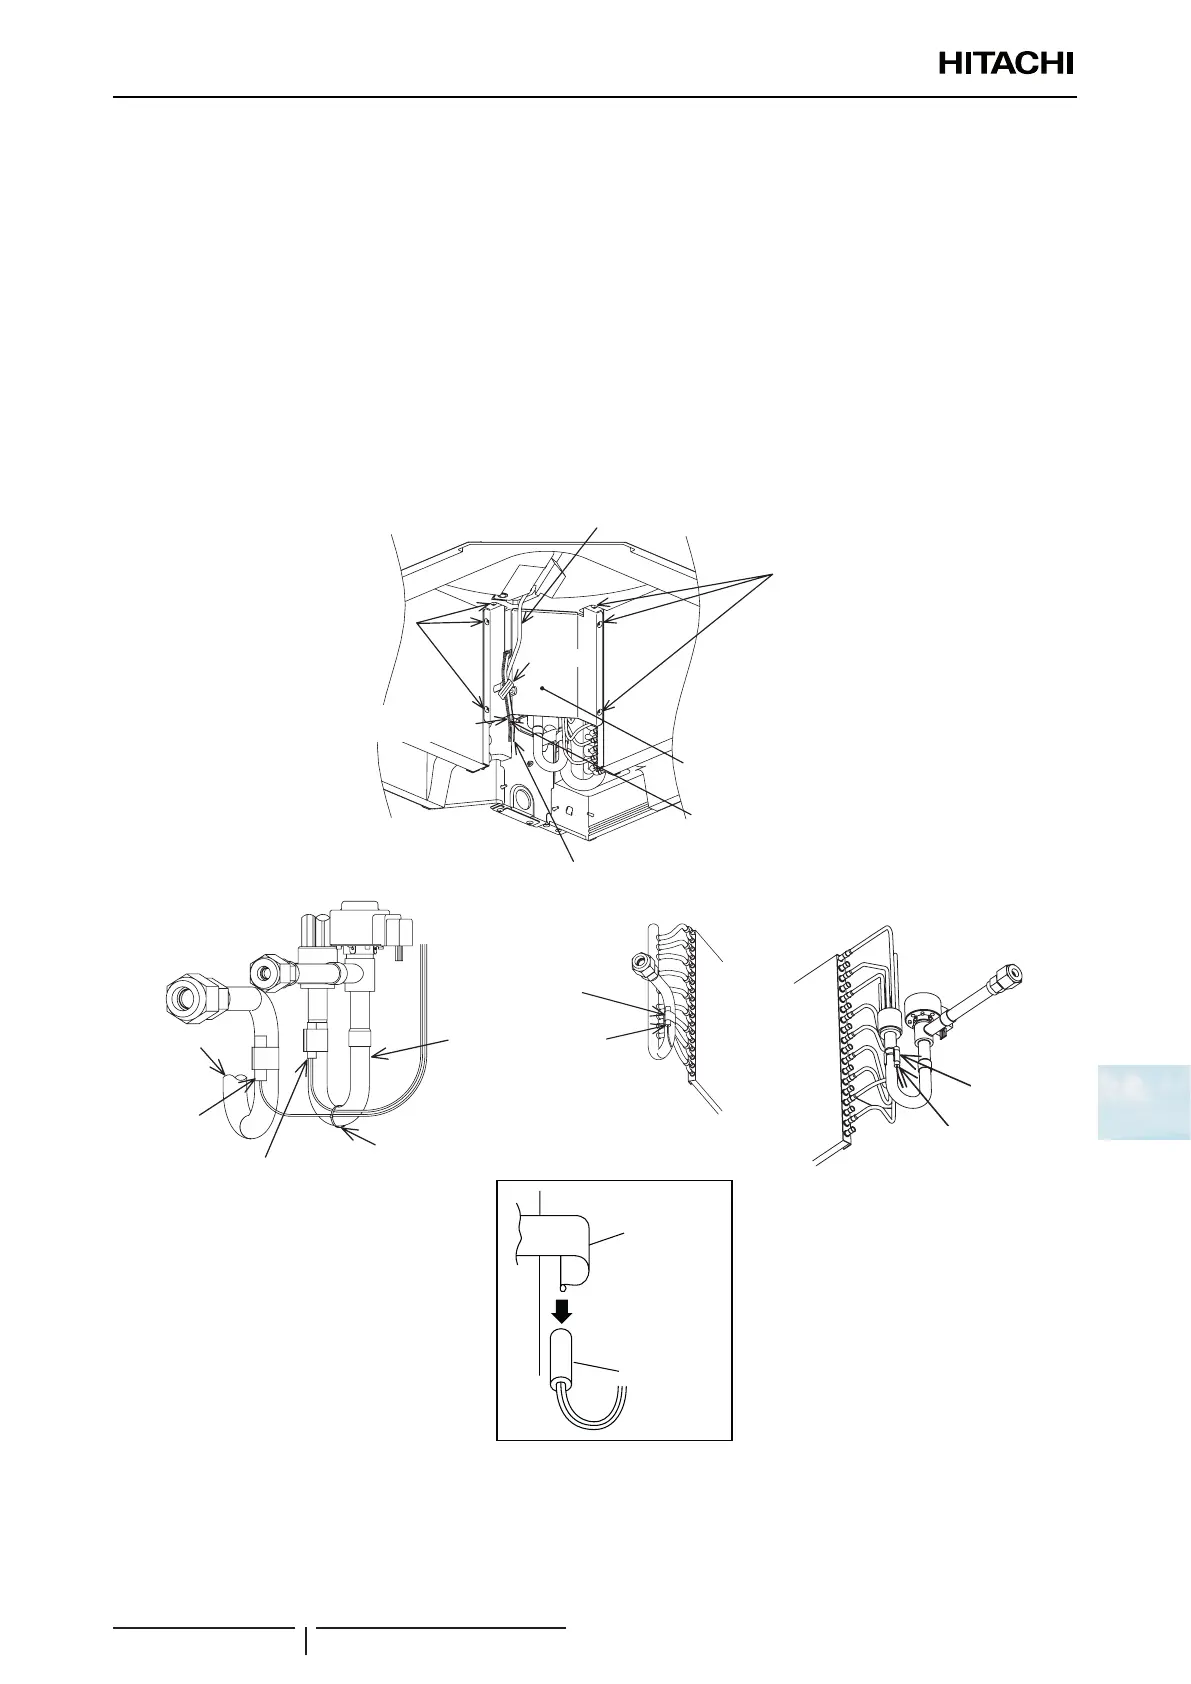
9.1.10 Removing Thermistors for Liquid Pipe and Gas Pipe
1 Remove the air panel according to the item “9.1.3 Removing Optional Air Panel”.
2 Remove the bell-mouth according to the item “9.1.4 Removing turbo fan and fan motor”.
3 Remove the drain pan according to the item “9.1.6 Removing Drain Pan”.
4 Removing Partition Plate. Remove six (6) xing screws for partition plate. Remove lead wires (for fan motor, 2 pipe
thermistors and expansion valve) from the cord clamp.
* When reassembling, bind lead wires (for liquid pipe and gas pipe thermistors) together by the plastic band (eld-
supplied).
5 Remove the xing plate for thermistor from the gas pipe, and remove the gas pipe thermistor.
6 Remove the xing plate for thermistor from the liquid pipe, and remove the liquid pipe thermistor.
* When reassembling, securely x lead wires (for fan motor, 2 pipe thermistors and expansion valve) together by the
cord clamp attaching at the partition plate and attach each thermistor to the original position.
Lead wires for fan motor
Fixing screws for
partition plate
Partition plate
Lead wires
for gas pipe
thermistor
Wire for expansion valve
Lead wires for liquid
pipe thermistor
Fixing screws for
partition plate
Gas pipe
Liquid pipe
Plastic band
Thermistor
for liquid pipe
Thermistor for
gas pipe
Fixing plate
for thermistor
Thermistor
for gas pipe
Fixing plate
for thermistor
Thermistor
for liquid pipe
Fixing plate for
thermistor
Thermistor
Details of thermistor installation
? NOTE
Fix lead wires (for 2 pipe thermistors and expansion valve) together by the plastic band to face the edge of vinyl tube downward as shown
in the gure of the item “9.1.11 Removing Electronic Expansion Valve Coil”. If the lead wires are not xed correctly, it may cause water
leakage.

 Loading...


