3 Piping work and refrigerant charge
Refrigerant and drain hose installation
SMGB0099 rev.0 - 12/2016
112
3.5.5 RPC-(1.5-6.0)FSN3E - Ceiling type
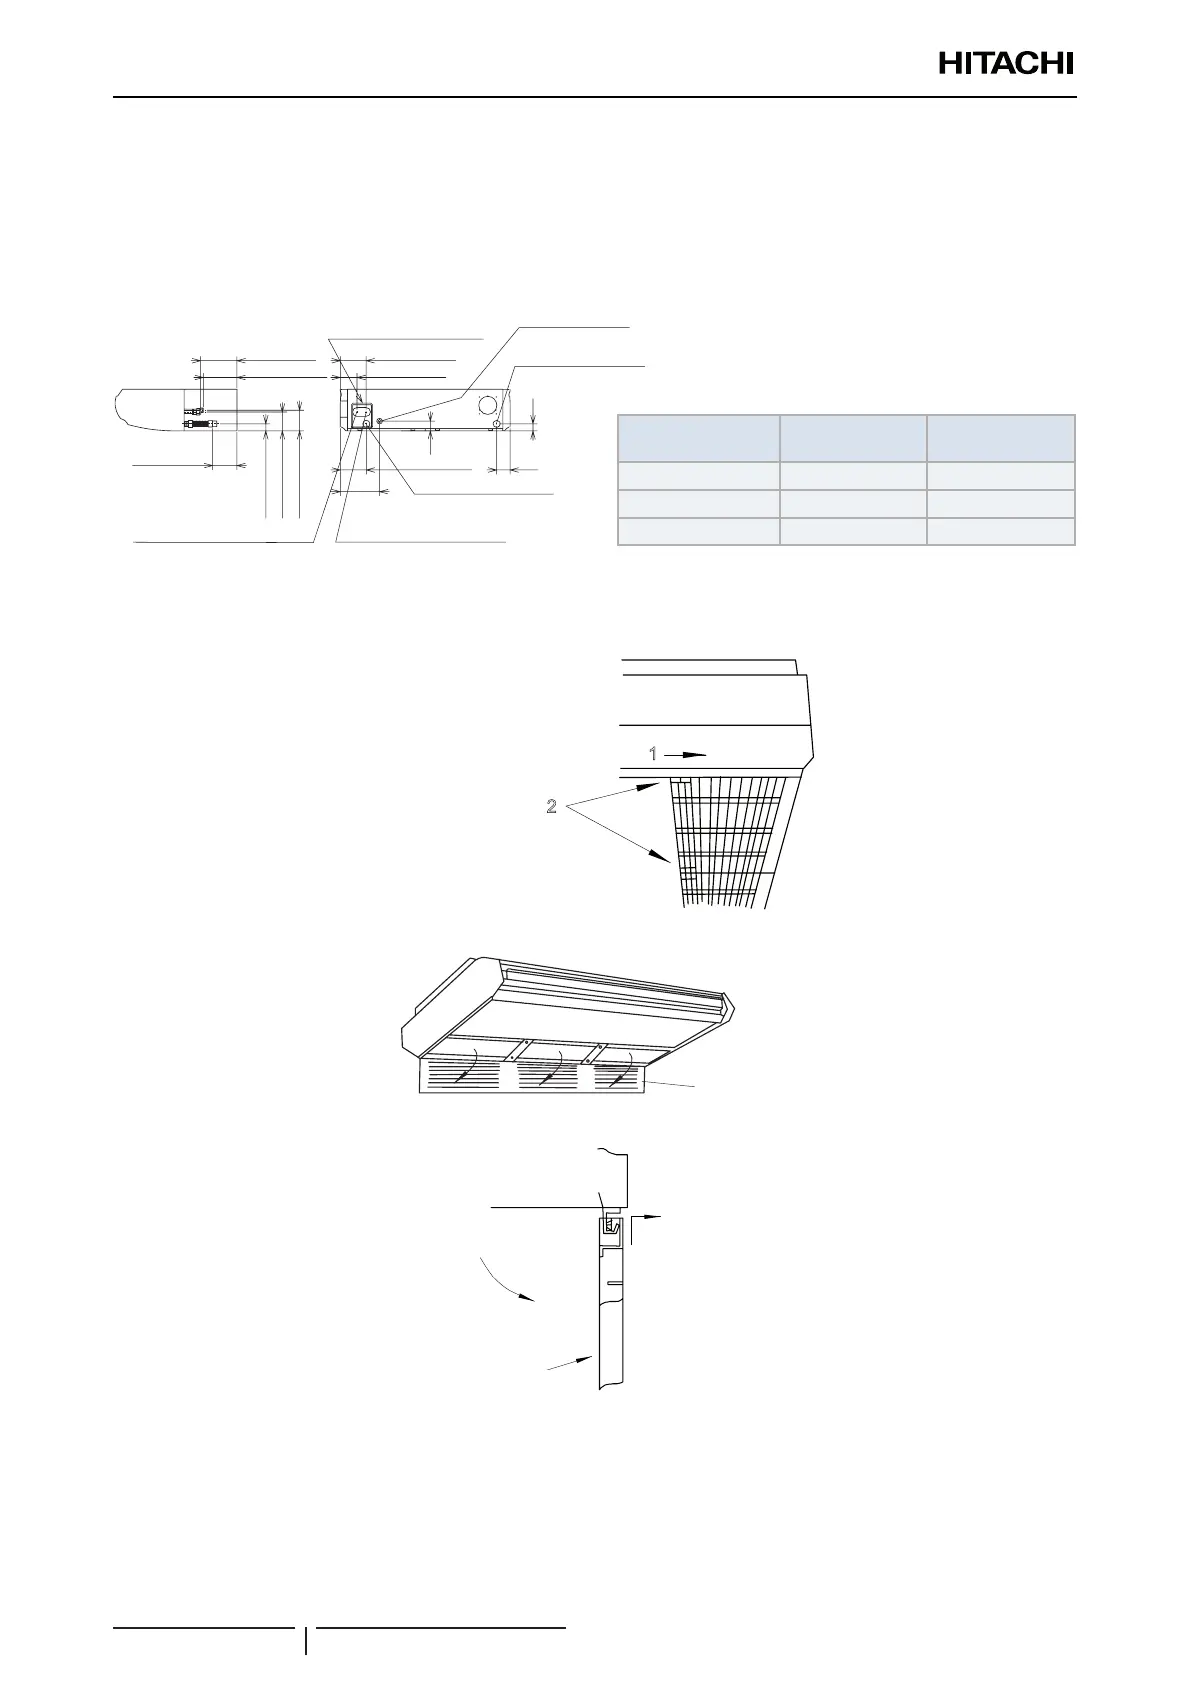
Refrigerant pipe installation
The correct position for the refrigerant pipe connection is shown below. The refrigerant piping can be connected to the
top or rear of the unit.
Each part has a die-cut hole as is indicated in chapter “2. Unit installation”.
40
76
94
146
147
55
222
40
107
117
138
205
190
Pipe through cover of rear side
Cable connecting hole
of rear side
Drain pipe connecting hole (VP20)
(In case of left side drain)
Drain pipe connecting hole (VP20)
(In case of right side drain)
Refrigerant liquid pipe connection
Refrigerant gas pipe connection
40 (Drain pipe)
138 (Drain pipe)
107 (Gas pipe)
117(Liquid pipe)
190 (Liquid pipe)
205 (Gas pipe)
Models
(1) Gas pipe mm
(inches)
(2) Liquid pipe
mm (inches)
RPC-1.5-FSN3 Ø12.7 (1/2) Ø6.35 (1/4)
RPC-2.0FSN3 Ø15.88 (5/8) Ø6.35 (1/4)
RPC-(2.5-6.0)FSN3 Ø15.88 (5/8) Ø9.52 (3/8)
The piping must be installed from the bottom of the unit.
1 Remove the air inlet grille and slide the buttons on the grille backwards.
1. Slide
2. Knob
1
2
2 Open the air inlet grille
Air
Air inlet grille
3 Push and slide the air inlet grille backwards and open it.
Rear side
Press
Unit
Unit
Open
Air inlet grille
Rear side
press

 Loading...


