2 Unit installation
RCI - 4-way cassette
SMGB0099 rev.0 - 12/2016
22
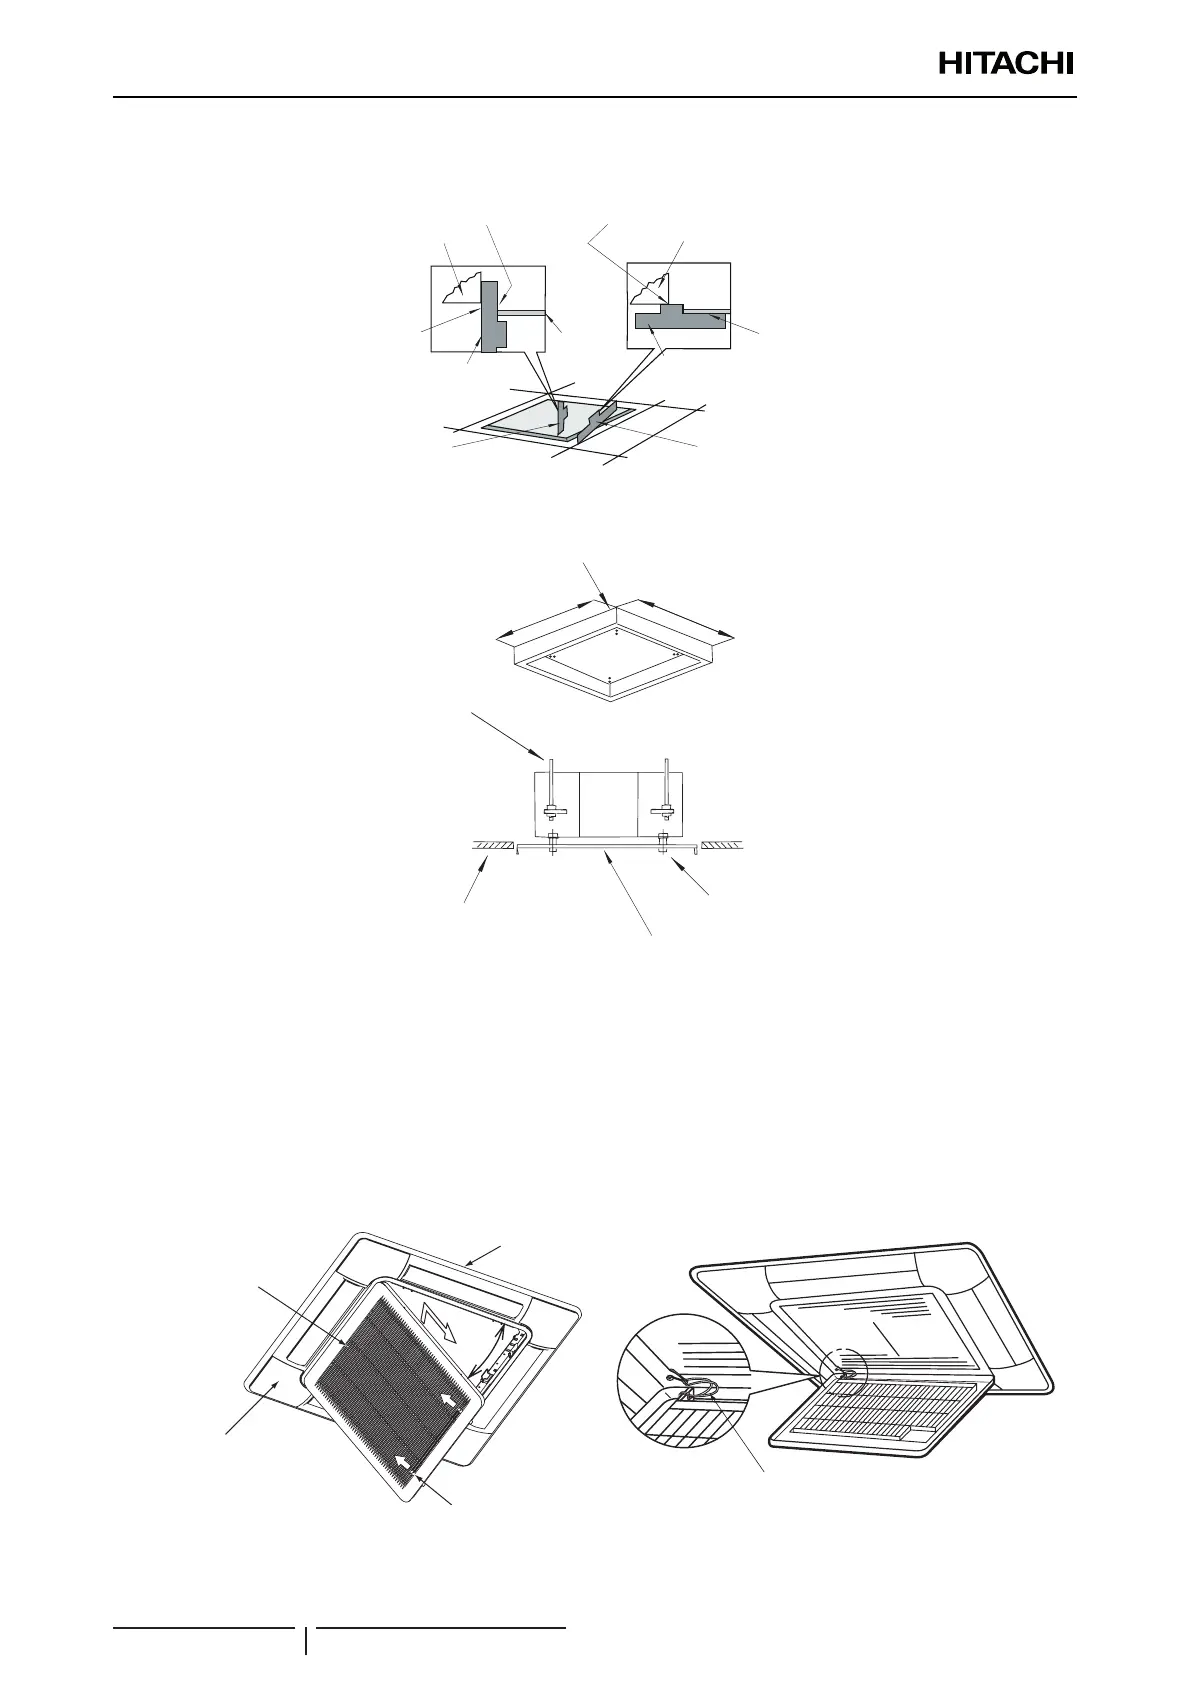
For ceiling already completed with panels
Indoor
unit
Attach this side of the checking
pattern to the inner side of the
opening of the ceiling
Attach this side of the
checking pattern to the lower
side of the unit
Indoor unit
Attach this side of
the checking pattern
to the ceiling panel
Checking
pattern
Check the height of
the ceiling at each
corner of the unit
Check the dimension
of opening at each
side of the unit
Attach this side
of the checking
pattern to the outer
side of the unit
Ceiling
panel
Checking
pattern
Ceiling not completed with panels yet
Pattern paper for installation
Dimension
for opening
Unit
Suspension bolt
Surface of ceiling
Pattern board for installation
Screw (M6)
Dimension
for opening
Tighten the nuts of the suspension brackets after the adjustment is completed. Apply LOCK-TIGHT paint to the bolts and
nuts in order to prevent them from loosening. If not done, abnormal noises or sounds may occur and the indoor unit may
come loose.
2.1.3 Air panel installation: P-N23NA2
Removing Air Intake Grille from Air Panel
1 Push both ends of knobs at the air inlet grille toward the arrow direction, open the air inlet grille until the angle of
approximately 45° from the air panel surface. After lifting the air inlet grille keeping it inclined, draw the air inlet grille
forward. (Remove the lament tape (4 portions) xing the air lter).
45°
Knob
Air inlet grille
Corner pocket
cover (4 portions)
Air panel
Supporting string
2 Lift the grille keeping it inclined.
3 Draw the grille towards the open space after lifting.

 Loading...


