9 Servicing
RPK-FSN(H)3M - Wall mounted
SMGB0099 rev.0 - 12/2016
317
9
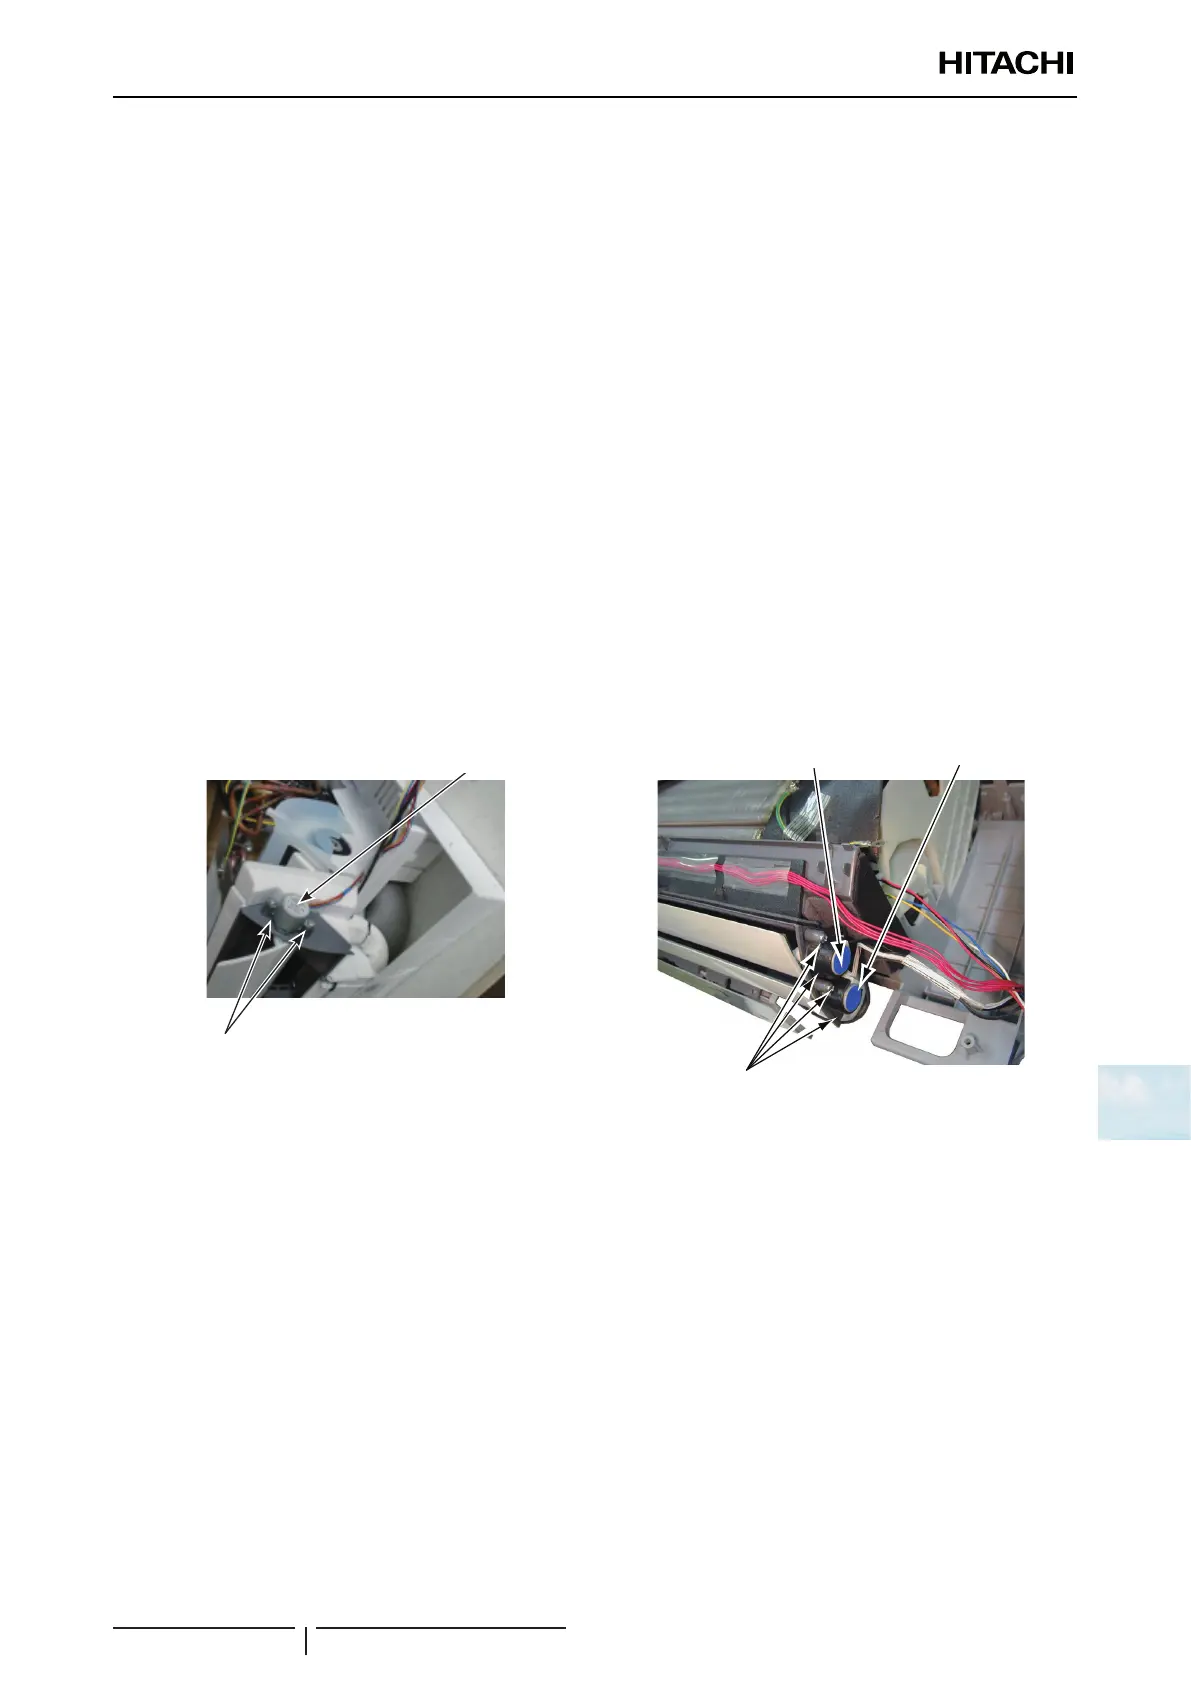
9.9.8 Removing AS Motor
For RPK-(0.6-1.5)FSN(H)3M
1 Remove the front panel according to the “9.9.2 Removal of the front panel” chapter.
2 Remove the electrical box according to the “9.9.7 Removing Electrical Box” chapter.
3 Remove 2 screws xing the AS motor to remove it. Then pull the AS motor outward and remove it from the shaft of
the horizontal louver.
4 When mounting the AS motor, insert the shaft of the AS motor into the D-cut portion of the horizontal louver. Then
mount the AS motor in the reverse procedure.
For RPK-(2.0-4.0)FSN(H)3M
1 Remove the front panel according to the “9.9.2 Removal of the front panel” chapter.
2 Remove the electrical box from the cabinet according to the “9.9.7 Removing Electrical Box” chapter.
3 Remove 4 screws xing 2 AS motors to remove them. Then pull the AS motors outward and remove them from the
shaft of the horizontal louver.
4 When mounting the AS motors, insert the shafts of the AS motors into the D-cut portions of the horizontal louver.
Then mount the AS motors in the reverse procedure.
? NOTE
The AS motor connected to the black cord is for the upper horizontal louver and the AS motor connected to the white cord is for the
lower horizontal louver. Take care not to mount a wrong AS motor when mounting them.
AS Motor
Screws Fixing AS Motor
(2 Portions)
AS motor
Screws xing AS motor (2 portions)
AS Motor
(Cord Color: Black)
Screws Fixing AS Motor
(4 Portions)
AS Motor
(Cord Color: White)
Screws xing AS motor (4 portions)
AS motor
(cord color: black)
AS motor
(cord color: white)
9.9.9 Removing Drain Pan
Take care when removing the drain pan, as water may have collected in the drain pan.
For RPK-(0.6-1.5)FSN(H)3M
Do not remove the horizontal louver. Otherwise, some component may be damaged.
1 Remove the front panel according to the “9.9.2 Removal of the front panel” chapter.
2 Remove the electrical box according to the “9.9.7 Removing Electrical Box” chapter.
3 Release the catches xing the drain pan.
- 1.0HP (3 portions): (A)×1, (B)×1 and (C)×1
- 1.5HP (4 portions): (A)×2, (B)×1 and (C)×1
Then draw the drain pan in the direction of the arrow in the gure below to remove it.
? NOTE
Before removing the drain pan, check that the drain hose is not xed. If the drain hose is rmly xed, the drain pan cannot be removed.

 Loading...


