9 Servicing
RPC-(1.5-6.0)FSN3 - Ceiling type
SMGB0099 rev.0 - 12/2016
284
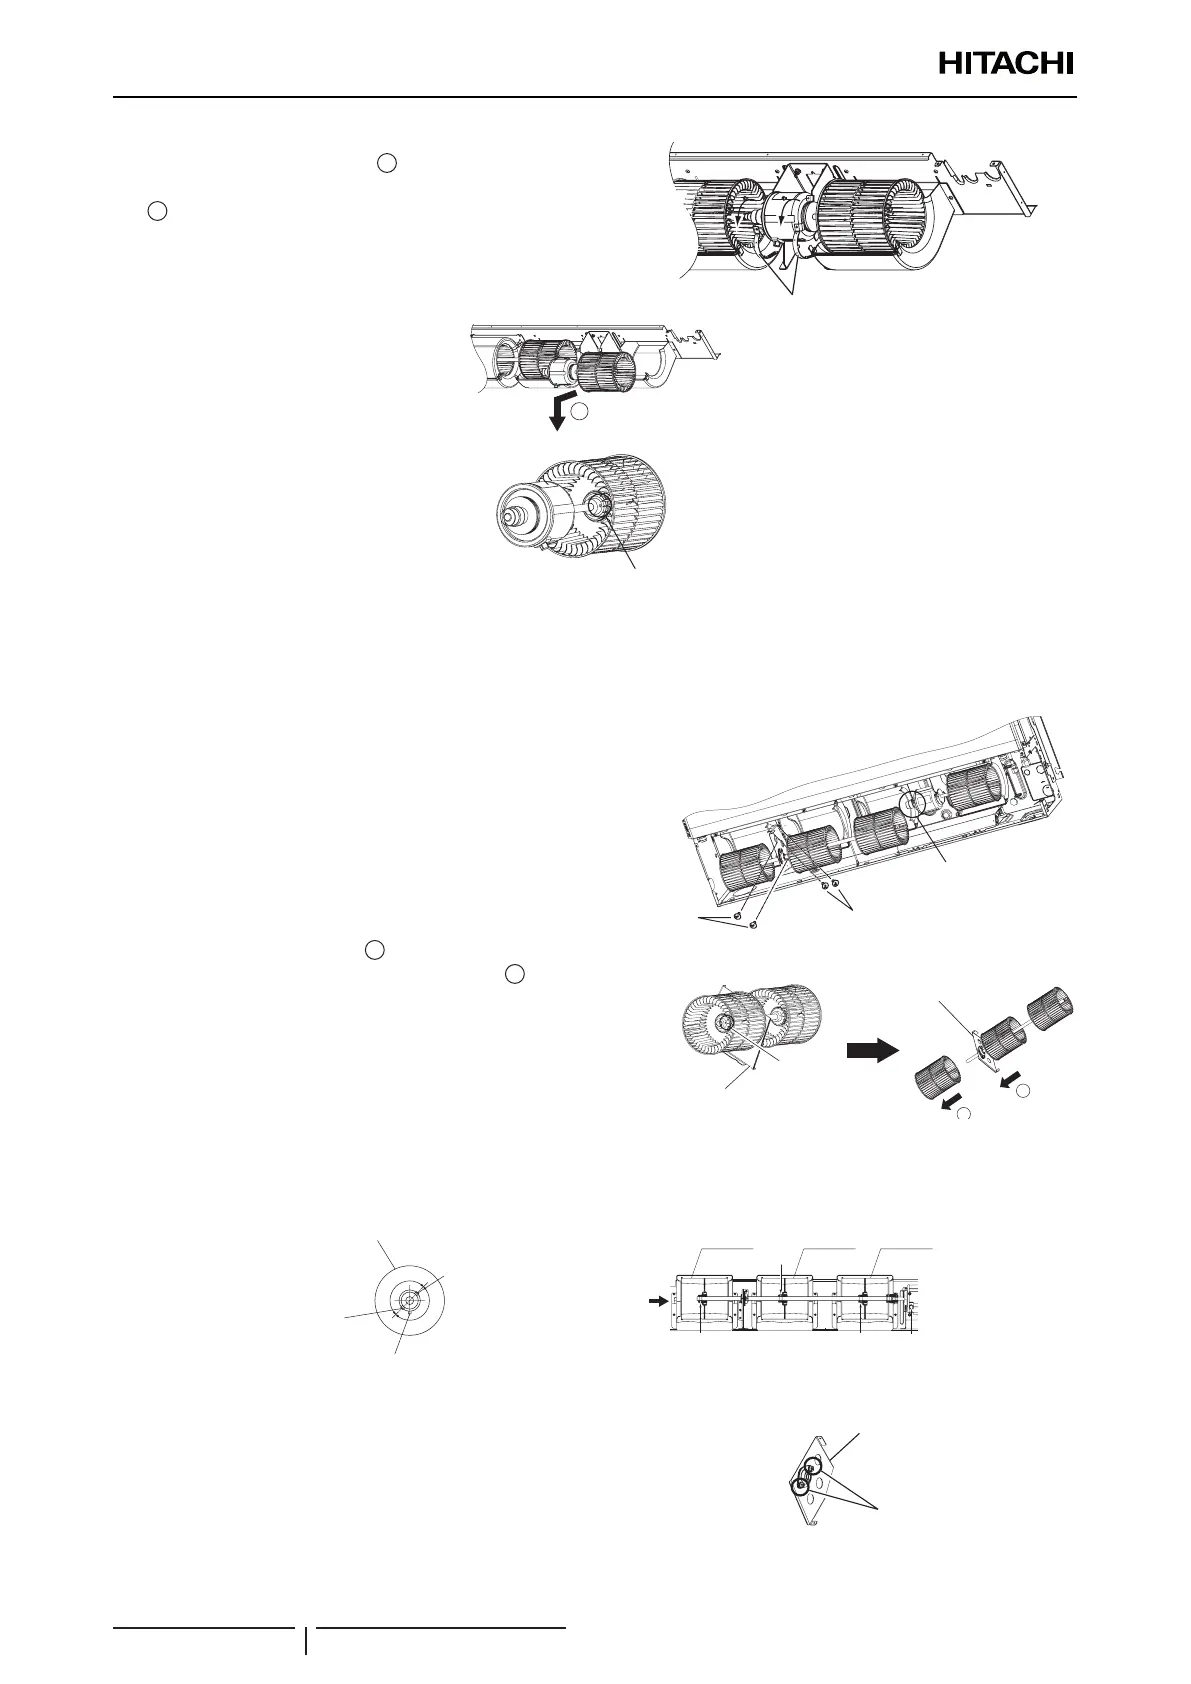
11 Remove 2 motor xing bands (
1
). Remove the fan runner on the
right and fan motor by shifting them in the direction of the arrow
(
2
) with care not to drop them. It takes 2 people to carry out the
work
.
12 Remove the xing screw for the fan runner with a hexagon
wrench and remove the fan runner from the fan motor.
Motor xing bands
2
Screw
9.5.5 Removing Bearing (Except for RPC-1.5 and 2.0FSN3)
1 Open the air inlet grille downward according to “9.5.1 Removing
Air Filter and Air Inlet Grille”.
2 Remove the lower casing according to “9.5.4 Removal of the fan
motor”.
3 Loosen 2 xing screws for the coupling with a hexagon wrench
and shift the coupling to the fan motor side according to “9.5.4
Removal of the fan motor”.
4 Remove 4 screws for the xing plate for the bearing as shown in
the gure. Remove the xing plate for the bearing together with
the shaft and fan runner. It takes 2 people to carry out the work.
5 Loosen 1 xing screw for the fan runner with a hexagon wrench
and remove the fan runner (
1
) from the shaft. Then pull the
xing plate for the bearing out from the shaft (
2
).
? NOTE
When pulling the xing plate for the bearing out, do not damage the shaft
surface contacting the bearing. If it is damaged, an abnormal noise may
occur. When remounting the fan runners, mount them with each of them
rotated by 180º as shown in the gure.
2
Shift the coupling to
fan motor side
Screws for xing plate for bearing
Screws for xing
plate for bearing
Fixing plate for
bearing
Fixing plate for bearing
Screw
180
o
180
o
Each fan runner is installed at every 180º angle.
View from P
Outline of fan runner
Screw position of
nº 2 fan runner
Screw position
of coupling
Screw position
of nº 1 (nº 3) fan
runner
Nº 1 fan
runner
Nº 2 fan
runner
Nº 3 fan
runner
Screw
Screw
Fan motor
6 Remove 2 xing bolts (M8) for the bearing and remove it. When
mounting it, refer to the following notes.
Fixing Plate for Bearing
Bolts (M8)
Fixing plate for bearing
Bolts (M8)

 Loading...


