9 Servicing
RPC-(1.5-6.0)FSN3 - Ceiling type
SMGB0099 rev.0 - 12/2016
283
9
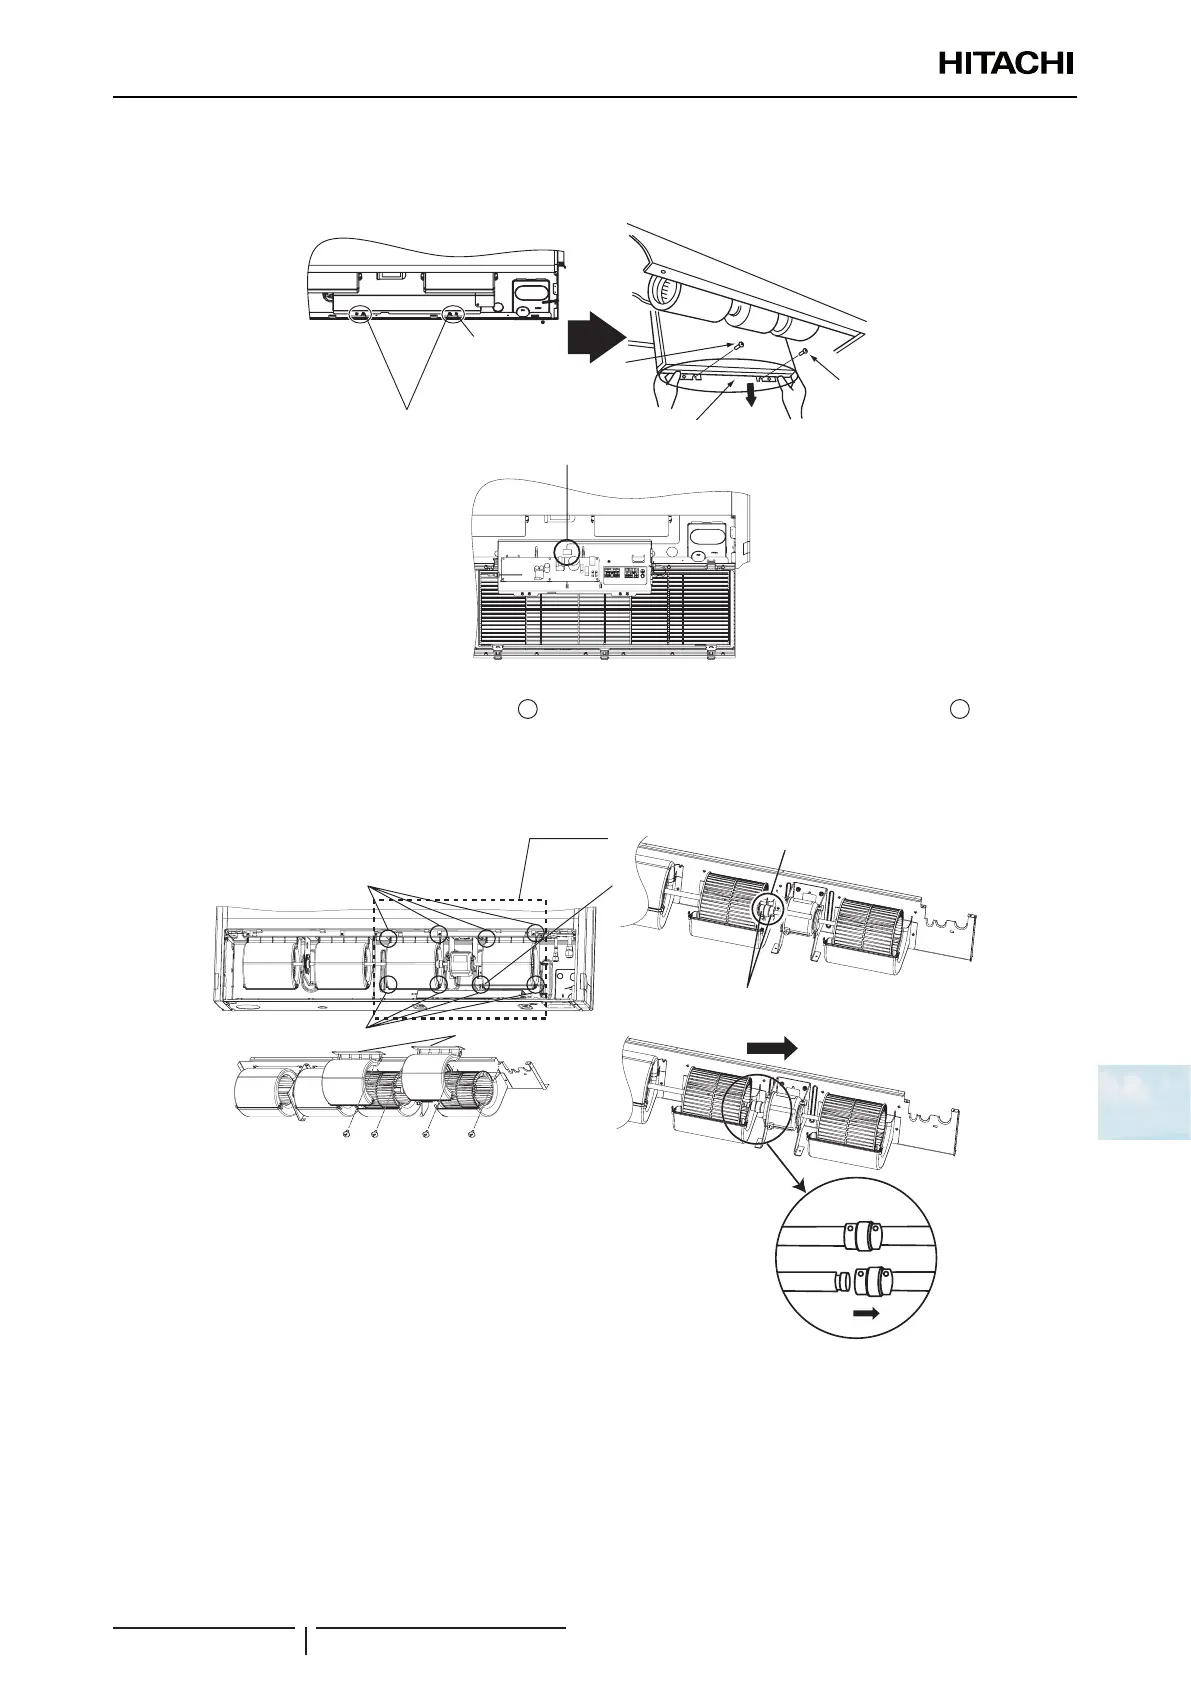
5 Remove 2 xing screws for the electrical box cover. Remove 2 xing screws for the electrical box and hook the
electrical box on the frame at the lower part of the unit. Hold the electrical box not to drop it during the work.
6 Remove the fan motor connector (CN1) from the Indoor Unit PCB.
Fan Motor Connector (CN1)
Fan motor connector (CN1)
Electrical box
Screw
Screw
Fixing screw for
electrical box
cover(outside)
Fixing screw for
electrical box
cover (inside)
7 Remove the lead wires for the fan motor from the cord clamp on the plate.
8 Remove 2 xing screws for each lower casing (
1
). Remove the lower casings by pushing 2 catches (
2
) inward.
(Only 2 casings on the motor side shall be removed.) (Except for RPC-1.5 and 2.0FSN3).
9 Loosen 2 xing screws for the coupling with a hexagon wrench.
10 Shift the coupling to the fan motor.
Shift the coupling
Coupling
Screws
Casings on motor side
Screws (for lower casing)
Catches
Lower casing
Cord clamp

 Loading...

