9 Servicing
RCIM-(0.6-2.5)FSN4(E) - 4-way cassette (compact)
SMGB0099 rev.0 - 12/2016
264
9.2.8 Removal of the drain mechanism
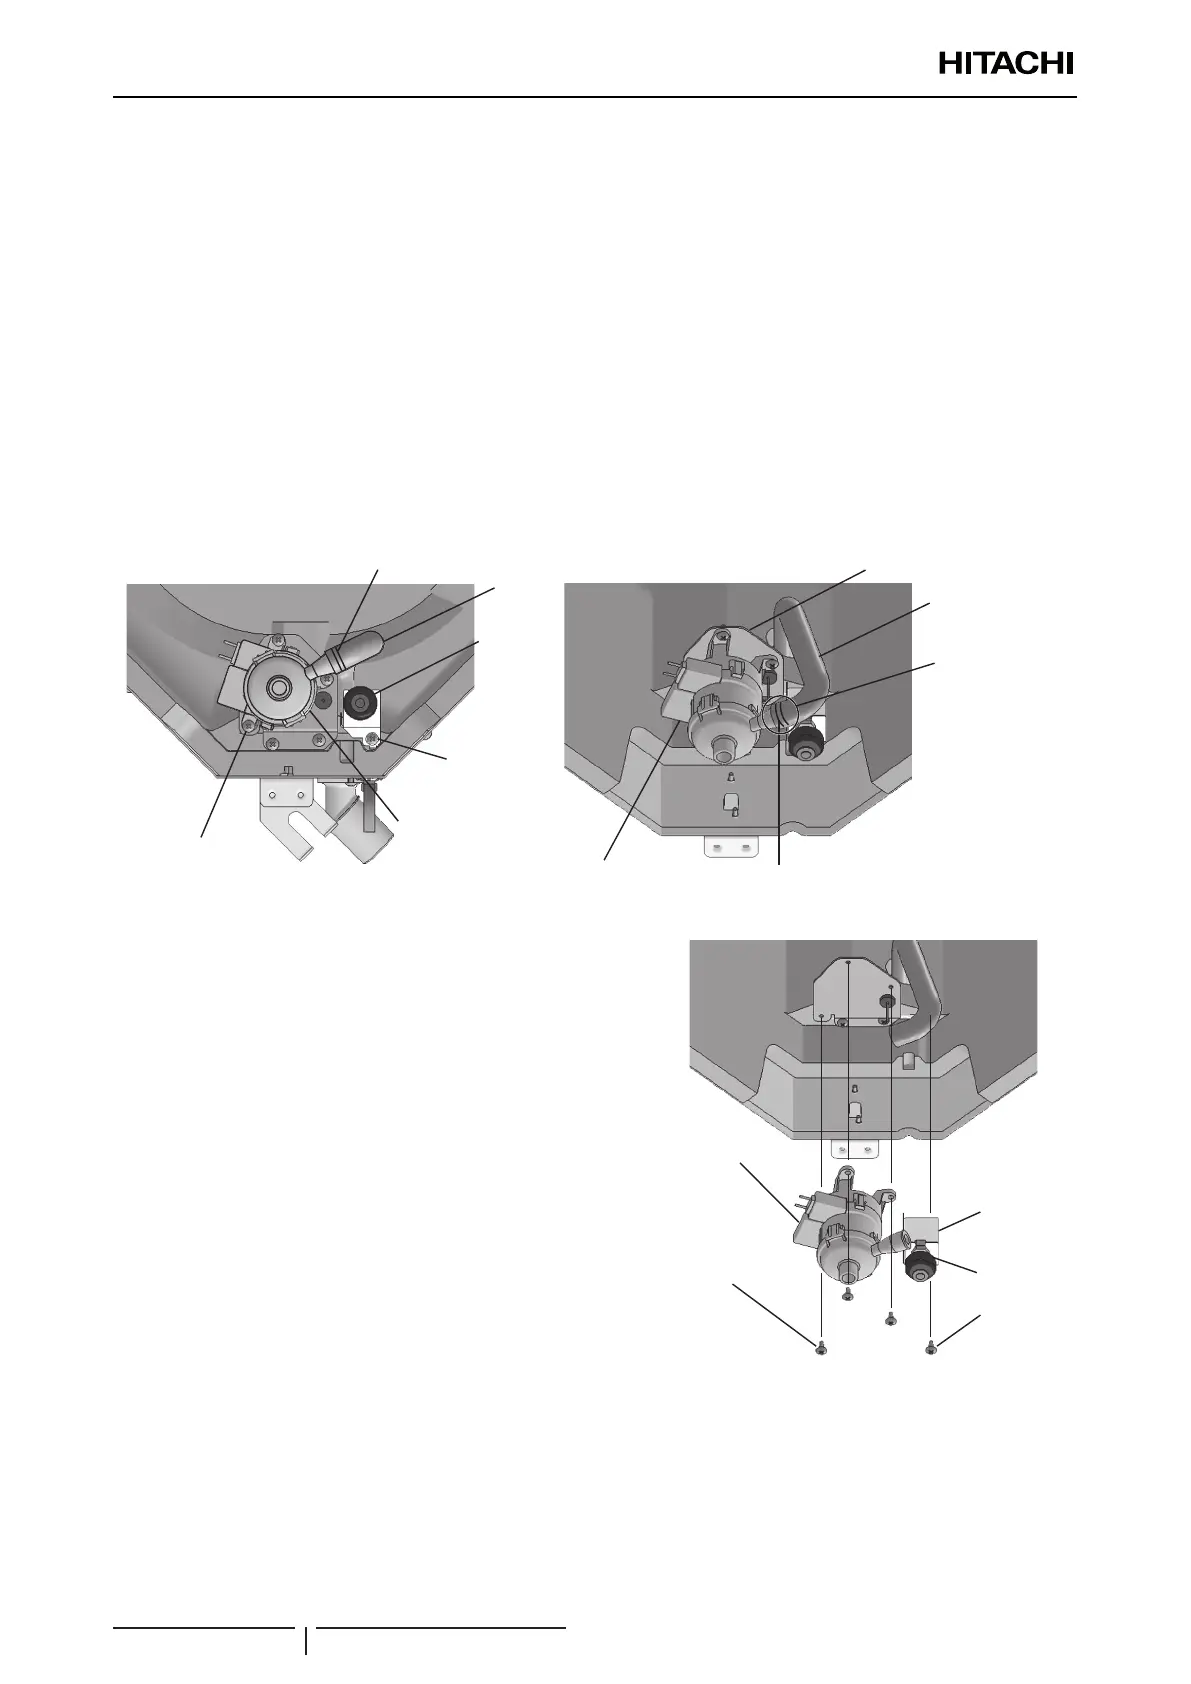
1 Remove the drain pan as indicated in chapter “9.2.7 Removal of the drain pan”.
2 Remove the lead wires of the drain pan mechanism, oat switch and outlet air thermistor gathered with vinyl tube and
a clamping band.
3 Cut the plastic band and disconnect the drain hose from the drain mechanism.
4 Hold the drain mechanism and remove the 3 screws from the mechanism securing plate.
5 Remove the mechanism with the securing plate.
? NOTE
• When installing, t the drain hose as far as possible in the pump.
• After attaching the drain mechanism, check that the drain hose does not contact the xing base of the drain mechanism. If it
contacts, adjust the position of the drain hose.
• When reassembling, wrap up the lead wires for the drain mechanism, the oat switch, and the outlet air thermistor together with
the vinyl tube, seal with lament tape and then tighten with the clamping. Fix the gathered wires with the plastic band attached to
the xing base of the drain mechanism.
Plastic band
Drain Hose
Float switch
Float switch
xing screw
Drain Mechanism
xing screws (x3)
Drain Hose
Drain mechanism
xing base
Plastic band
Drain Mechanism
Disconnect the drain
hose from the drain
mechanism
9.2.9 Removal of the oat switch
1 Remove the drain pan as indicated in chapter “9.2.7 Removal of
the drain pan”.
2 Remove the lead wires for the drain mechanism, the oat switch
and the outlet air thermistor, as described in section “9.2.8
Removal of the drain mechanism”
? NOTE
The oat switch is attached to the drain pan.
3 Remove the 3 screws securing the drain mechanism to remove
the mechanism.
4 Remove the xing plate for the oat switch by removing the xing
screws.
5 Loosen the resin nut securing the oat switch and remove it.
? NOTE
• When retting, make sure the hook is tted into the groove in the drain
pan and screw into place.
• The torque value of the resin nut is 0.3 - 0.4 Nm. If the torque value is
higher, the nut will be damaged.
Drain Mechanism
Drain Mechanism
xing screws (x3)
Float switch
xing plate
Float
switch
Float switch
xing screw

 Loading...

