9 Servicing
RCI-(1.0-6.0)FSN4 - 4-way cassette
SMGB0099 rev.0 - 12/2016
251
9
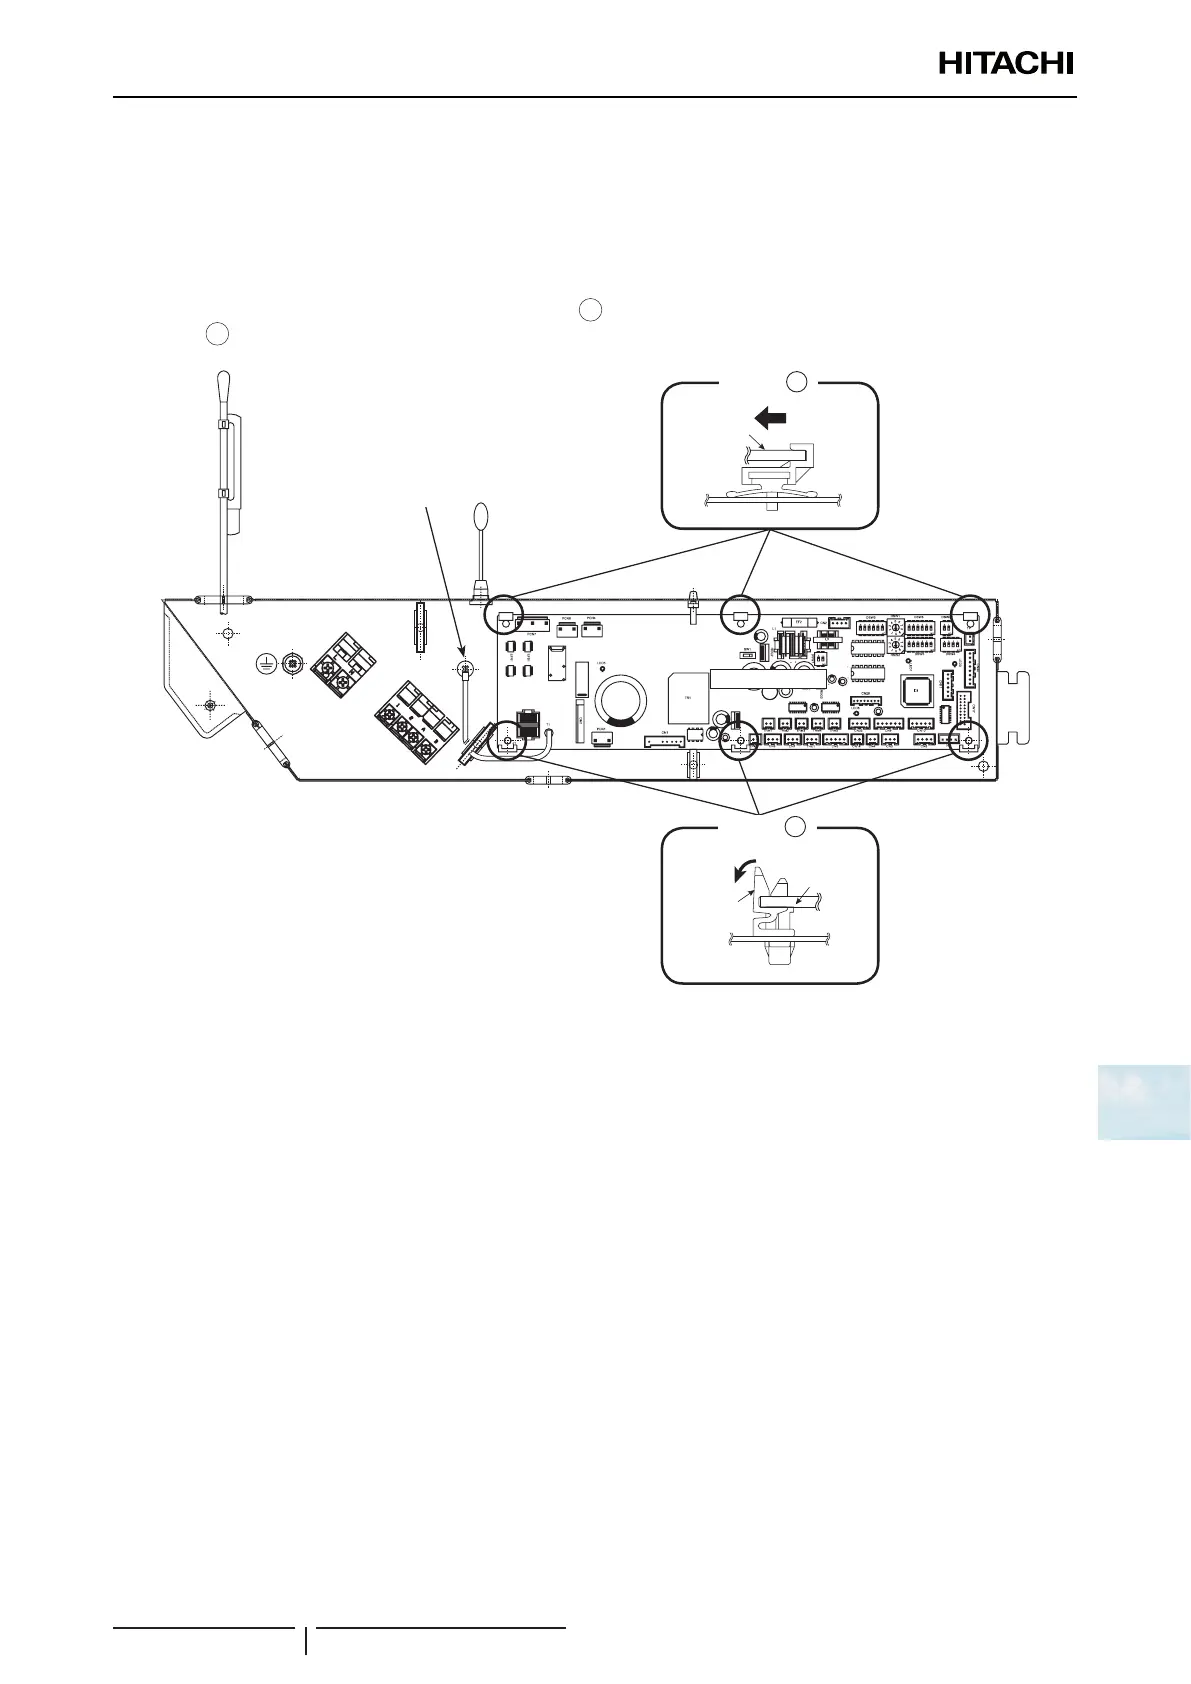
9.1.5 Removing Printed Circuit Board (PCB1)
1 Remove the air inlet grille according to the item “9.1.1 Removing Air Filter and Air Inlet Grille”.
2 Remove the electrical box according to the item “9.1.2 Removing Electrical Box Cover”.
3 Disconnect all wiring connectors from PCB1.
4 Remove the screw for earth wire.
5 The PCB1 is xed by six (6) holders. Bend the holders
B
by nger and raise the PCB1. Remove the PCB1 from the
holders
A
by drawing it towards arrow direction in the gure below.
Indoor Unit PCB
Electrical Box
Holder B
Screw for
Earth Wire
PCB1
PCB1
Holder
Bend the holder by finger.
Holder A
Holder
Screw for
earth wire
Electrical box
Holder
Holder
Bend the holder by nger
Indoor unit PCB
? NOTE
• Do not touch electrical parts on PCB1.
• Pay attention not to apply an excessive force to PCB1. It may cause failure of PCB1.
• When reassembling, attach connectors to the correct position. If not, the PCB1 may be damaged. In addition, securely attach the
screw for earth wire.
 Loading...


