9 Servicing
RPK-FSN(H)3M - Wall mounted
SMGB0099 rev.0 - 12/2016
307
9
9.9 RPK-FSN(H)3M - Wall mounted
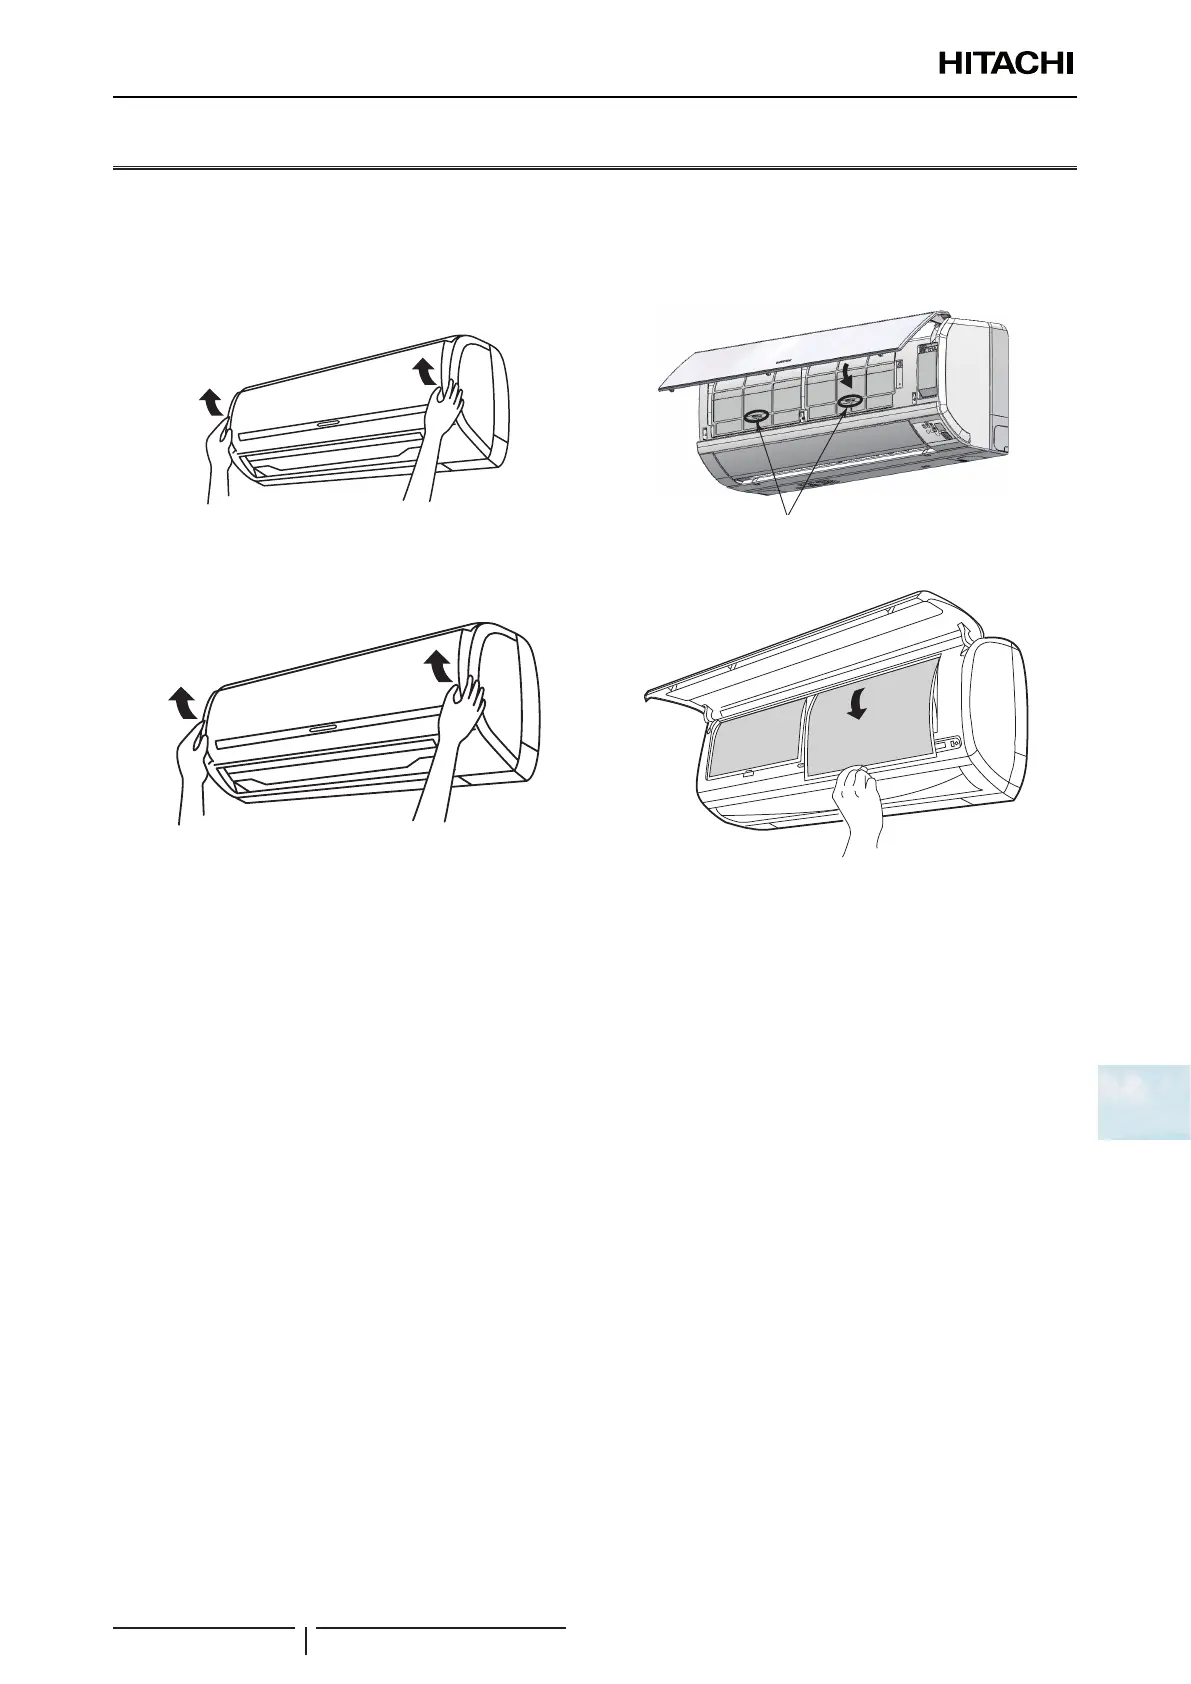
9.9.1 Removal of the air lter
For RPK-(0.6-1.5)FSN(H)3M
1 Open the at panel. Hold the both sides of at panel and pull it up
Filter Catches (2 portions)
Filter catches (2 portions)
For for RPK-(2.0-4.0)FSN(H)3M
9.9.2 Removal of the front panel
! CAUTION
• Cover completely the front panel with a sheet of plastic to protect it during installation work.
• The shaft is coated with a lubricant. If it gets in eyes or contacts with skin, ash them out with water immediately. Also consult a doctor
if necessary. Wash your hands thoroughly after handling the shaft.
For RPK-(0.6-1.5)FSN(H)3M
1 Remove the air lter according to the “9.9.1 Removal of the air lter” chapter.
2 Open the at panel fully and slightly extend the right arm shaft outward. After the shaft is removed from the front
panel, pull the at panel frontward with the right arm shaft slightly extended outward and then remove the at panel.
3 Remove 2 bushes and then 2 screws. Pull the lower side of the front panel forward to release the catches. Then
remove the front panel carefully so that it does not touch the horizontal louver attached to the air outlet.
4 Slightly lift the front panel up to release the catches (four portions) on the upper side of the unit. Then pull the front
panel forward to remove it
? NOTE
When releasing the catches, snap sound is heard. This is the sound made when the catches are released and so there are no safety
concerns.
 Loading...


