9 Servicing
RPK-FSN(H)3M - Wall mounted
SMGB0099 rev.0 - 12/2016
308
panel
Expand the shaft
toward arrow direction
Remove this part
from hole
Flat panel
Expand the shaft toward
arrow direction
Remove this part from
hole
Catches on
Lower Side of
Front Panel
Drain Pan’
s Projection
Portion for Catches
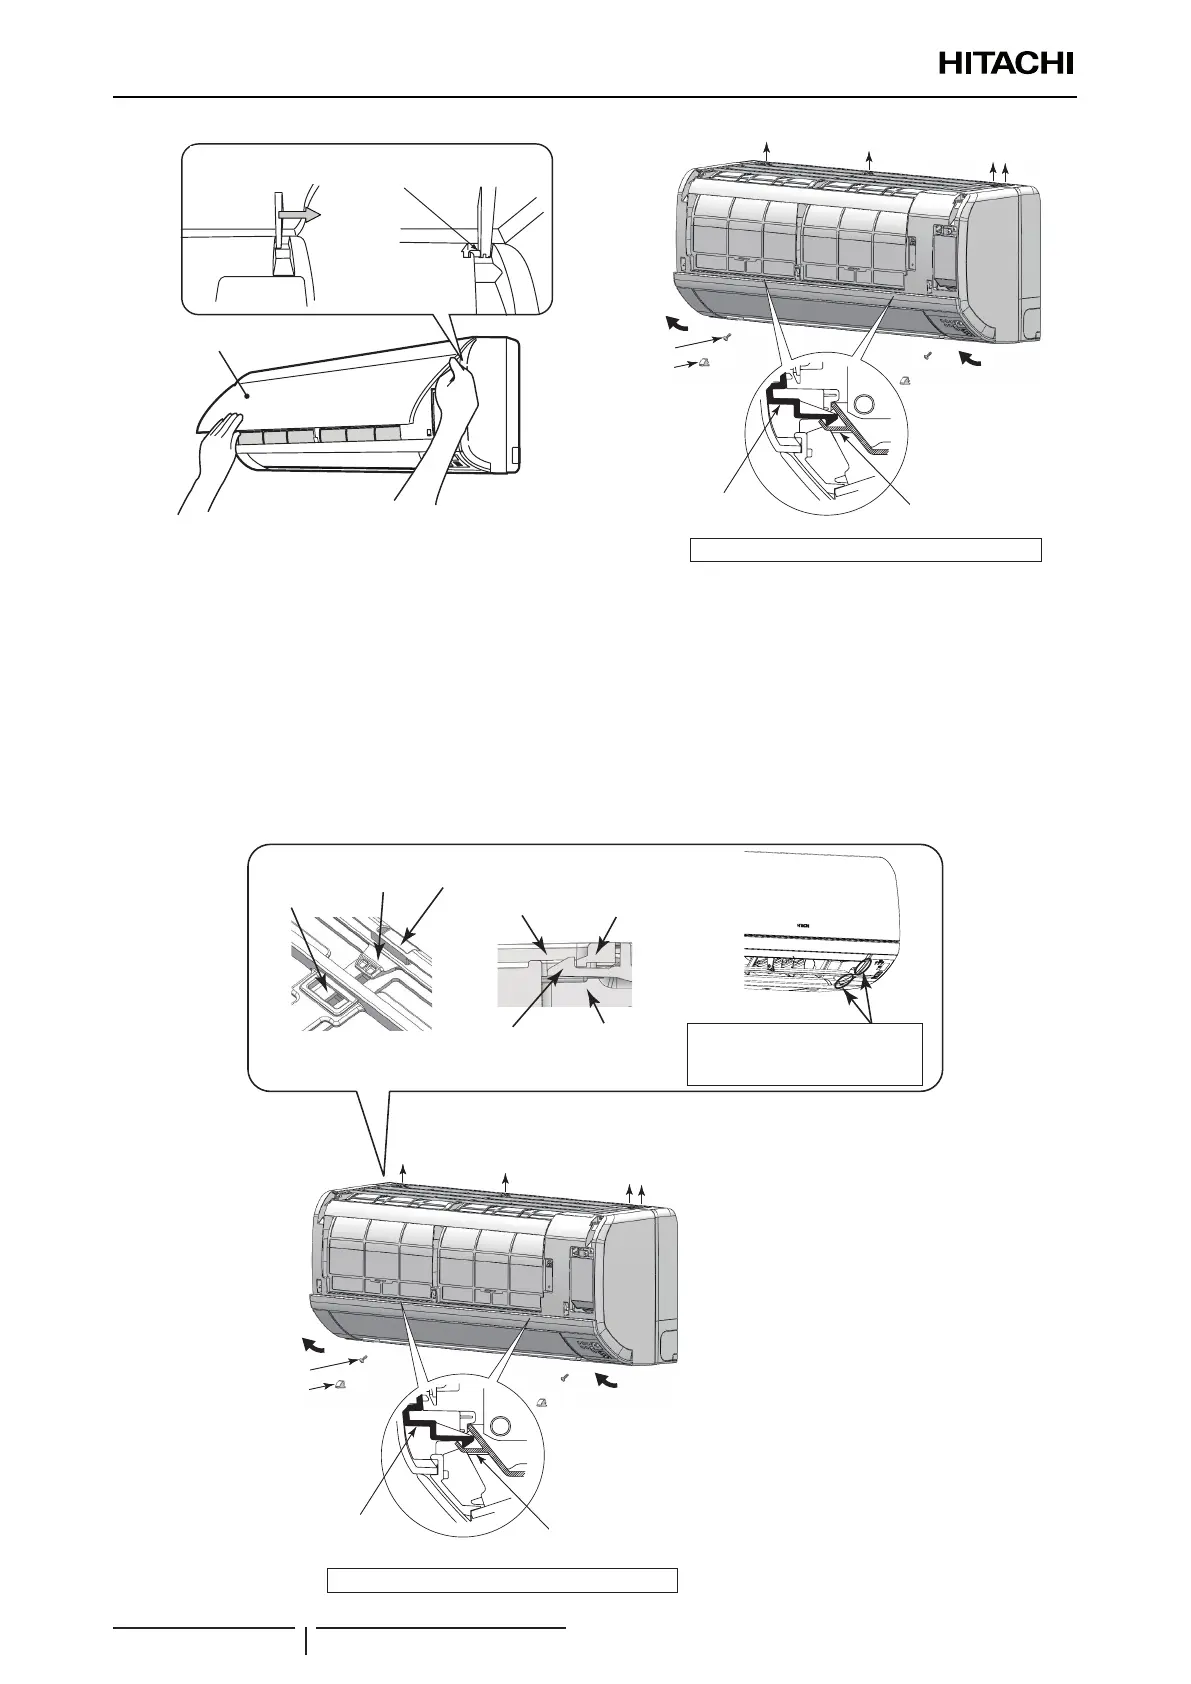
Do not apply an excessive force to the catches.
Catches on lower side
of front panel
Drain pan’s projection
portion for catches
Do not apply an excessive force to the catches
Screw
Bush
5 When mounting the front panel, rstly attach the air outlet side of the panel to the unit and then put the catches (four
portions) on the upper side of the unit into the holes on the panel. Push the lower side of the panel to fasten the
catches.
? NOTE
Make sure that there is no gap nor lap between the front panel and the right side of the drain pan. If there is a gap there, an air leakage
and dew condensation may occur and the dew may drop on the front panel.
6 Tighten 2 screws and attach 2 bushes. And then mount the air lter.
7 Insert the arm shafts on both sides of the at panel into the holes on the unit body, along the guide of the front panel.
After the at panel is attached properly, close the at panel.
Catches on
Lower Side of
Front Panel
Drain Pan’
s Projection
Portion for Catches
Do not apply an excessive force to the catches.
Catches on lower side
of front panel
Drain pan’s projection
portion for catches
Do not apply an excessive force to the catches
Screw
Bush
Hole for
catch
Catch
Indoor unit
body
Catch
Indoor
unit body
Hole for
catch
Front
panel
Make sure that there is no gap or lap
between the front panel and the right
side of the drain pan.

 Loading...


