9 Servicing
RPK-FSN(H)3M - Wall mounted
SMGB0099 rev.0 - 12/2016
324
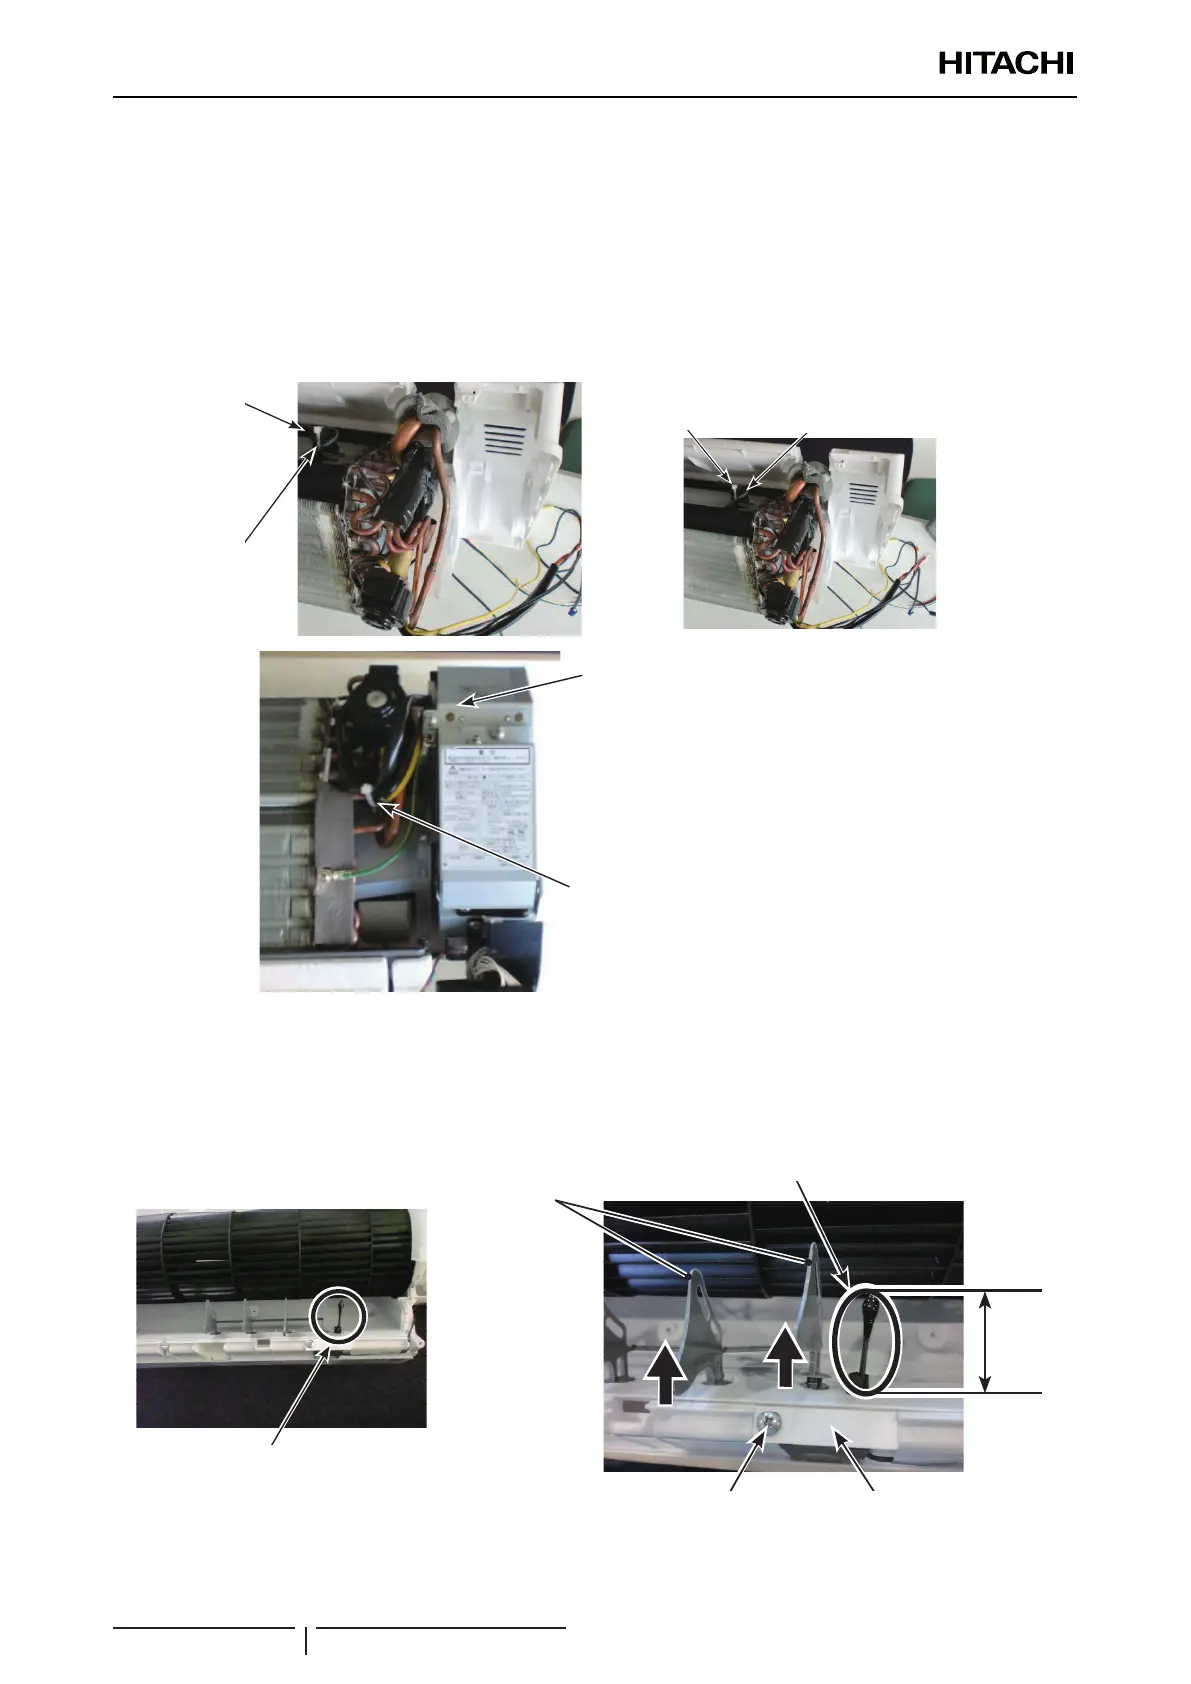
6 Removing Inlet Air Thermistor
a. The inlet air thermistor is clamped with 1 plastic band (B) to the resin component for xing the thermistor inserted
into the heat exchanger ns. Remove the plastic band to remove the thermistor.
b. When attaching the inlet air thermistor, attach it to the resin component with the plastic band in the reverse
procedure. Take care during the work so that the wiring for the thermistor will not come into contact with metal
edges of ns or side plates of the heat exchanger.
c. After attaching the thermistor, clamp the wiring for the expansion valve, freeze protection thermistor, gas pipe
thermistor and inlet air thermistor with 1 plastic band.
Inlet Air Thermistor
Plastic Band (B)
Plastic band (B)
Inlet air thermistor
Plastic Band (B)
Fix the Inlet air thermistor
with the plastic band so that the
thermistor wire will not be loosened.
Plastic band (B)
Fix the inlet air thermistor with the plastic band so
that the thermistor wire will not be loosened
Place the wirings for the thermistors (for inlet air, gas
pipe and freeze protection), and the expansion valve
coil into the electrical box from the wiring outlet at the
upper side.
(The wiring for the expansion valve coil is not included
when using the unit without expansion valve)
Clamp the wirings for the thermistors (for inlet air, gas
pipe and freeze protection), and the expansion valve
coil with the plastic band.
(The wiring for the expansion valve coil is not included
when using the unit without expansion valve)
7 Removing Outlet Air Thermistor
a. Remove the front panel according to the “9.9.2 Removal of the front panel” chapter.
b. Lift the front side of the vertical blade up in the direction of the arrow to remove it.
c. Remove 1 screw xing the outlet air thermistor cover to remove the cover.
Outlet air thermistor
Vertical blade
Outlet air thermistor
Screw xing cover for
outlet air thermistor
Cover for outlet air thermistor
Approx
29mm
a. After removing the insulation, pull out the rubber bush to remove the outlet air thermistor.
b. Remove the tape xing the thermistor to remove the thermistor.

 Loading...


