9 Servicing
RPK-FSN(H)3M - Wall mounted
SMGB0099 rev.0 - 12/2016
328
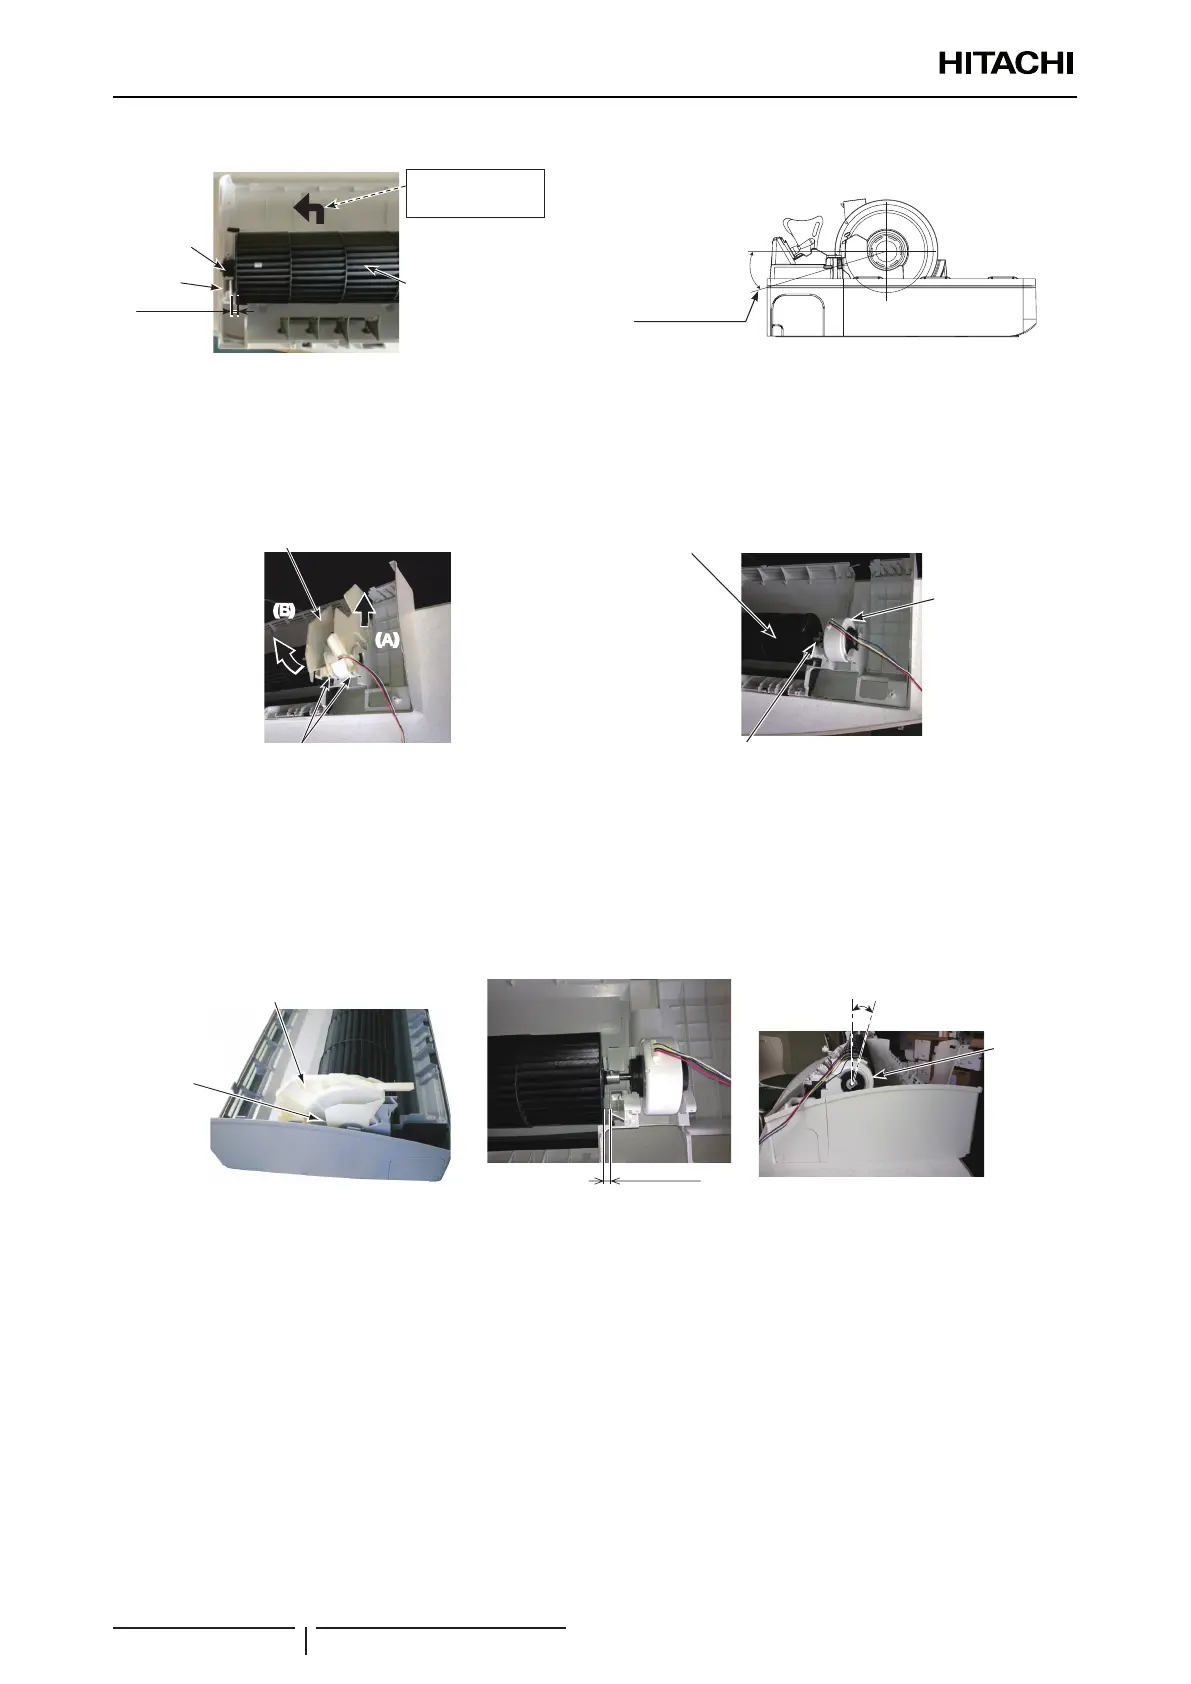
6 The lead wire for the fan motor shall be pulled out as shown in the gure below.
4mm
(20°)
Fan
Unit body
Bearing
Lift up the fan and
pull it to the left
Lead wire for fan
motor
For RPK-(2.0-4.0)FSN(H)3M
1 Remove the heat exchanger according to the “9.9.10 Removing Heat Exchanger” chapter.
2 Remove 2 screws xing the motor clamp. As lifting up the motor clamp in the direction of the arrow (A), pull it out in
the direction of the arrow (B).
3 Then Loosen 1 screw xing the fan and the motor shaft.
Motor Clamp
Fixing Screws for Motor Clamp
A
(
)
B
(
)
Fixing screws for motor clamp
Motor clamp
Fan
Fan Motor
Fixing Screw for Fan
Fixing screw for fan
Fan
Fan motor
4 Remove 1 screw xing the bearing holder and remove the bearing holder.
5 Hold the fan with hands and lift the bearing side up slightly. Then pull out the fan to the left to remove the fan and the
motor.
6 When mounting the fan motor and fan, mount them in the reverse procedure. The fan shall be mounted 6~7mm away
from the unit body.
7 The outlet of the lead wire for the fan motor shall be at the cabinet side and the lead wire shall be pulled out as shown
in the gure below.
Bearing Holder
Fixing Screw for
Bearing Holder
Bearing holder
Fixing screw for
bearing holder
䌾
Approx. 10°
Outlet of
Lead Wire
Outlet of
lead wire
Approx 10º

 Loading...


