11 Maintenance notes
Indoor cleaning
SMGB0099 rev.0 - 12/2016
357
11
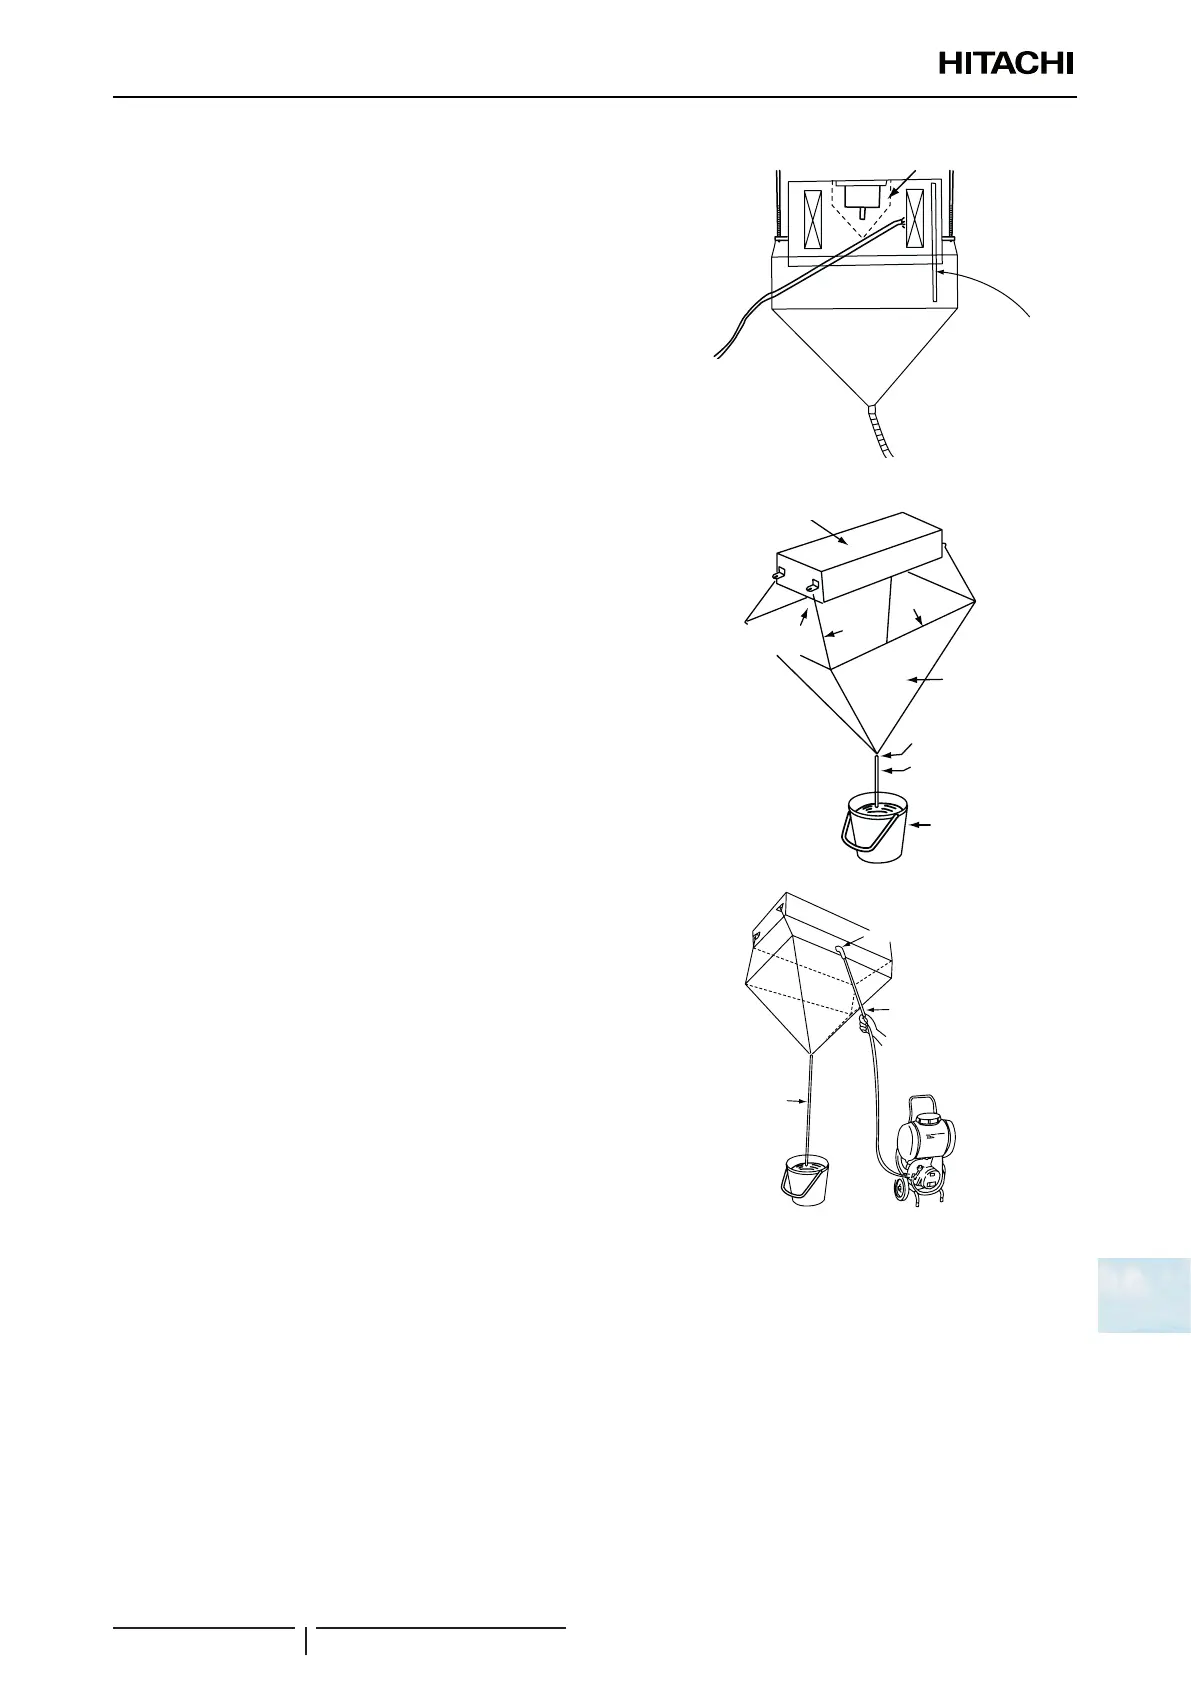
Place a vinyl sheet around the heat exchanger to prevent the
cleaning water from splashing the insulation surface and drain pump.
Secure the vinyl sheet to the side plate of the exchanger using
adhesive tape and seal the gap between the vinyl sheets in the
same manner.
Secure the motor panel using adhesive tape.
Water collector
Motor panel
Attach the water collector
to the heat exchanger
Put a vinyl sheet here
in order to protect the
insulation sheet from
the splashed cleaning
water
Hang the cleaning water manifold from the indoor unit.
1 Tie the rope to the suspension bolts of the indoor unit and drop
downwards.
2 Insert the support bars into the holes in the water manifold.
3 Tie the rope to the support bar of the water manifold and hang
the manifold.
4 Connect a pipe to the boss and place the end inside the pipe.
Cleaning water
collector
Suspension bracket
Indoor unit
Rope
Support
bar
Boss
Hose
Bucket
Pour approximately 15 litres of cleaning product for the aluminium
ns into a supply tank.
Insert the nozzle of the pressurised water gun into the hole in the
cleaning water manifold. Start the water pump and clean the heat
exchanger of any dust.
After cleaning, spray and remove all remains of water.
? NOTE
Set the pressure of the water pump so as not to damage the funs.
Any cleaning water left behind will rust the ns. Set the pump pressure to
between 2.5 and 5 kg/cm
3
to protect the ns.
Spray
Bucket
Hose
Pump
Nozzle
After cleaning, t the drain pan by lowering the rope.
Dry the remains of any water on the indoor unit.
Check the insulation of the drain pump using a megohmmeter. Check that the insulation is above 1 MΩ when 500V are
applied.
Connect the wiring.
Perform the neutralisation treatment after cleaning.

 Loading...


