2 Unit installation
RPI - Ducted indoor unit (8/10)FSN3E(-f)
SMGB0099 rev.0 - 12/2016
54
Installation
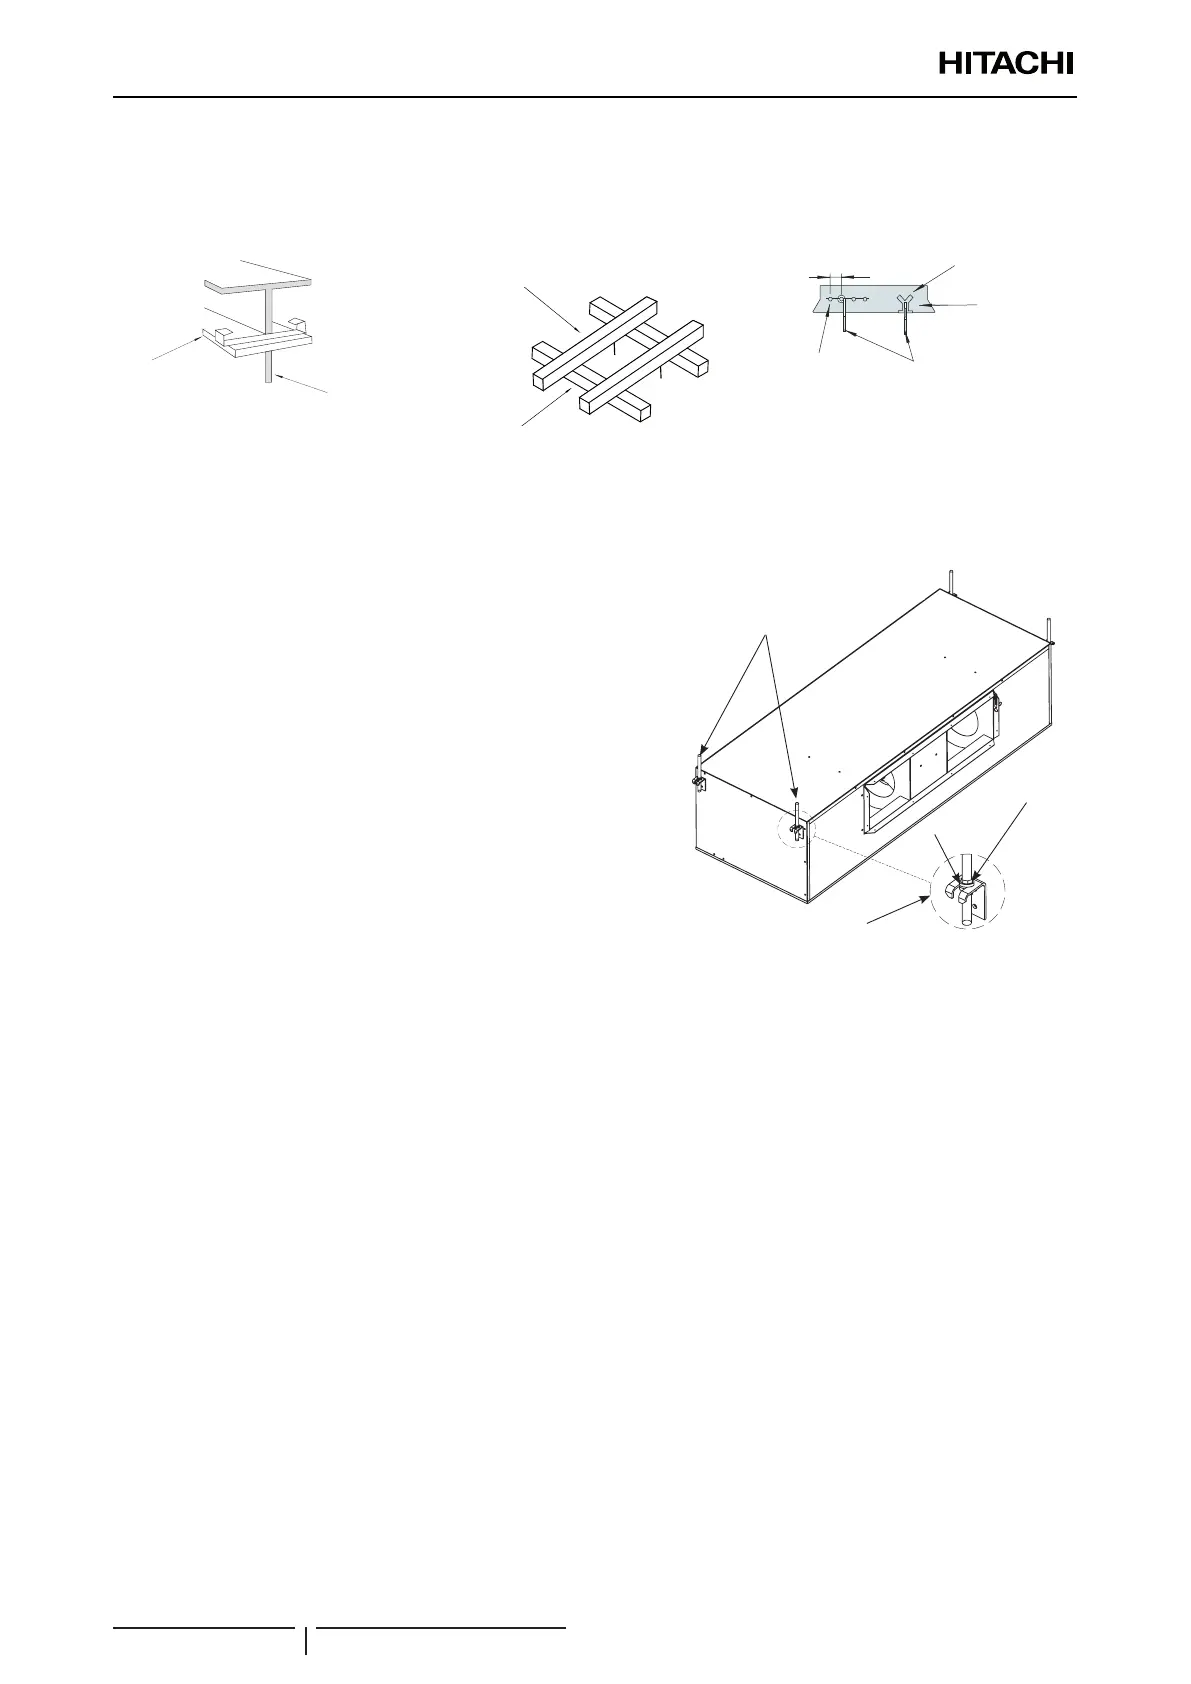
Install the M10 (3/8) suspension bolts depending on the type of surface:
Steel beams Wooden beams Concrete beams
Steel beam
Anchor bolt
(W3/8 or M10)
:RRGHQ%HDP
:RRGHQ%DU
PPWRPP
VTXDUH
Wooden bar
(60mm to 90mm square)
Wooden beam
1
2
4
5
1 150 to 160 mm
2 Steel
3 Anchor bolt (W3/8 or M10)
4 Concrete
5 Insert (100 to 150 kg)
Thread the suspension bracket onto the nut and washer of each bolt,
starting on one side.
Check that the nut and washer are correctly secured with the
suspension bracket retainers.
Attach the top of the suspension bracket with another nut and washer.
! CAUTION
• Before lifting the unit, prepare any necessary means (ladders, scaffolding,
elevator platform, etc.) and check that the current safety regulations in the
place where the installation is taking place are met.
• Check that the lifting work can be carried out without the risk of injuries to
you or others in the surrounding area.
• Request the assistance of another person to lift the unit.
Nut
Washer
Suspension bracket
Sling bolt
Lift the unit carefully.
Check that the condensate discharge system in the indoor unit works correctly. To do so, check the level of the drain pan
using a spirit level or a clear exible pipe full of water. The side of the unit on which the drain hose is located must be
around 5 mm lower than the front side.
Once adjusted, tighten the suspension bracket nuts.
Apply a thread-locking product to the bolts and nuts to prevent them from loosening. Otherwise, abnormal noise may be
caused by mechanical vibrations and the indoor unit may become loose.
Apply protective paint to the bolts and nuts to prevent rusting.
Secure the drain hose with the clamp and adhesive supplied.
! CAUTION
Completely cover the unit with a sheet of plastic to protect it during installation work.

 Loading...


