2 Unit installation
RPK - FSN(H)3M Wall mounted
SMGB0099 rev.0 - 12/2016
61
2
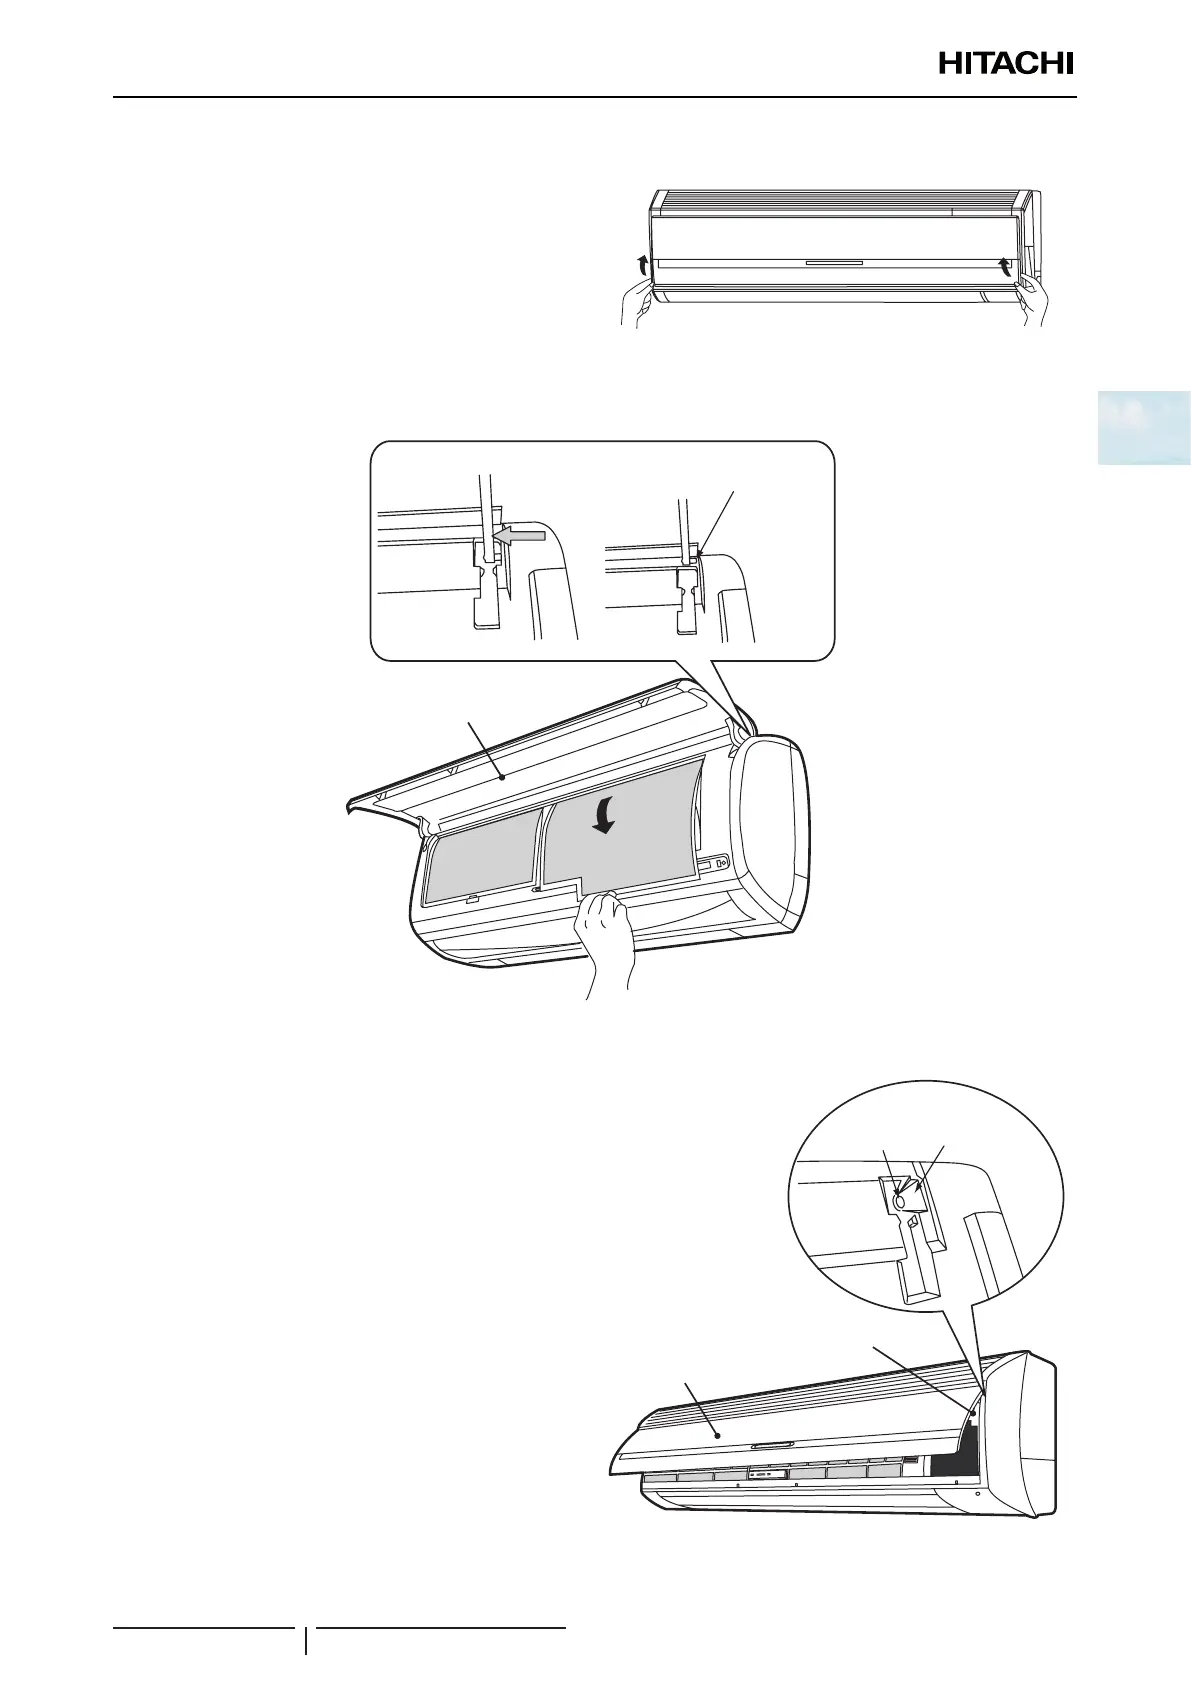
Removal of the front panel for RPK-(2.0-4.0)FSN3M
Hold both sides of at panel and open it fully.
Lift up the air lter, detach the catches from the indoor unit and remove the air lter downward.
After the right arm shaft is pushed inward and the shafts are removed from the front panel, pull the at panel frontward
while the right arm shaft is slightly pushed inward.
Flat panel
Push the shaft
toward arrow
direction.
Remove this part
from the hole.
Attaching at panel for RPK-(2.0-4.0)FSN3M
Insert completely the left and right arm shafts of at panel
into the holes along the guide at the front panel. After the
at panel is attached completely, insert the catches for air
lter to x.
! CAUTION
When removing front panel, do not apply an excessive force by
hitting, etc. It may break the unit body.
Hole
Guide at
front panel
Front panel
Flat panel

 Loading...


