2 Unit installation
RPF - Floor type, RPFI - Floor concealed type
SMGB0099 rev.0 - 12/2016
65
2
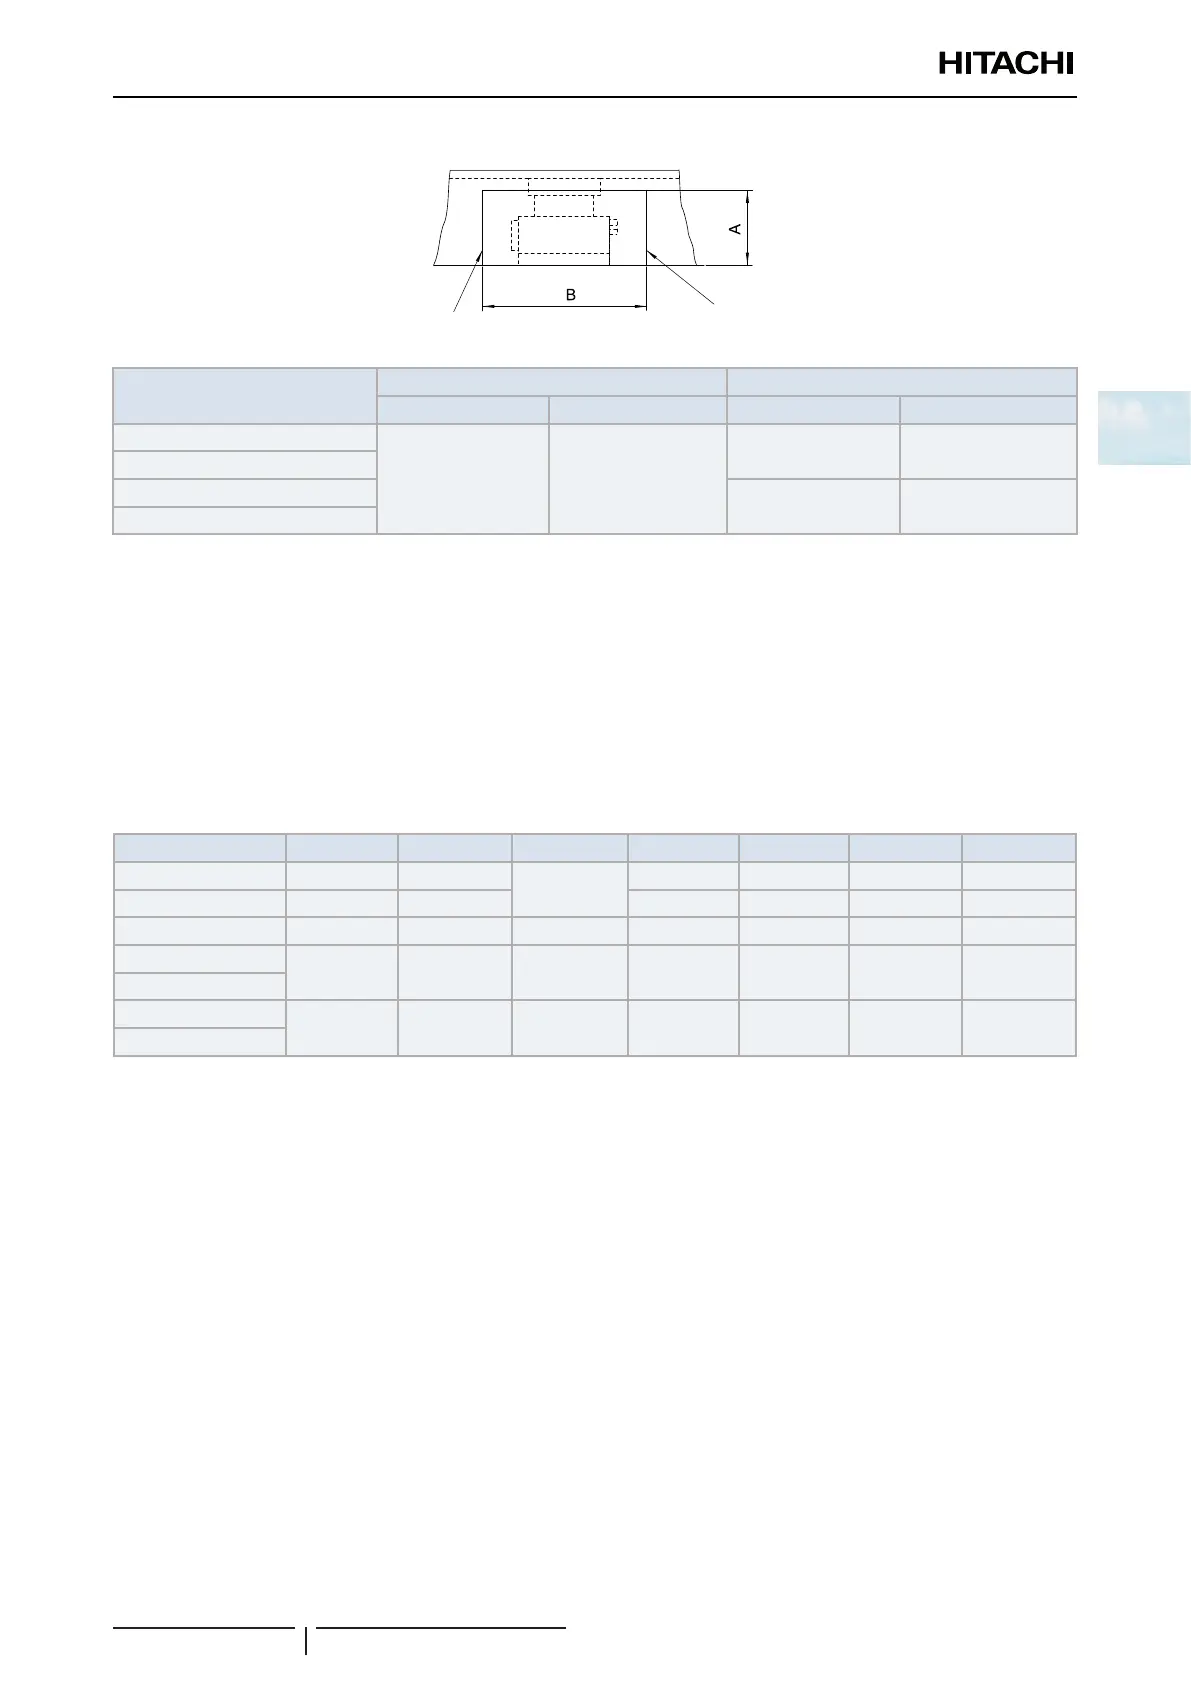
Install a service hatch near the pipe connection area and electrical junction box for installation and maintenance work.
Unit (inside)
Floor
Service
access panel
Service
access panel
Model
A (mm) B (mm)
RPF RPFI RPF RPFI
RPF(I)-1.0FSN2E
630 620
1479 1359
RPF(I)-1.5FSN2E
RPF(I)-2.0FSN2E
1729 1609
RPF(I)-2.5FSN2E
Check that the drain hose can be installed maintaining the necessary down-slope.
Installation
! CAUTION
The place where the indoor unit is to be installed must be a at surface with enough space to fully house the unit. The weight of the unit
must be evenly distributed over the surface.
Handle and position the unit carefully.
Check that the attachment position (in mm) of the unit is as indicated in the gure.
Model A B C D E F G
RPF-1.0FSN2E 1045 754
217
732 228 140 360
RPF-1.5FSN2E 1170 879 857 228 140 630
RPFI-1.5FSN2E 988 879 66 857 77 138 620
RPF-2.0FSN2E
1420 1129 11 1107 228 140 630
RPF-2.5FSN2E
RPFI-2.0FSN2E
1234 1129 11 1107 53 139 620
RPFI-2.5FSN2E
Adjust the horizontal level of the unit by loosening or tightening the unit installation bolts.
Check that the condensate discharge system in the unit works correctly. To do so, check the level of the drain pan using
a spirit level. The side of the unit on which the drain hose is located must be around 3 mm lower than the opposite side.
Secure the base plate and the rear plate of the unit using eld-supplied bolts and screws.
? NOTE
RPFI units: remove the electrical wiring box when tting the installation bolts.

 Loading...


