• Two rack rails (left and right)
• Pins for round-hole rack conversion
The rack rails are configured for square-hole racks, but are easily converted for use in a round-hole
rack. To do this remove the standard pins from the front and back ends of each rail and replace them
with the eight round-hole pins (supplied in the bag of miscellaneous hardware).
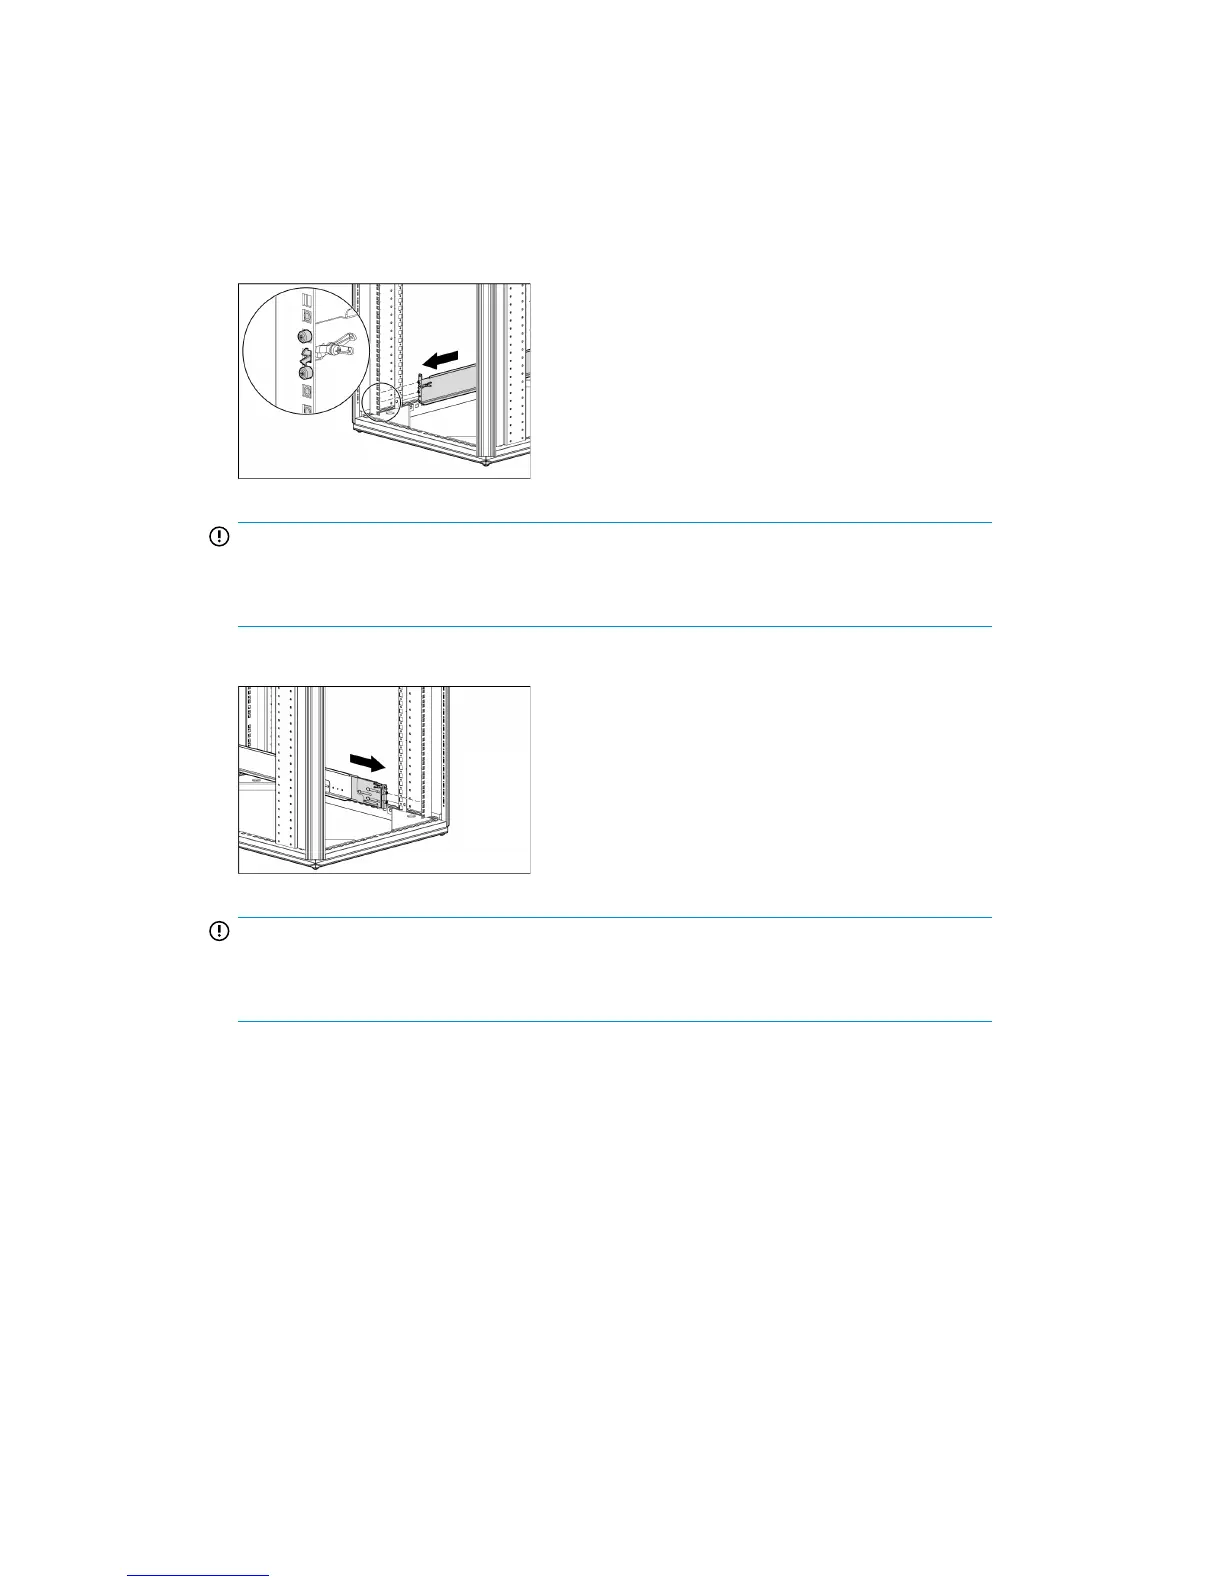
1. Secure the front end of the rails to the rack. (Identify the left (L) and right (R) rack rails by markings
stamped into the sheet metal.)
IMPORTANT:
Be sure that the scissor-type locking latches engage the rack fully when the pins extend
through the holes marked with the template.
2. Secure the back end of the rails to the rack.
IMPORTANT:
Be sure that the scissor-type locking latches engage the rack fully when the pins extend
through the holes marked with the template.
3. Slide the Capacity Upgrade Kit into the rack. It should be immediately above or immediately
below the HP D2D Backup System.
4. Use the thumbscrews on the front of the chassis to secure it to the rack. (Remove the small side
panels secured with blue tape to access the thumbscrew.)
Connecting the Capacity Upgrade Kit to the HP D2D
1. To ensure correct keying, first connect the supplied cable to the IN connector on the rear of the
Capacity Upgrade Kit.
2. Connect the other end of the cable to the port labeled "Port 2E" on the RAID 800 PCI-e card on
the rear of the HP D2D Backup System.
D2D Backup System HP D2D4112 199