4. Operation
4.2 Operation in Positioner Mode
4-44
ME0342-4B
[4] Pressing Operation
■ Sample use
* Position No.2 sets pressing operation.
■ Control method
1) The method of controlling the pressing operation is the same as that described in [1]
Positioning except the setting of the position table. Any setting of “Pressing” in the position
table allows the pressing operation to be done. “Positioning width” is assumed as pressing
operation distance.
2) The actuator moves at the setting speed and rating torque to the position of the coordinate
set in “Position” in the similar way as normal positioning. Then the operation changes to
pressing. The moving distance in pressing is the value set in “Positioning width”. The
pressing is performed with the torque (current limit value) set in percent [%] in “Pressing” of
PIO patterns 0 to 3 being the upper limit.
The pressing force when using PCON-CBP/CGBP and the maximum current limit is set
should be the maximum pressing force [N] when force sensor is used. In this case, the value
for the target pressing force [N] setting should be figured out with the formula below.
Note 1 The maximum pressing force [N] when the force sensor is used and the maximum
pressing current limit [%] should differ depending on models. Shown in the table
below is the values for each model.
Actuator
(Pulse Pressing)
Max. Pressing Force [N]
when the force sensor is used
Max. Pressing
Current Limit [%]
Max. Pressing Force [N]
when the force sensor is used
Target Pressing Force [N]
Max. Pressing Current Limit [%]
(Note 1)
4.2 Operation in Positioner Mode
ME0342-4B 4-45
Caution
● It is necessary to have the calibration done on the loadcell in order to perform the force
sensor used pressing in PIO Pattern 6. Refer to [4.2.8 Preparation for Operation with
Force Sensor Used Pressing (Loadcell Calibration)]
● The force sensor used pressing is applicable only for PCON-CBP/CGBP.
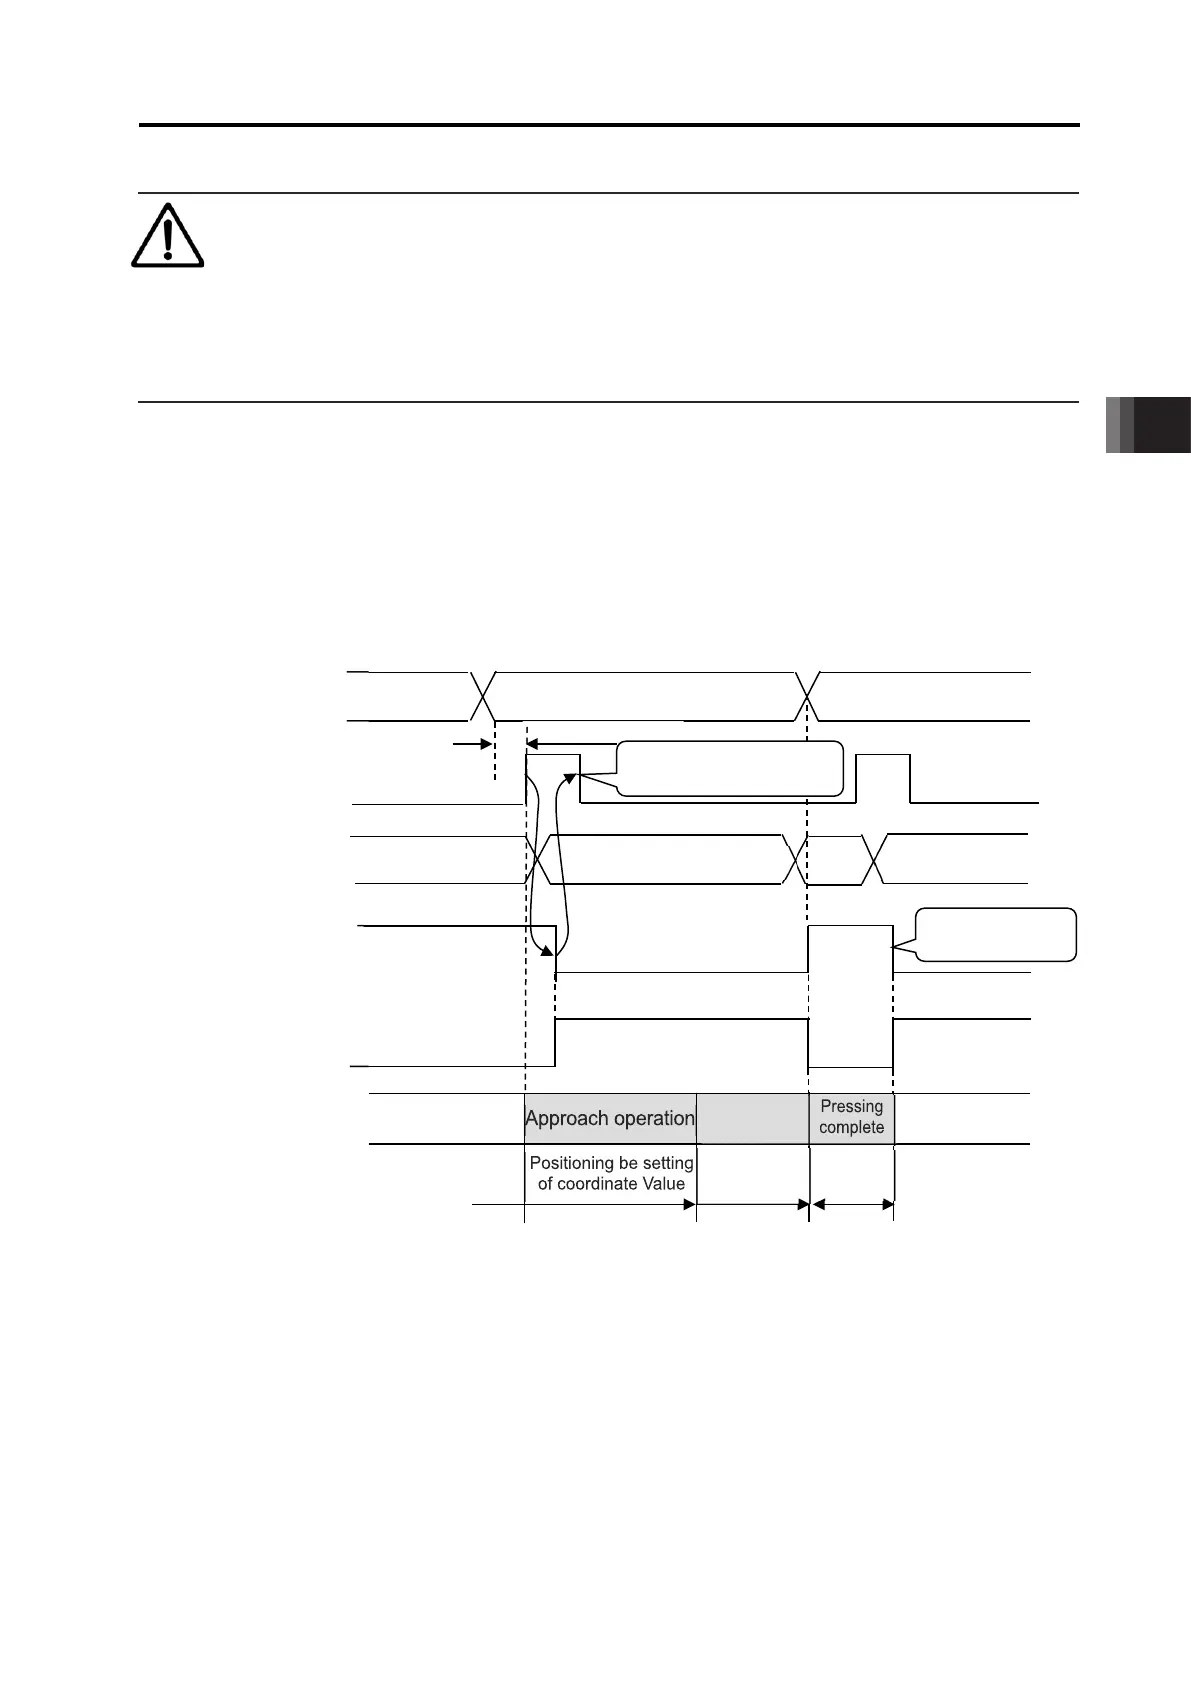
3) The control method is the same as that in [1] Positioning. However, the processing of
positioning complete signal PEND is different from that in [1] Positioning.
PEND is output when the shaft is stopped by pressing (pressing complete). If the work is not
subject to pressing (miss-pressing), the actuator moves by the value set in “Positioning
width” to stop but PEND is not turned ON.
Note 1 Set the period taken from entering the position number to turning CSTR ON to 6ms or longer.
Because 6ms timer process on the PLC is also entered to the controller, positioning at another
position may occur. Take the PLC scan time into account.
Note 2 The completion position No. output is set to 0 during movement of the actuator.
Not turned ON for
miss-pressing
PC1 to PC**
(PLC→Controller)
Completed position
PM1 to PM**
(Controller→PLC)
(PLC→Controller)
Positioning Completion Signal
PEND
(Controller→PLC)
Moving Signal MOVE
(Controller→PLC)
pressing
Turned OFF by turning
PEND OFF
positioning
width
 Loading...