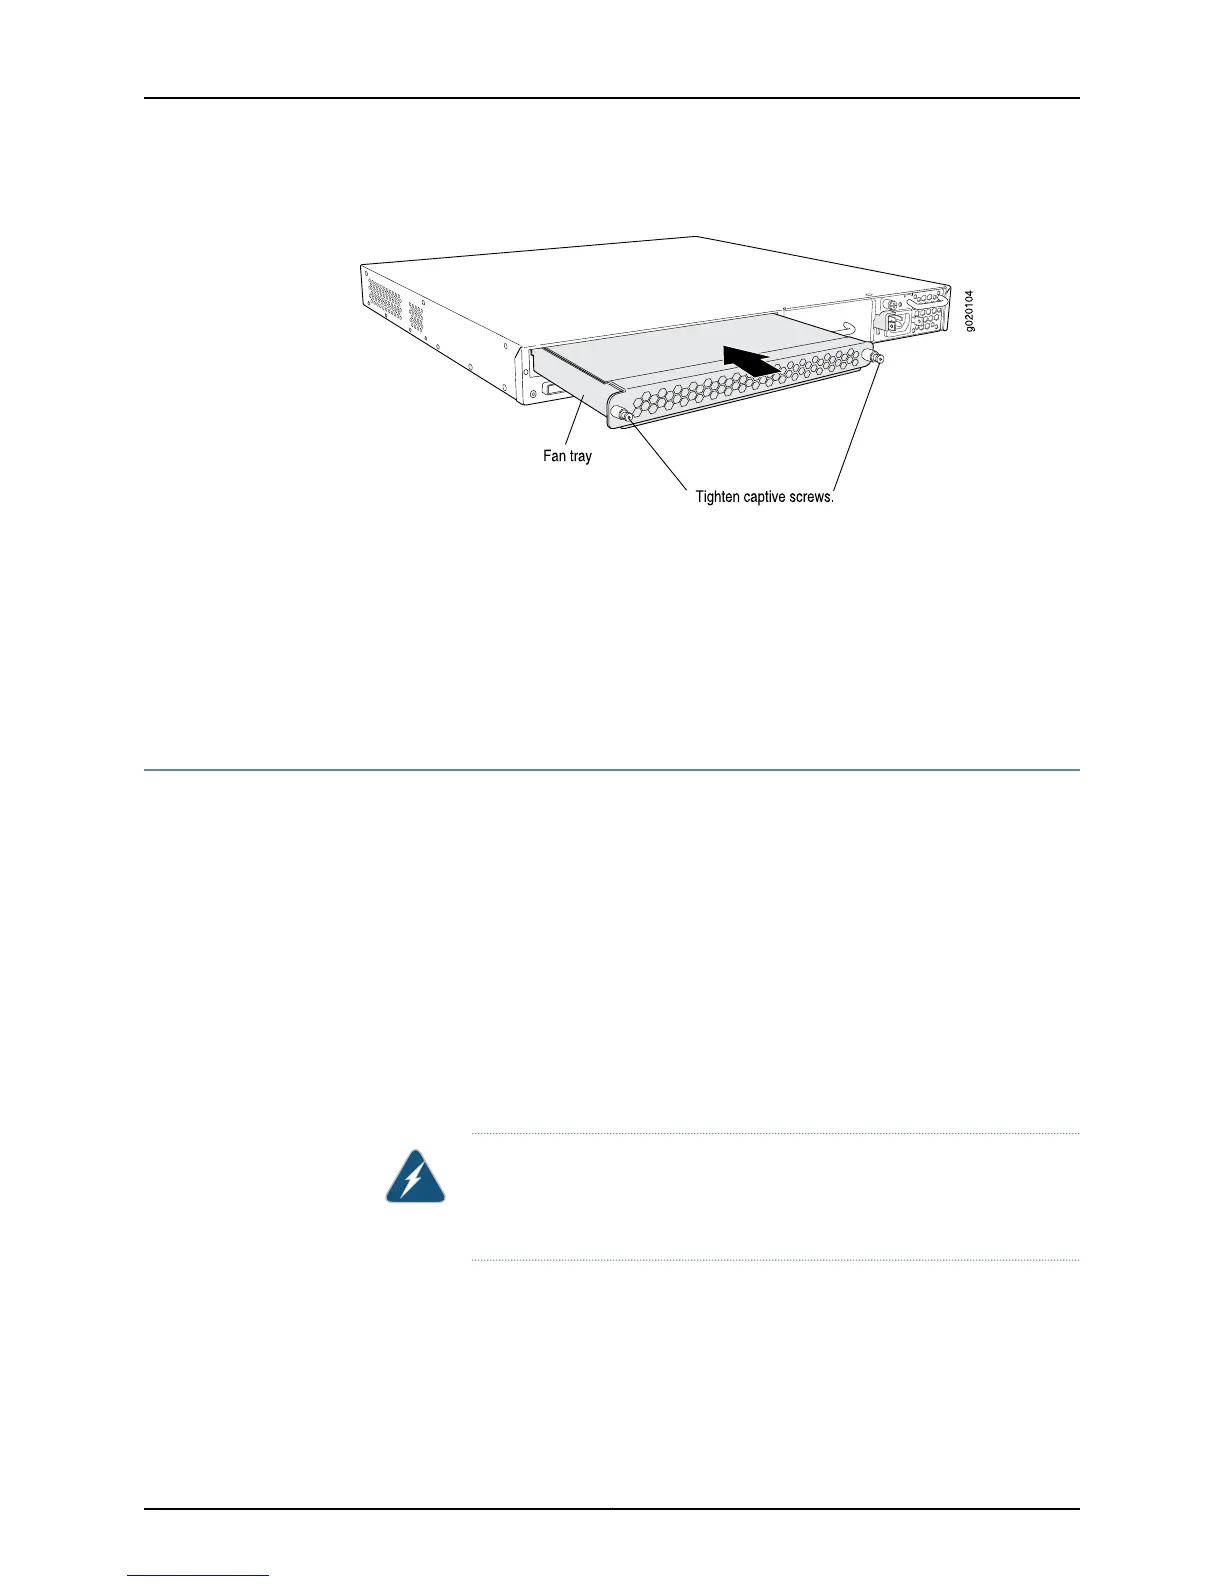
Figure 54: Installing a Fan Tray in an EX4200 Switch
Related
Documentation
Removing a Fan Tray from an EX4200 Switch on page 208•
• Installing and Removing EX4200 Switch Hardware Components on page 169
• Cooling System and Airflow in an EX4200 Switch on page 31
• Field-Replaceable Units in EX4200 Switches on page 10
• Rear Panel of an EX4200 Switch on page 12
Removing a Fan Tray from an EX4200 Switch
Thefan trayin anEX4200 switchis a hot-removableand hot-insertable field-replaceable
unit (FRU) located on the rear panel of the switch: You can remove and replace it without
powering off the switch or disrupting switch functions.
Ensure that you have the following parts and tools available:
•
Phillips (+) screwdriver, number 2
•
An antistatic bag or an antistatic mat
To remove a fan tray from the switch:
1. Place the antistatic bag or the antistatic mat on a flat, stable surface.
2. Loosen the screw or screws securing the fan tray by using the screwdriver.
WARNING: To avoid injury, do not touch the fan with your hands or any
tools as you slide the fan tray out of the chassis—the fan may still be
running.
3. Grasp the handle on the fan tray and pull firmly to slide the fan tray halfway out of
the chassis.
4. When the fan stops spinning, slide the fan tray completely out of the chassis.
5. Place the fan tray in the antistatic bag or on the antistatic mat placed on a flat, stable
surface.
Copyright © 2015, Juniper Networks, Inc.208
EX4200 Switch Hardware Guide