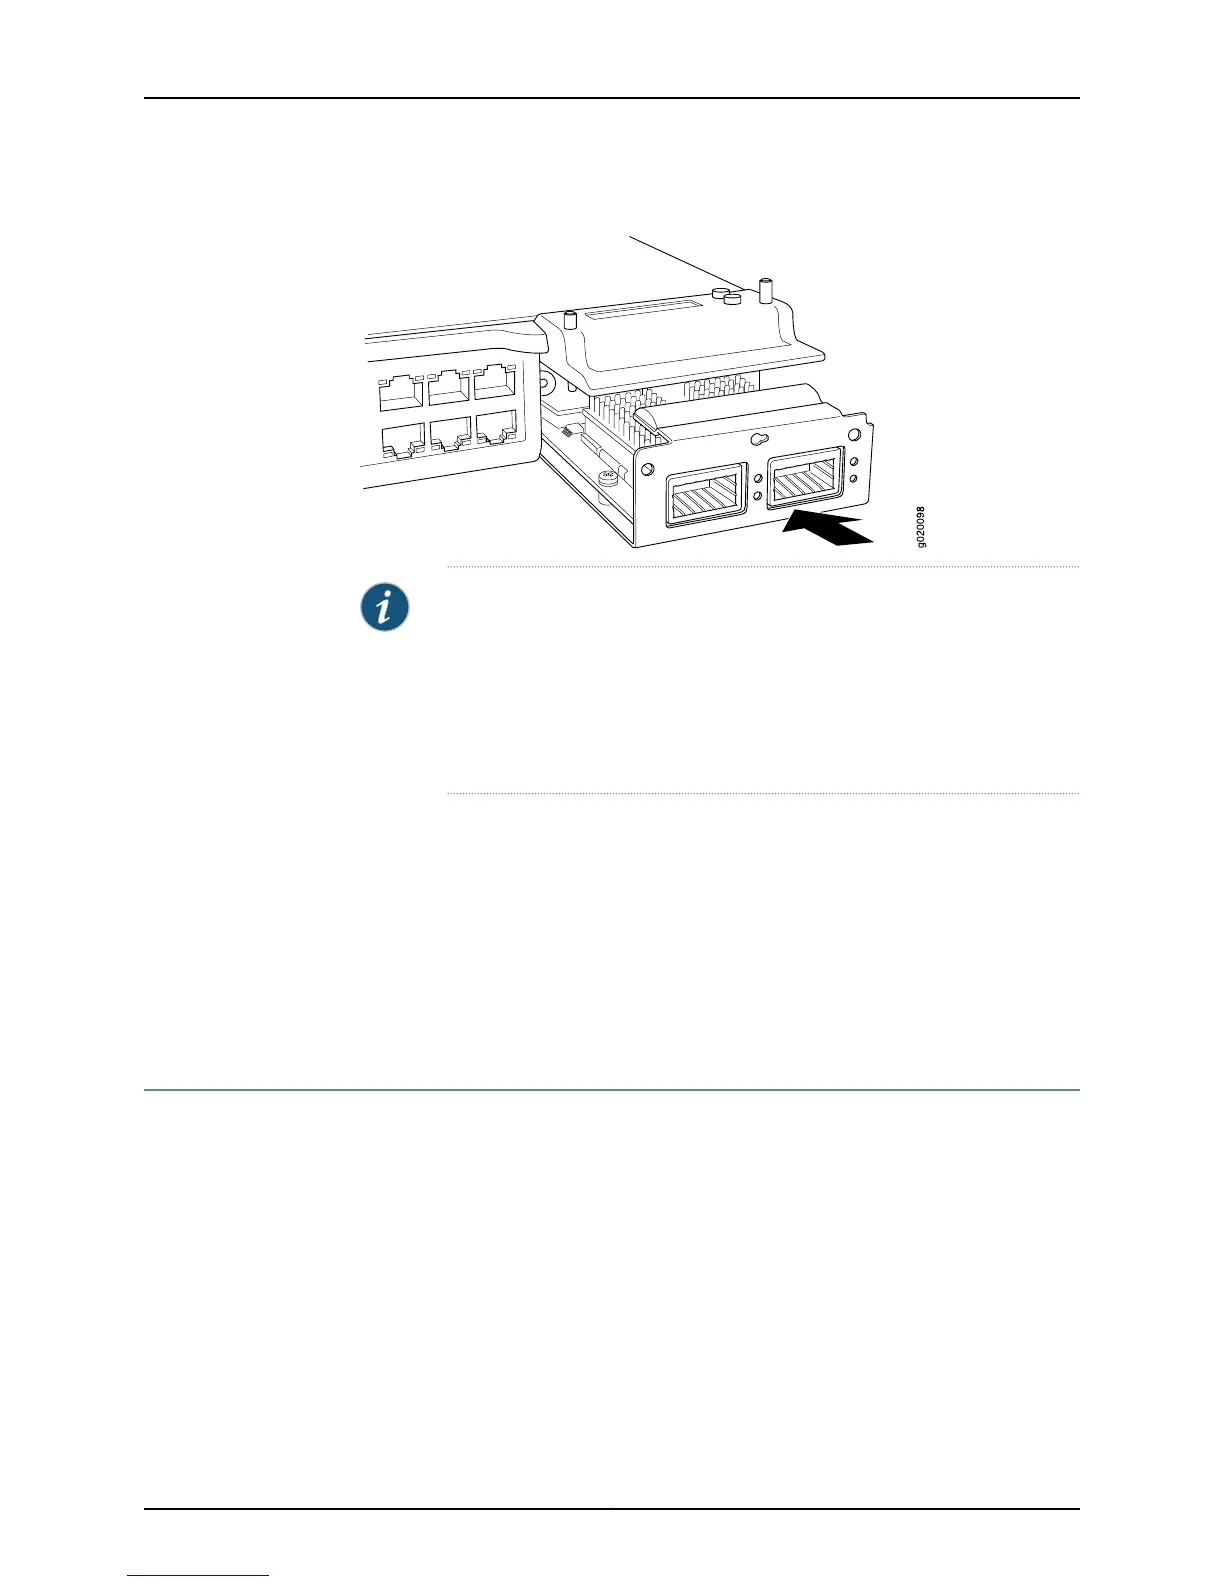
Figure 58: Installing an Uplink Module in an EX4200 Switch
NOTE: If you have a Juniper J-Care service contract, register any addition,
change, or upgrade of hardware components at
https://www.juniper.net/customers/csc/management/updateinstallbase.jsp .
Failure to do so can result in significant delays if you need replacement parts.
This note applies if you change the type of power supply or add a new type
of uplink module. It does not apply if you replace these components with the
same type of component.
Related
Documentation
Troubleshooting Virtual Chassis Port Connectivity on an EX4200 Switch on page 262•
• Removing an Uplink Module from an EX4200 Switch on page 217
• Installing a Transceiver in an EX Series Switch on page 221
• Installing and Removing EX4200 Switch Hardware Components on page 169
• Configuring Gigabit Ethernet Interfaces (CLI Procedure)
• Front Panel of an EX4200 Switch on page 11
Removing an Uplink Module from an EX4200 Switch
If your EX4200 switch includes an optional uplink module, it is installed in the switch's
front panel. The different types of uplink modules are described in “Uplink Modules in
EX4200 Switches” on page 18.
Theuplink module in EX4200 switchesis a hot-removable and hot-insertableunit (FRU):
You can remove and replace it without powering off the switch.
217Copyright © 2015, Juniper Networks, Inc.
Chapter 18: Replacing Uplink Module