Copying Functions
1-18
Margin Mode
You can shift the original image to make space on the copy for binding on the left (right) or top
(bottom) side. The supported margin width is as follows.
Margin on the Back Side
When duplexing, you can also specify the margin on the back side.
Auto - When [Auto] is specified, the left and right margins on the front are reversed on the back. For
example, if the left margin on the front is 1/2" (10 mm), the right margin on the back will be 1/2"
(10 mm). The top and bottom margin widths on the back will match those on the front.
Separate Front/Back Margins - Enables you to specify the front and back settings separately.
NOTE: You can set the default margin width. Refer to Default Margin on page 3-15 for details.
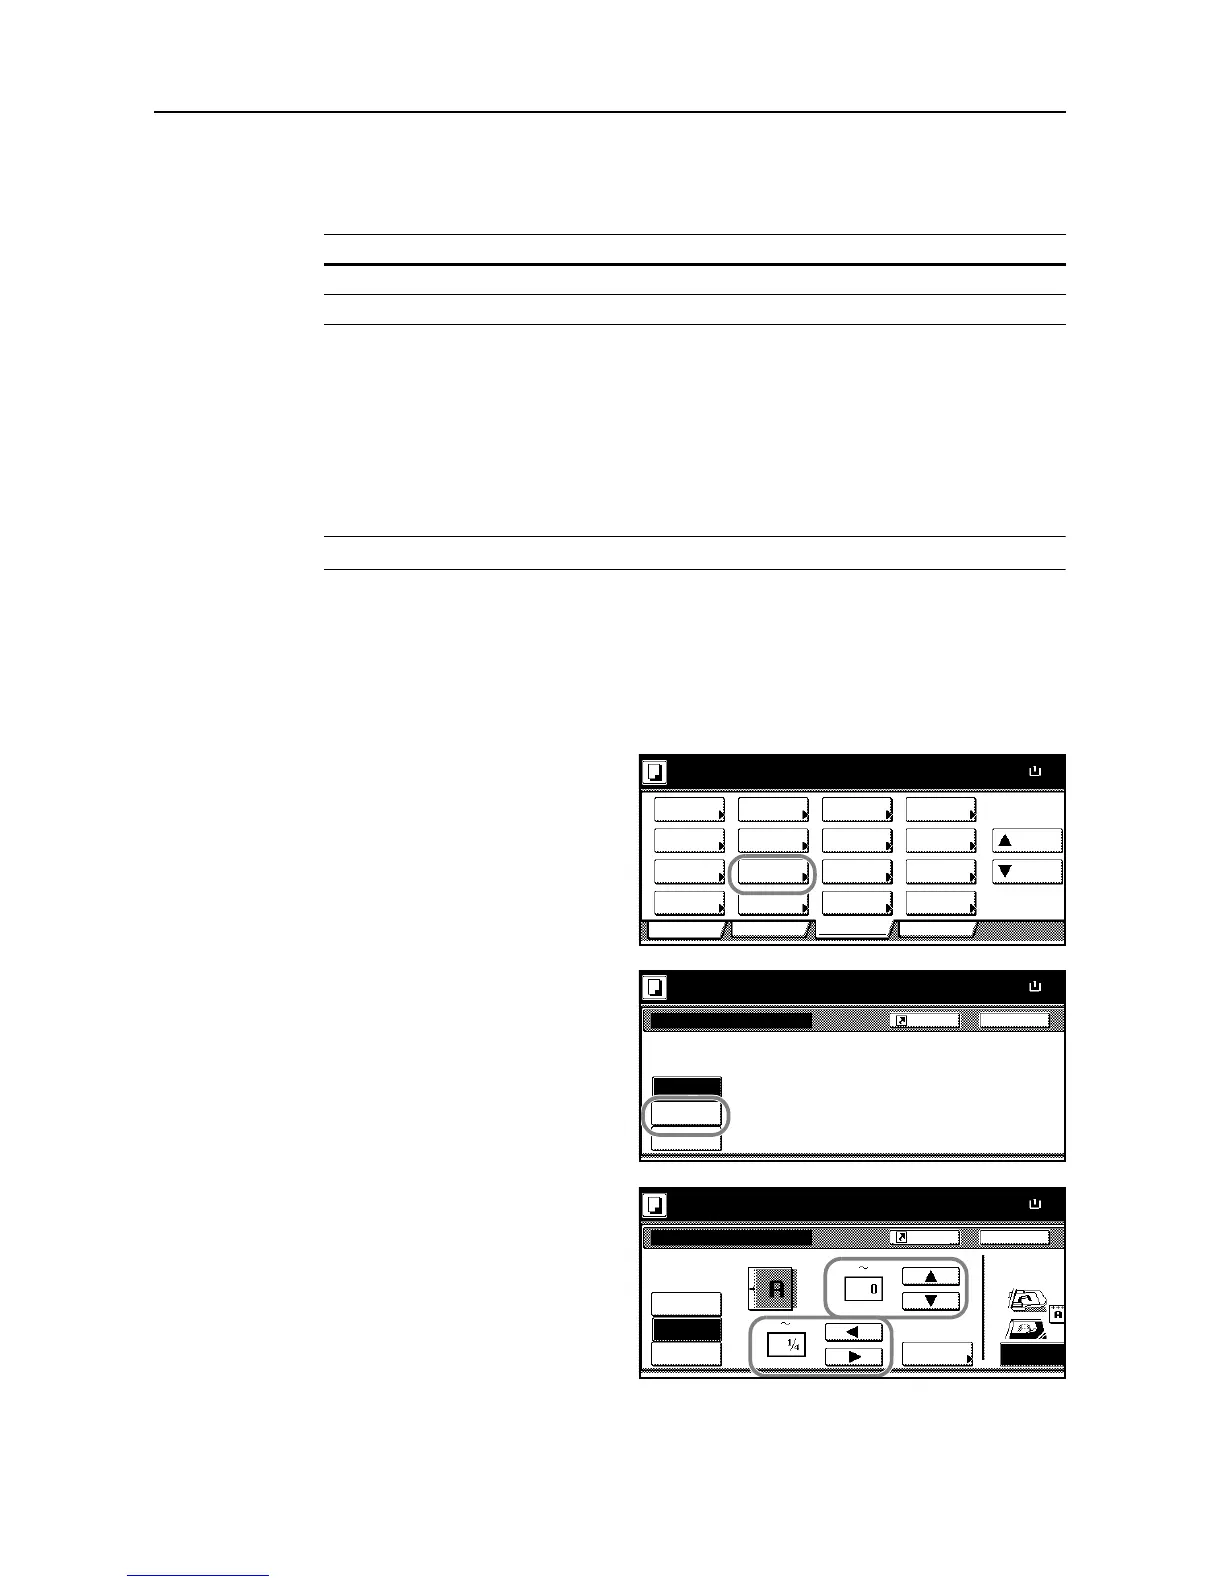
Follow the steps as below to use the Margin mode.
1
Place the originals in the document processor or on the platen with the top edge facing either the
rear or the left side of the copier.
2
Press [Function].
3
Press [Margin/Centering]
([Margin/Imag.Shift]).
4
Press [Margin].
5
Use [S], [T], [W] and [X] to specify the
margins.
6
When duplexing, press [Back page margin].
Margin Width
Inch models 0 to 3/4" (in 1/8" increments)
Metric models 0 to 18 mm (in 1-mm increments)
BackMargi n/Ce nte ri n g
Ready to copy.
Off
Margin
Paper Size
11x8
Centering
Re po si tion image to l e ft/ri gh t o r
top/bottom, and also center image
on paper.
100%
Shortcut