Mini-Crawler Crane M A E D A Section 4 – OUTRIGGER STOWING
1/2019 MC405C-3 4-51
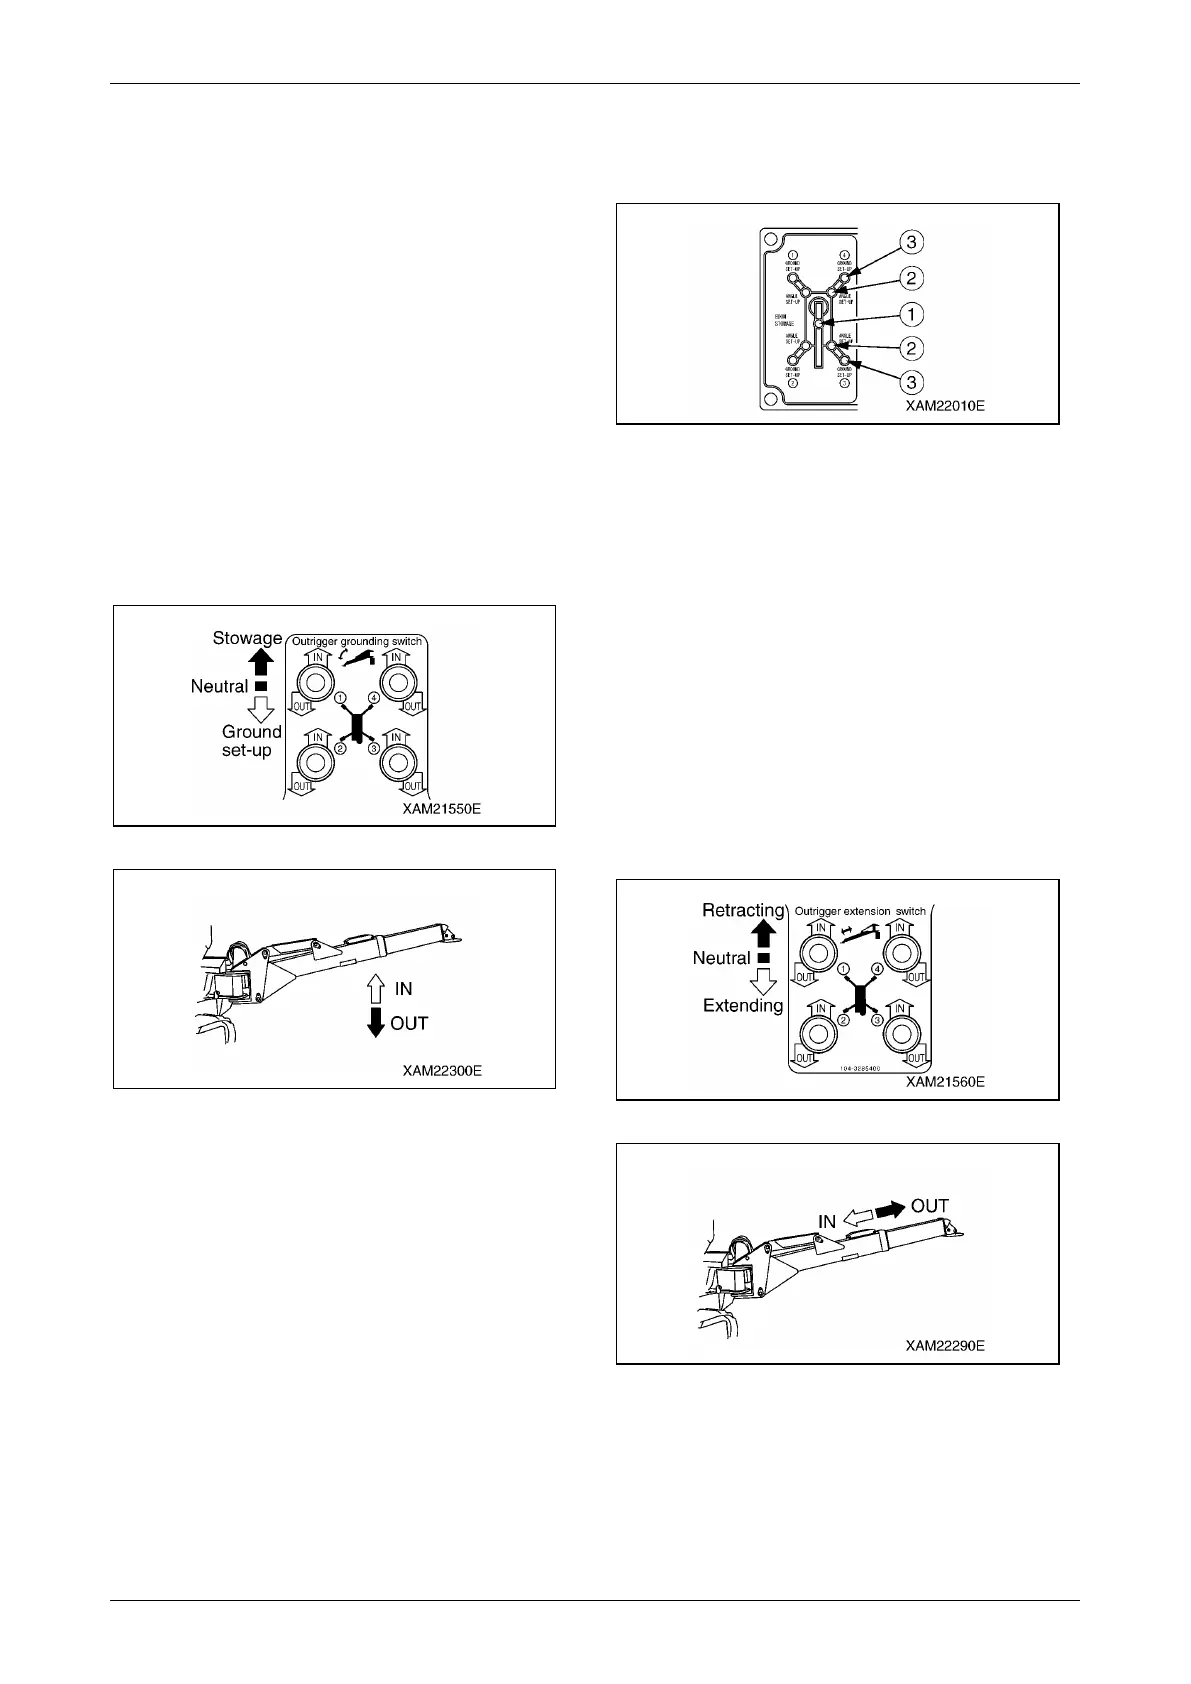
6. Check the number on the operation plate at
the switch section on the outrigger operation
panel to determine which outrigger to be
operated.
7. Push down an outrigger grounding switch or
two of them at the same time to the "ON"
(upward) side.
When the outrigger setting cylinder retracts
and the machine starts to go down, return
the switch to the "Neutral" position.
Operate the remaining switches in the same
way and lower all the four outriggers to the
same height. Return the switch to the
"Neutral" position.
Repeat this operation to gradually lower the
machine until the rubber tracks go down
completely on the ground.
Fig. 4-129
Fig. 4-130
8. When the left and right rubber tracks are
completely set on the ground, push down
again an outrigger grounding switch or two
of them at the same time to the "IN"
(upward) side.
When the setting cylinder completely retracts
and the top box goes up to the upper limit,
release your finger from the outrigger
grounding switch.
9. Verify that the four outrigger grounding
lamps (3) on the outrigger display are
flashing in red.
Fig. 4-131
NOTICE: On the outrigger display, the boom
stowing lamp (1) (green) is illuminated and four
outrigger extension lamps (2) and four outrigger
grounding lamps (3) are flashing in red.
10. Push down an outrigger extension switch or
two of them at the same time to the "IN"
(upward) side.
When the extension cylinder fully retracts
and the inner box is at its shortest, return the
switch to the "Neutral" position.
Operate the remaining switches in the same
way and make the inner box of the four
outriggers to their shortest. Return the switch
to the "Neutral" position.
Fig. 4-132
Fig. 4-133