Procedures for Testing with the DX Host
megger.com 113
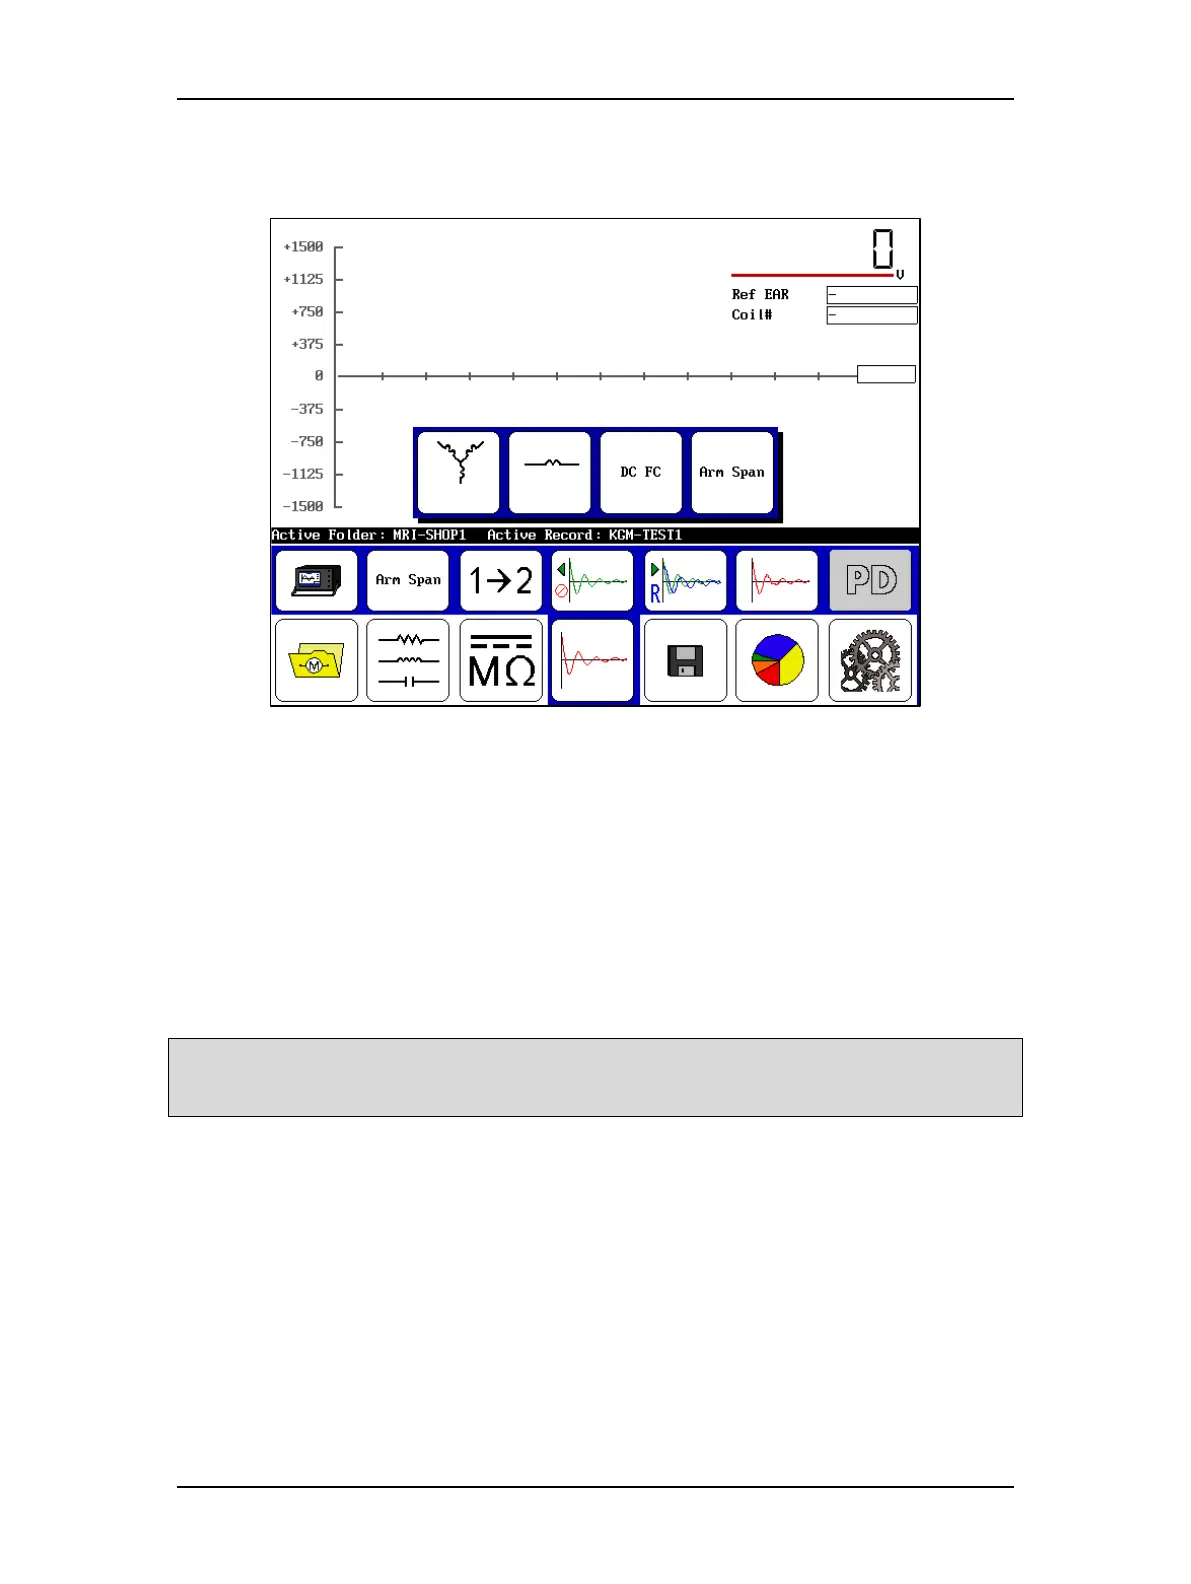
4. Check the Status Bar to ensure the Active Folder and Active Record fields display the
intended target destinations for your test data.
Figure 125. Armature span test start screen.
5. Ensure the configuration icon displays the Standalone icon.
6. Touch the Surge icon in the mode menu.
7. Touch the Coil mode selection icon then the Arm Span icon.
8. Select a starting point armature bar span to use as a reference. For example, bar 1 and
bar 5 and place the probes on these bars to start the process.
9. From this point, the process is the same as testing single coils. Refer to the “Surge
testing procedure for single-coil mode” found earlier in this chapter for detailed
instructions.
NOTE: When testing armatures, apply the surge pulse until you see the EAR graph add the new bar
information. Releasing the PTT, footswitch, or fixture button too soon can result in a collapsed waveform
and errant test data being collected.
10. When you have completed testing all bars of the armature, return the Voltage Output
Control knob to Min (full counterclockwise rotation).


 To Next Page