Quick IP Setup Summary
Lynx II DSA User's Manual – 7096089 159
1. From the Control Panel, locate the Network Connections page. Accessing the
selection is operating-system dependent; in some cases, the Network Connections
is selected directly from the Control Panel, while in others it is accessed through
the Change Adapter Settings link. Please refer to the appropriate system
documentation on changing network adapter settings if necessary.
2. At the Network Connections page, locate and select the Network Adapter
icon corresponding to the network connection to be used with the Lynx II, then
access its Properties settings. The adapter’s Properties are typically accessed
through the icon’s context menu (right-clicking after having selected the icon), or
by double-clicking and then selecting the Properties button.
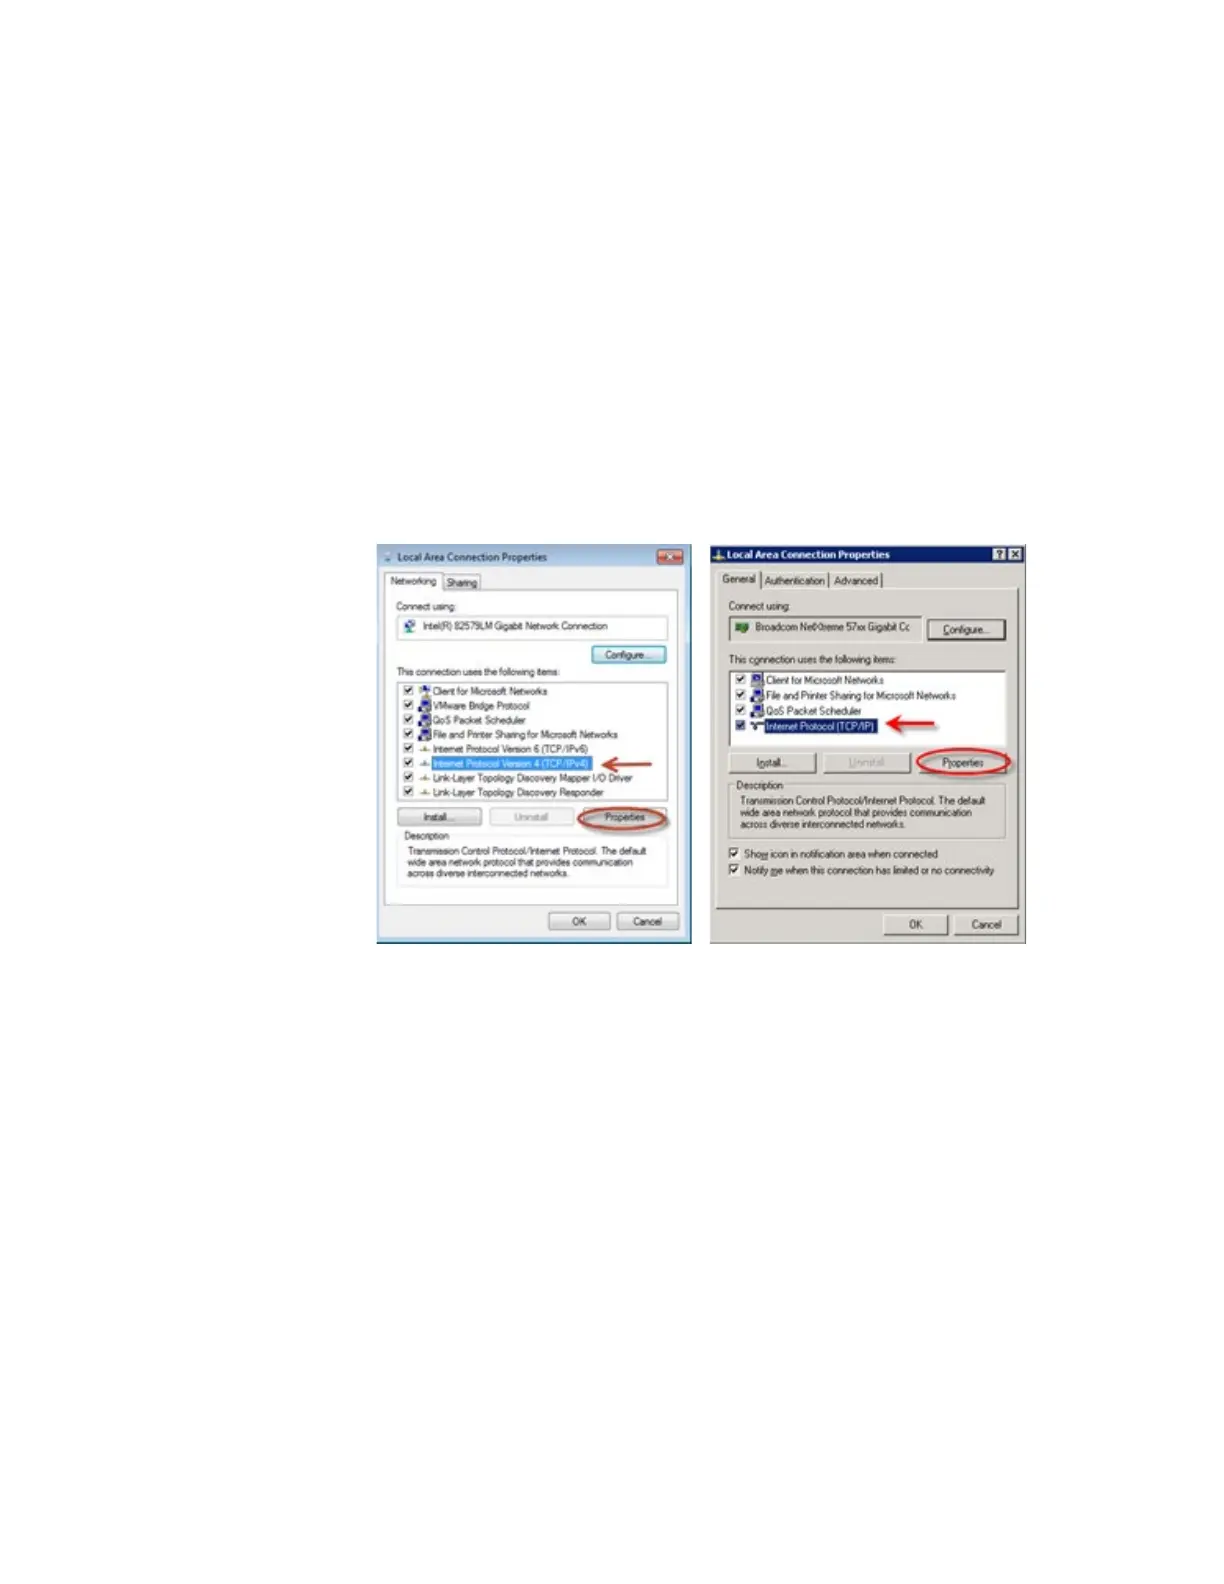
3. At the adapter’s Properties dialog, locate and select the Internet Protocol
(TCP/IP) or Internet Protocol Version 4 (TCP/IPv4), depending on your
operating system, then select Properties. See the example below:
4. From the protocol’s Properties dialog select the General Configuration tab.
Select the “Obtain an IP Address Automatically” button. Next, press OK to accept
this setting, then continue to press OK to accept and exit all setup dialogs.
5. In your Network icon through Windows Explorer, if your system and network
support UPnP discovery, you should see the added Lynx II as a peripheral (similar
to a printer) connected to the network with the default name Lynx-II name or with
the new UPnP Friendly Name if changed. Double-clicking or selecting this unit or
name, will start your browser and present the opening page to access the Lynx II.
Depending on your system policies, your browser may not start automatically by double-
clicking on the Lynx II from the UPnP discovery; in that case, start your browser then type
in the name of the added Lynx II in the browser’s URL section. The browser should
present the opening page to access the Lynx II.
 Loading...