Rack-mounting Two Lynx II Units
Lynx II DSA User's Manual – 7096089 183
Rack-mounting Two Lynx II Units
This assembly must be done with power off, and preferably with no cables connected to
the Lynx II unit(s). It is best to pre-assemble these parts on a bench and install the joined
items as a unit into your equipment rack.
Make sure to:
• Remove and discard the rubber feet from the bottom of the Lynx II unit if installed.
• Remove the contents of the Rack Mount Kit from its packing material.
• Use the proper tools. You will need an Allen Wrench (4 mm or 5/32") and a #2
Phillips screwdriver.
• Use the mounting hardware from your rack system to mount the joined components
into your rack.
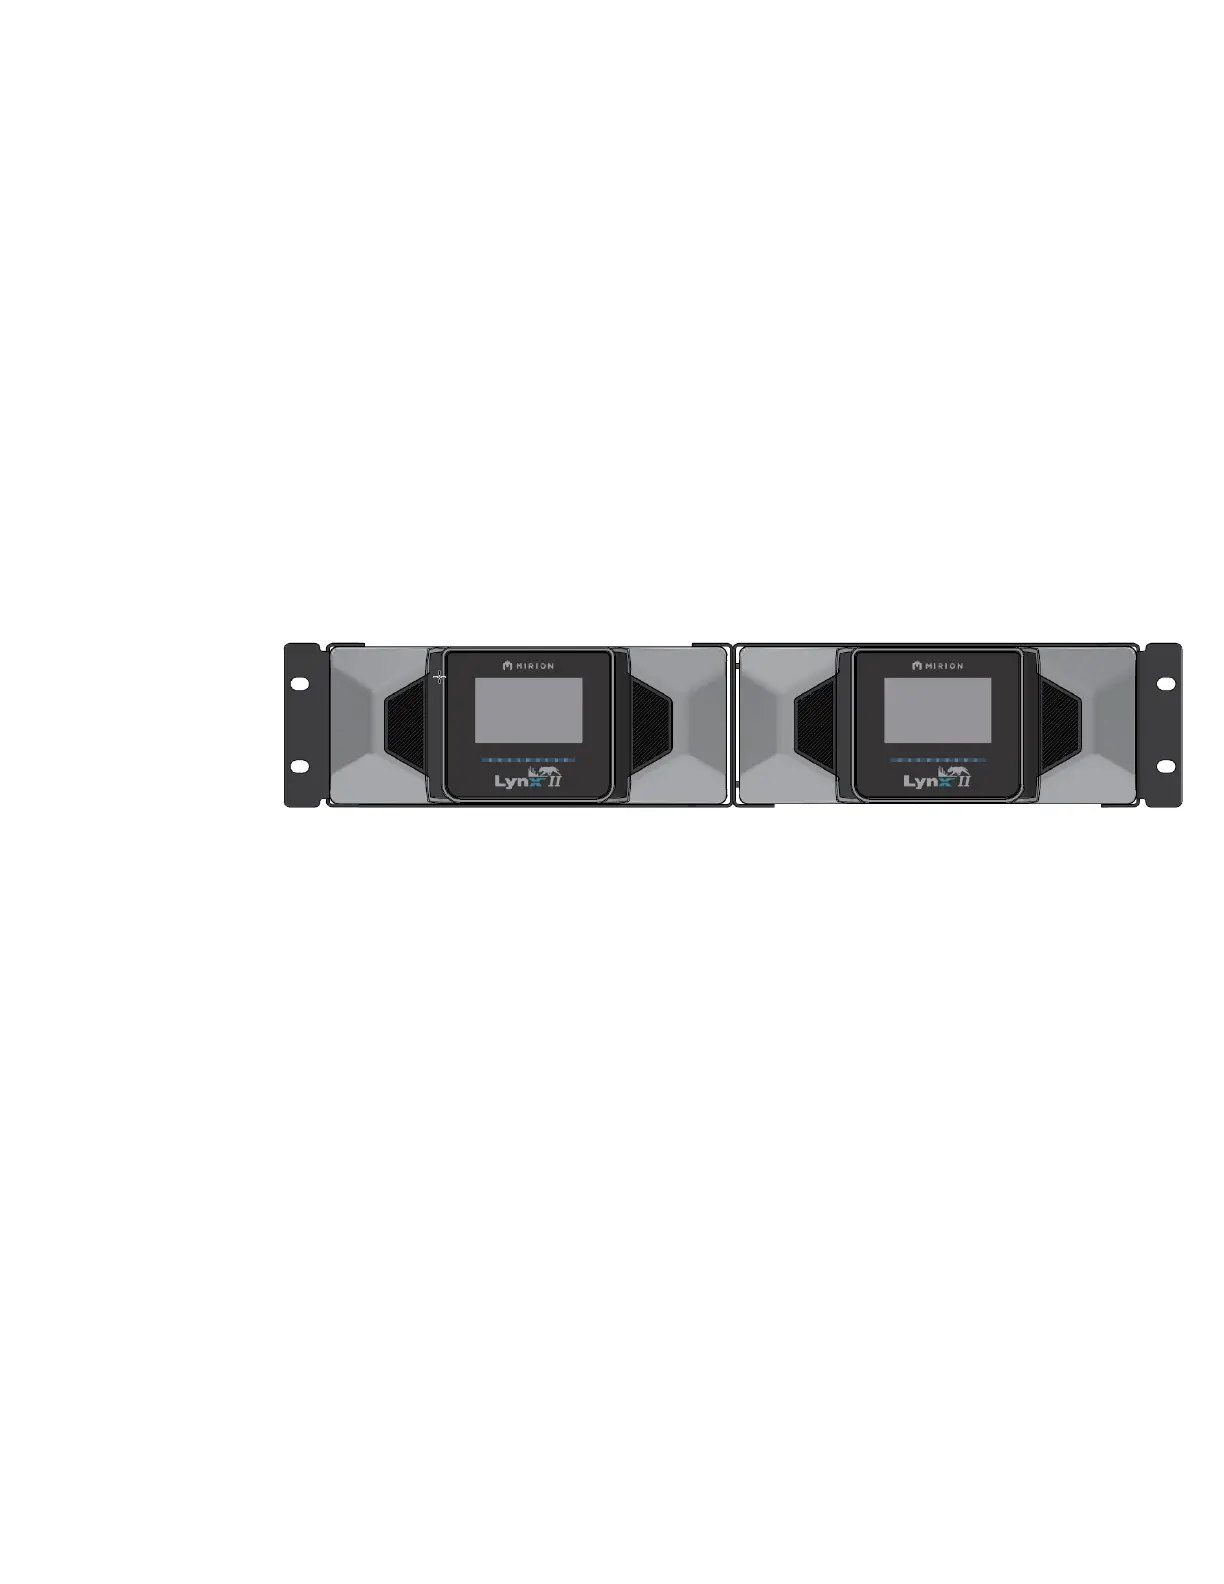
You will join two Lynx II units’ side-by-side. Note the orientation of the blank rack, it will
be positioned so the bracket handles are on the outside as shown in Figure 85.
Figure 85: Rack Mounting Two Lynx II Units
1. Position the half-rack bracket so the bracket handle is on the outside. Slide the
Lynx II DSA into the half-rack bracket (item 1). See Figure 86.
2. Use 12 of the provided M3 X 10mm LG SS 18-8 FHMS (item 3) to secure the
Lynx II DSA to the half-rack bracket, four screws for the top, four for the bottom,
and four for the side. Tighten the screws until snug with your screwdriver; do not
over-tighten the screws. See Figure 86.
3. Attach a second Lynx II half-rack bracket (item 1) to the assembled rack using four
10-32 X 1/4IN, 316 SS FHMS (item 4). Tighten the screws until snug with your
screwdriver; do not over-tighten the screws. See Figure 87.
4. Slide the Lynx II DSA into the second Lynx II half-rack bracket (item 1). Use 12 of
the provided M3 X 10mm LG SS 18-8 FHMS (item 3) to secure the Lynx II DSA
to the half-rack bracket, four screws for the top, four for the bottom, and four for
the side. Tighten the screws until snug with your screwdriver; do not over-tighten
the screws. See Figure 87.
 Loading...