14 - 19
14.7 I/O Check
14.7.3 I/O check operation
9
UTILITY FUNCTION
10
COMMUNICATION
INTERFACE
SETTING
11
DISPLAY AND
OPERATION
SETTINGS
12
CLOCK SETTINGS
AND BATTERY
STATUS DISPLAY
13
FILE DISPLAY AND
COPY
14
GOT SELF CHECK
15
CLEANING OF
DISPLAY SECTION
16
INSTALLATION OF
BOOTOS AND
STANDARD MONITOR OS
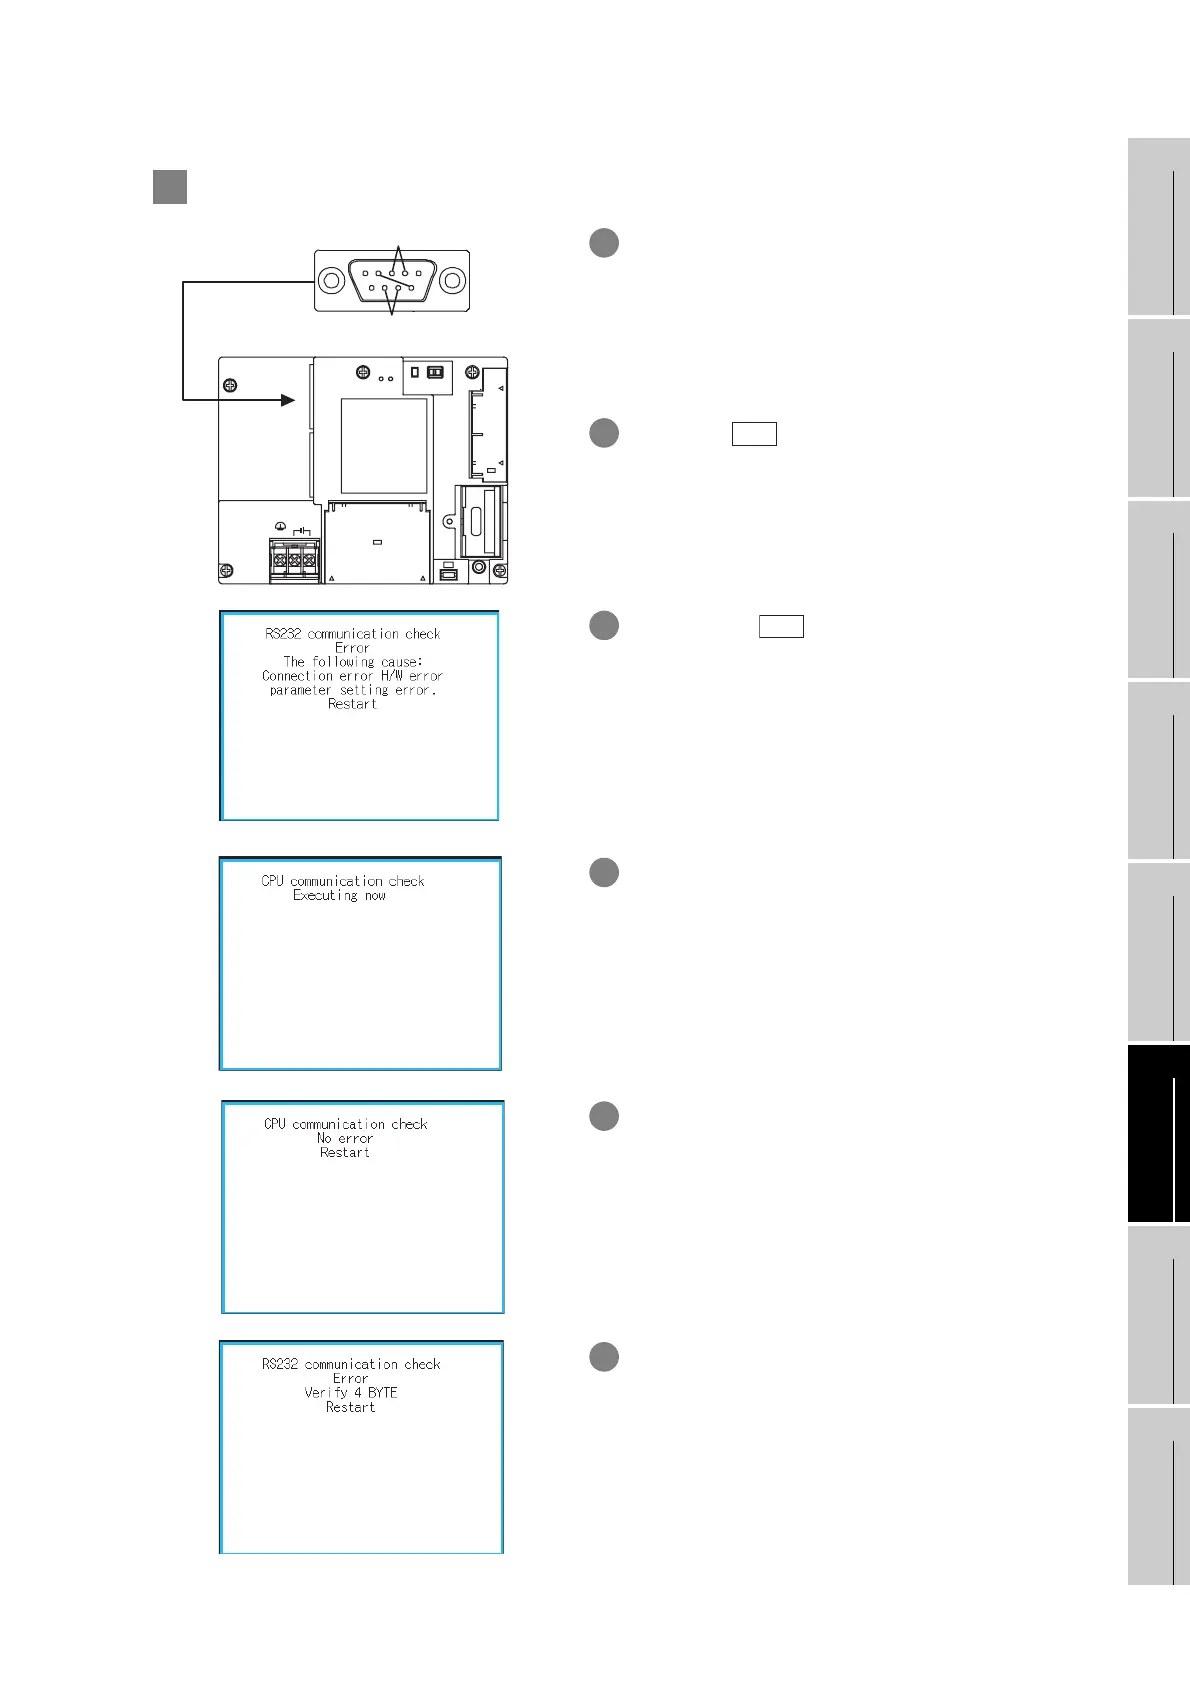
2 Self-loopback
1 For preparation for the self-loopback communication
check, insert the connector for self-loopback check
(Customer purchased) shown in the diagram left in
the RS-232 interface.
For this connector, short 2 and 3 pins, 7 and 8 pins, 4
and 6 pins, respectively.
2 If touch the button, the hardware check for the
RS-232 interface is carried out.
3 After selecting , the transferred data and
received data are verified through the self-loopback
connector. If data can not be received during data
transmission, the dialog shown left is displayed,
which notifies the self-loopback connector failure,
self-loopback connector communication error or RS-
232 interface hardware failure.
4 During check, the dialog shown left is displayed.
5 When all checks end normally, the dialog shown left
is displayed, and the GOT restarts.
6 If an error occurs the dialog is displayed at that point,
notifying the GOT has terminated abnormally and
which byte the error occurred, and then the GOT
restarts.
If a verification error occurs, the RS-232 interface
hardware may be faulty.
Display unit (back)
RS-232
CF CARD
I/F
ACCESS
BATTERY
24V DC
INPUT
RESET
+-
(FG)
CF
CARD
OFF ON
RS-422
432
876
Self
Self

 Loading...

