8 - 6
8.3 Option Function Board
8.3.3 How to install or remove the option function board
8.3.3 How to install or remove the option function board
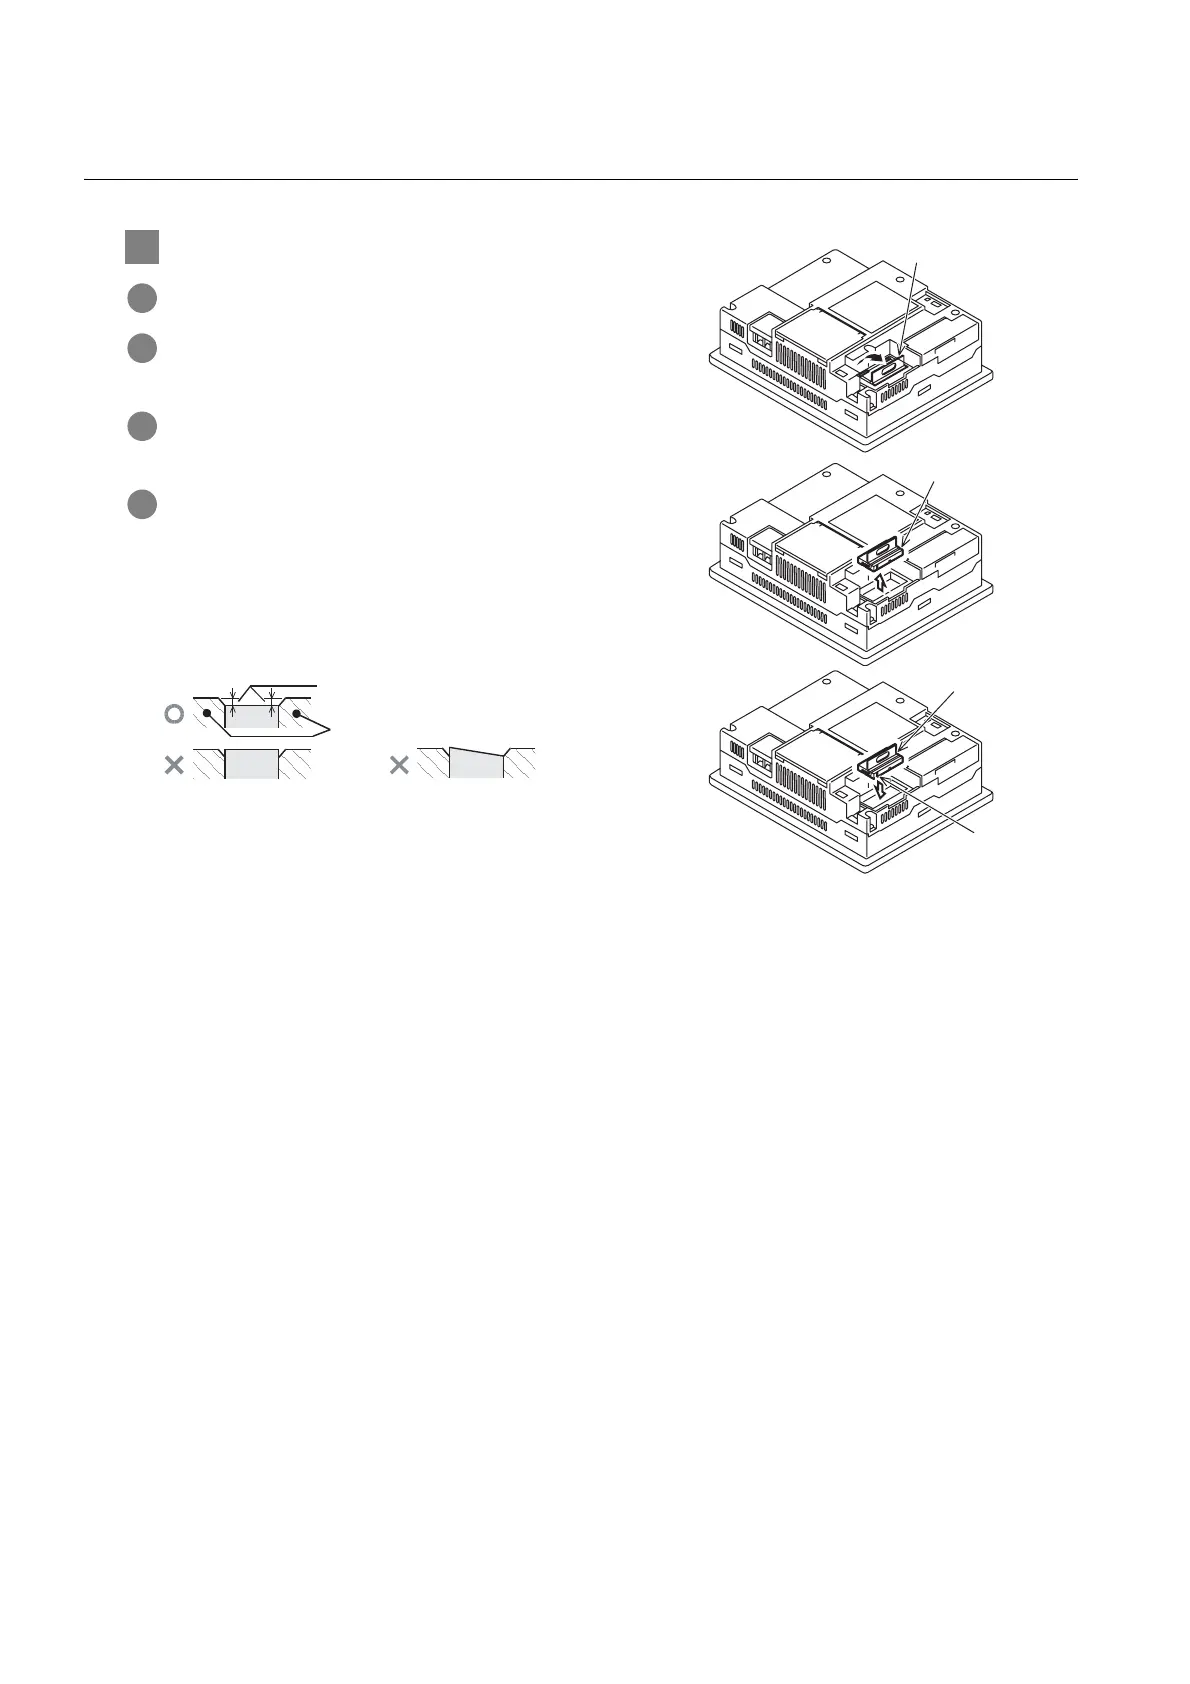
1 Installing
1 Turn the GOT power off.
2 Rise the lever on the dummy cover with a fingernail as
shown in the figure on the right.
3 Pinch the lever with fingers and pull-up it vertically to
remove the dummy cover.
4 Install the option function board to the option function board
connector on the back panel of the GOT.
Push-down the option function board by approximately
0.5mm with fingers along the groove for reverse installation
protection.
Do not keep the option function board in a floated or inclined
status.
Do not touch the circuit board in the GOT main unit during
the option function board installation.
Dummy cove
Dummy cove
Option function
board
Groove for
reverse installation
protection
Cross sectional view (with option function board installed)
InclinedFloated
*1
*1
Push-down by
approx. 0.5mm
at four corners.
*1
GOT main unit
*1:Option function
board

 Loading...

