Install the Server Top Cover
Returning the Server to Operation 189
3.
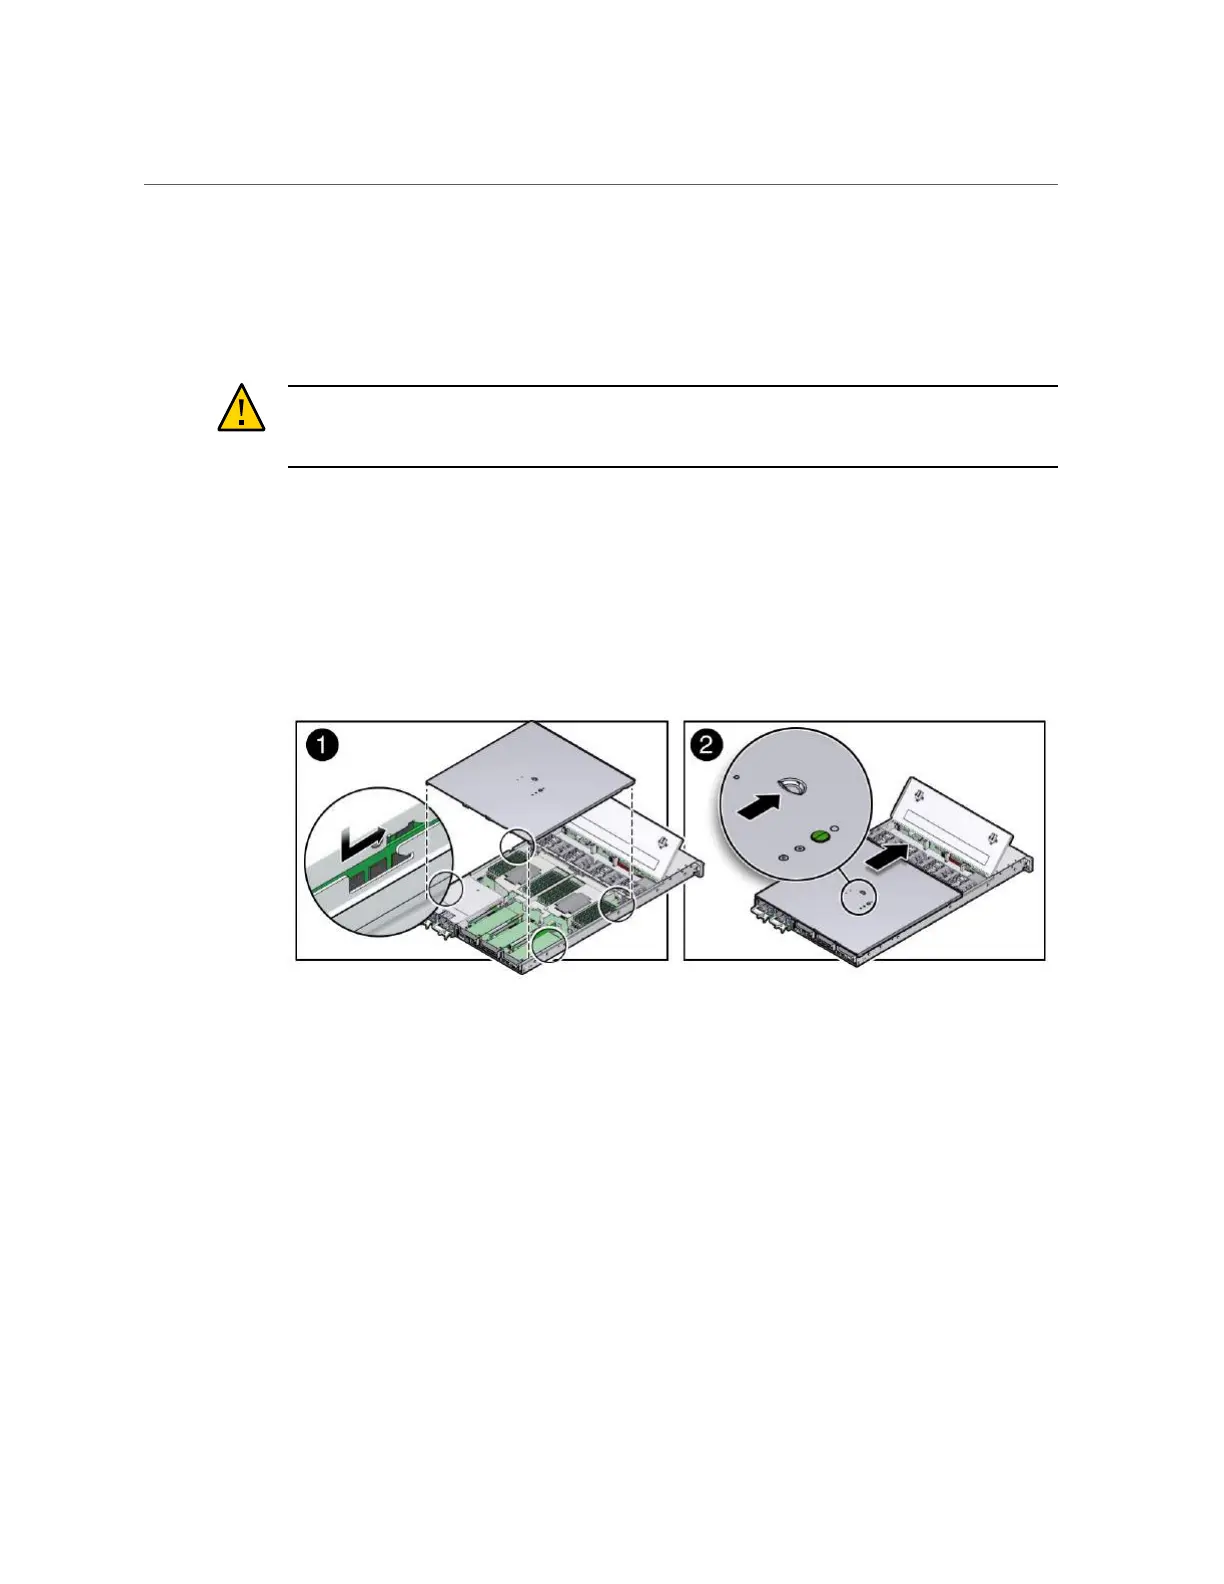
Check both sides of the chassis to ensure that the four corners of the top cover
are fully down and flush with the chassis.
If the cover corners are not flush with the chassis, slide the cover towards the rear of the chassis
until you can position the cover correctly.
Caution - If the top cover is not correctly positioned before you attempt to slide the cover
toward the front of the chassis, the internal latch that is located on the underside of the cover
might be damaged.
4.
Gently slide the cover toward the front of the chassis until it locks into place
(with an audible click) [2].
As you slide the cover toward the front of the server, watch the green release button. You will
hear an audible click when the green release button pops up, indicating that the cover is locked.
FIGURE 34
Installing the Top Cover
5.
Close the server fan door.
6.
Remove the antistatic precautions.
See “Remove Antistatic Measures” on page 190.
Related Information
■
“Remove the Server Top Cover” on page 60
■
“Remove Antistatic Measures” on page 190