Install a Fan Module
Servicing CRUs That Do Not Require Server Power-Off 79
Install a Fan Module
1.
Remove the replacement fan module from its packaging and place it on an
antistatic mat.
2.
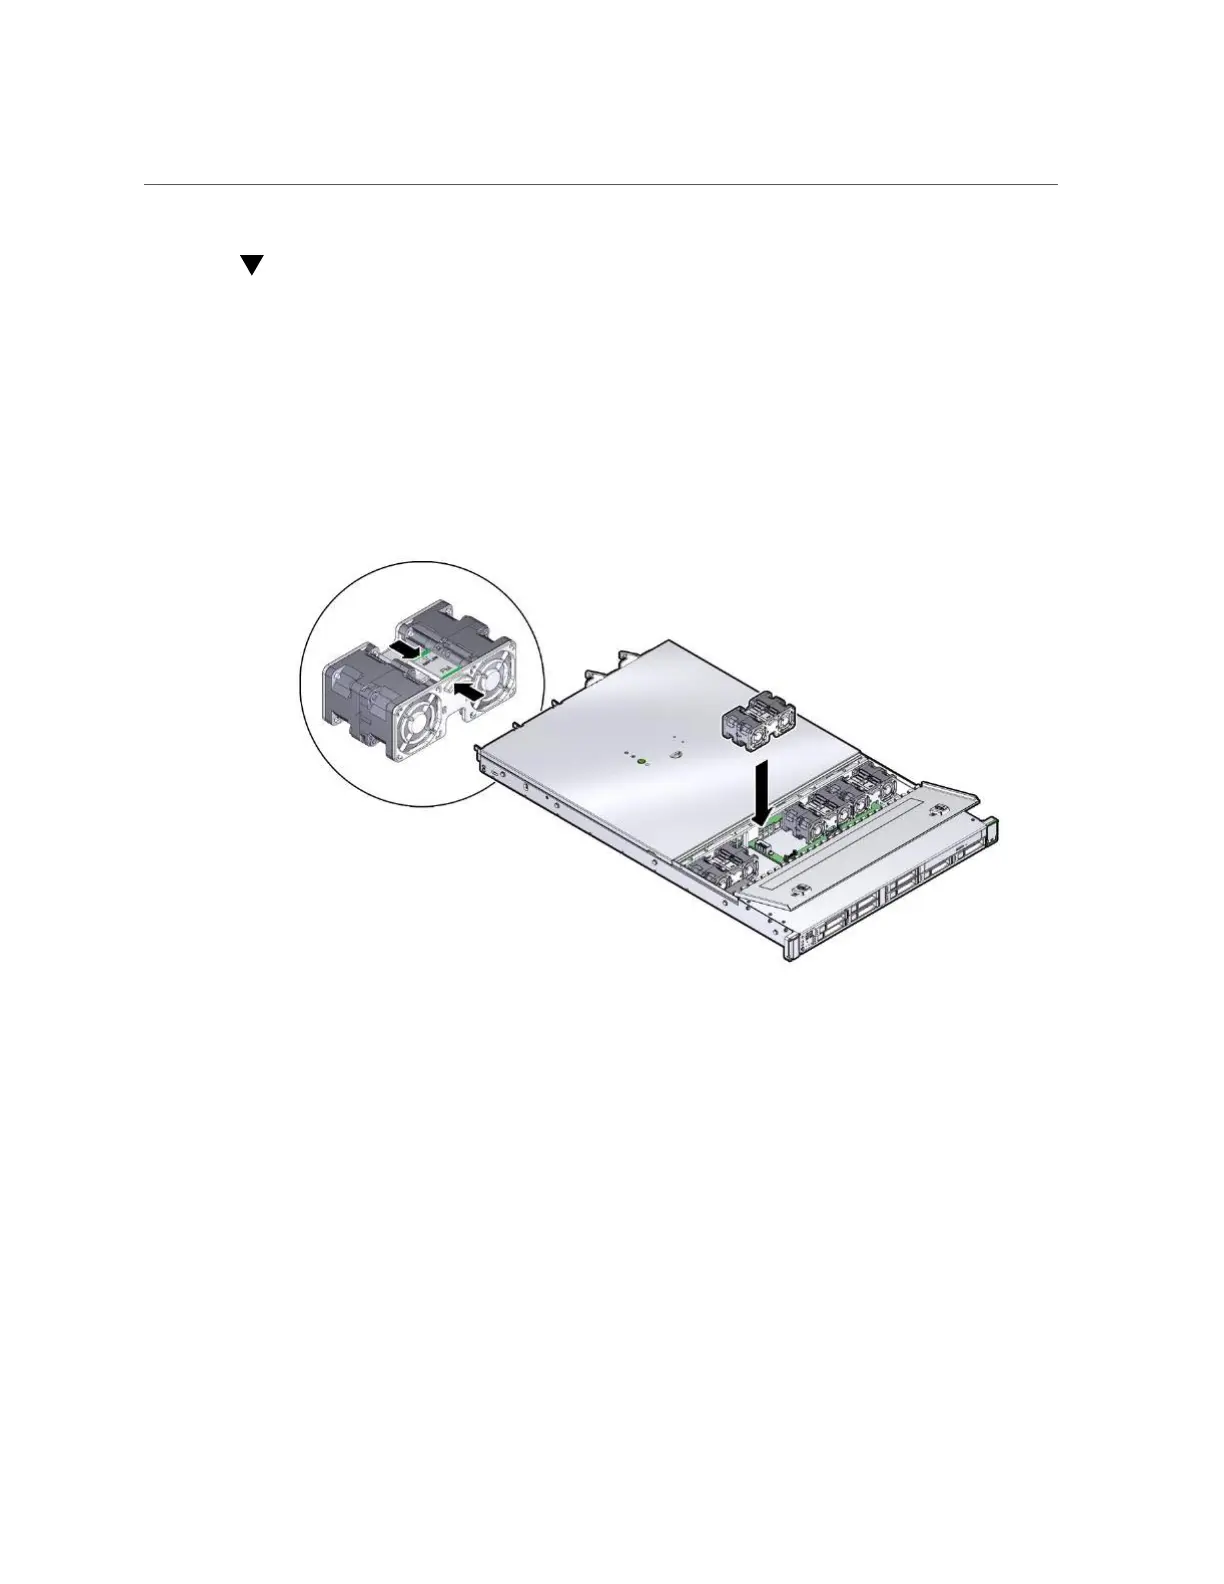
With the fan door open, position the replacement fan module into the server.
The fan modules are keyed to ensure that they are installed in the correct orientation.
FIGURE 13
Installing a Fan Module
3.
Press down on the fan module and apply firm pressure to fully seat the fan
module.
4.
Verify that the fan module status indicator (LED) that aligns with the replaced fan
module is extinguished.
5.
Close the fan door.
6.
Verify that the Top Fan Fault LED on the front of the server and the Service
Required LEDs on the front and rear of the server are extinguished.
See “Troubleshooting Using the Server Front and Rear Panel Status Indicators” on page 28 for
more information about identifying and interpreting system indicators.