Chapter B: SETTINGS 4 TECHNICAL SETTINGS
Technical manual Planmeca ProOne 69
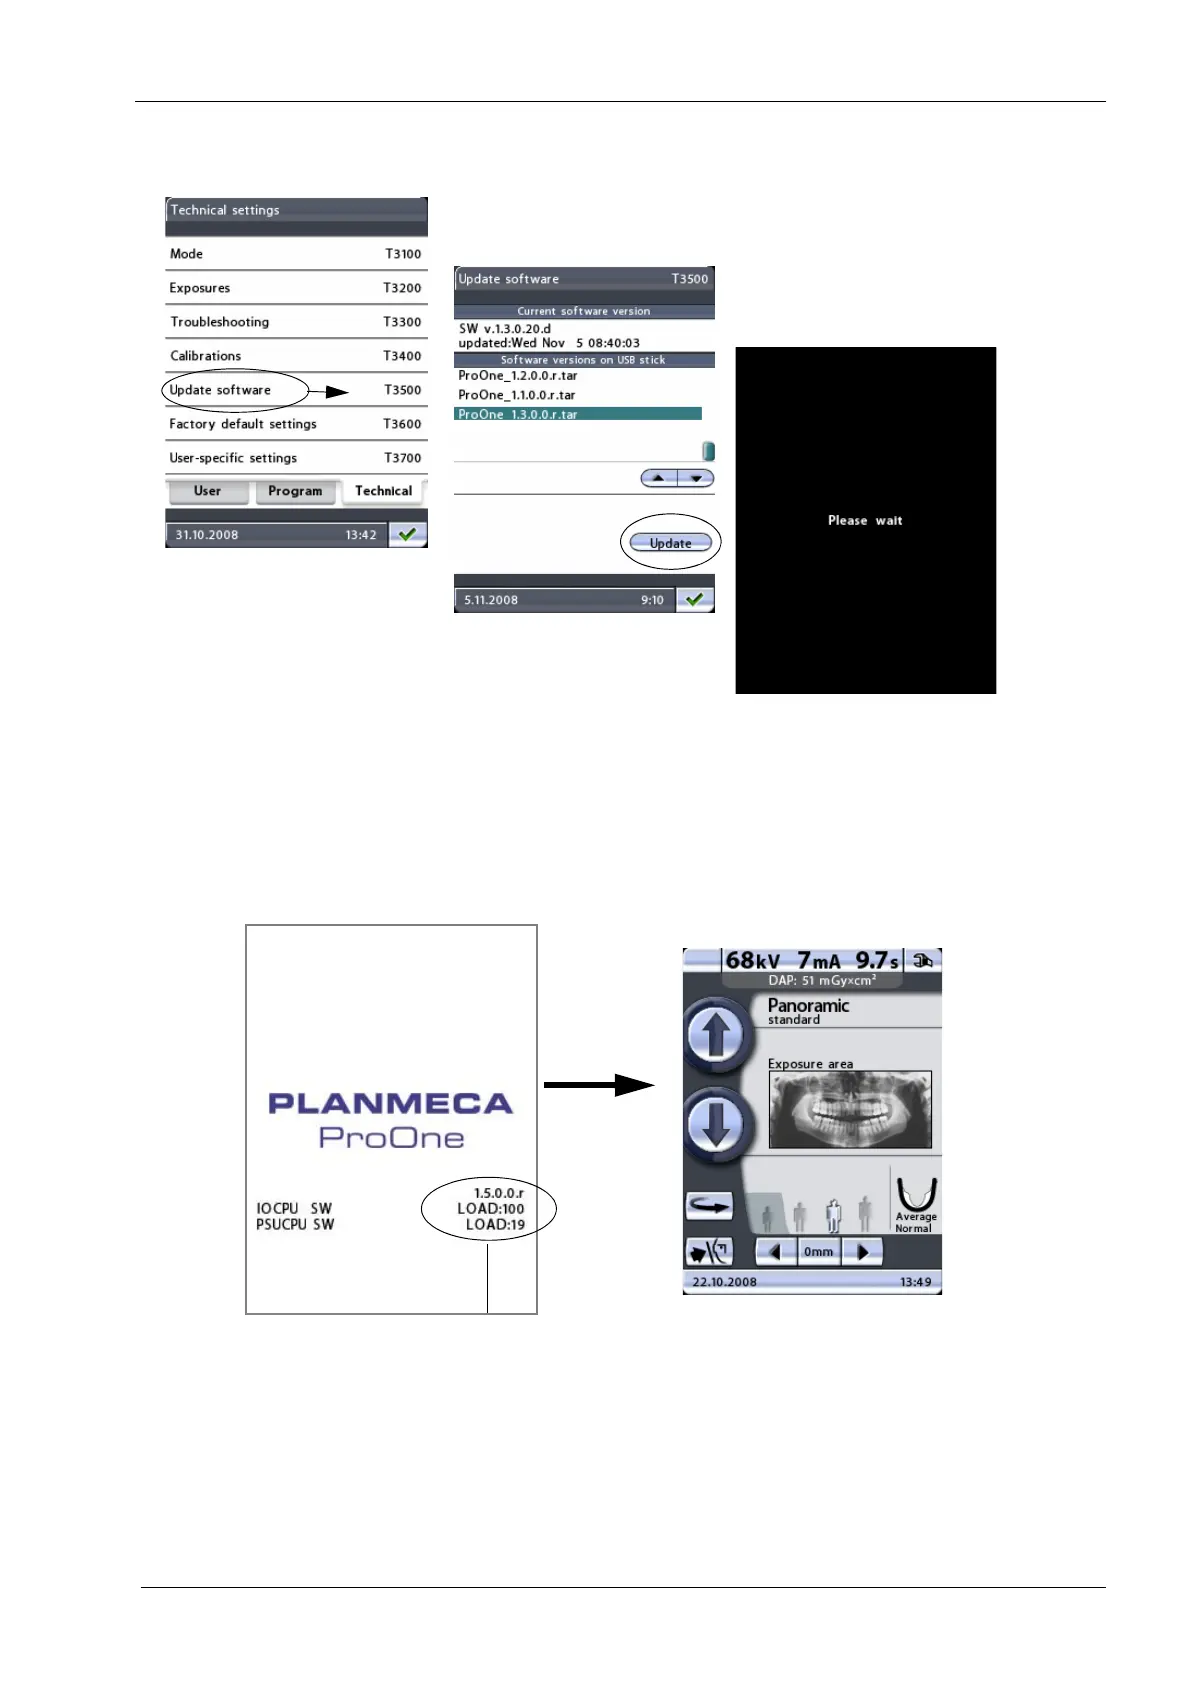
5. You will receive a message asking you to wait.
The X-ray unit will be automatically
rebooted. Do not switch the X-ray unit off manually at this stage.
6. The new software will now be updated and you can follow the update progress on the
display. The new software has been successfully updated when both figures in the
LOAD field reach 100 (%). The main display will then be shown again. The software
has now been updated and it is ready for use. Switch off the X-ray unit.
7. You can now remove the USB memory stick from the terminal at the back. Reattach
the cover that protects the terminals by first latching the cover in place at the top and
then fastening the two screws at the bottom. Switch on the X-ray unit.