3 COLUMN PARTS REPLACEMENT Chapter F: PARTS REPLACEMENT AND REPAIR
134 Planmeca ProOne Technical manual
3.6 Replacing the lift motor steel cable
Care must be taken when replacing the lift motor steel cable. Removing parts of the
lift motor assembly may make the column fall causing a dangerous situation and/or
damage to the X-ray unit. The downwards movement of the moving column must be
eliminated before detaching any parts.
The X-ray unit contains live mains voltage parts. Always disconnect the X-ray unit
from the mains before carrying out any servicing work on the lift motor.
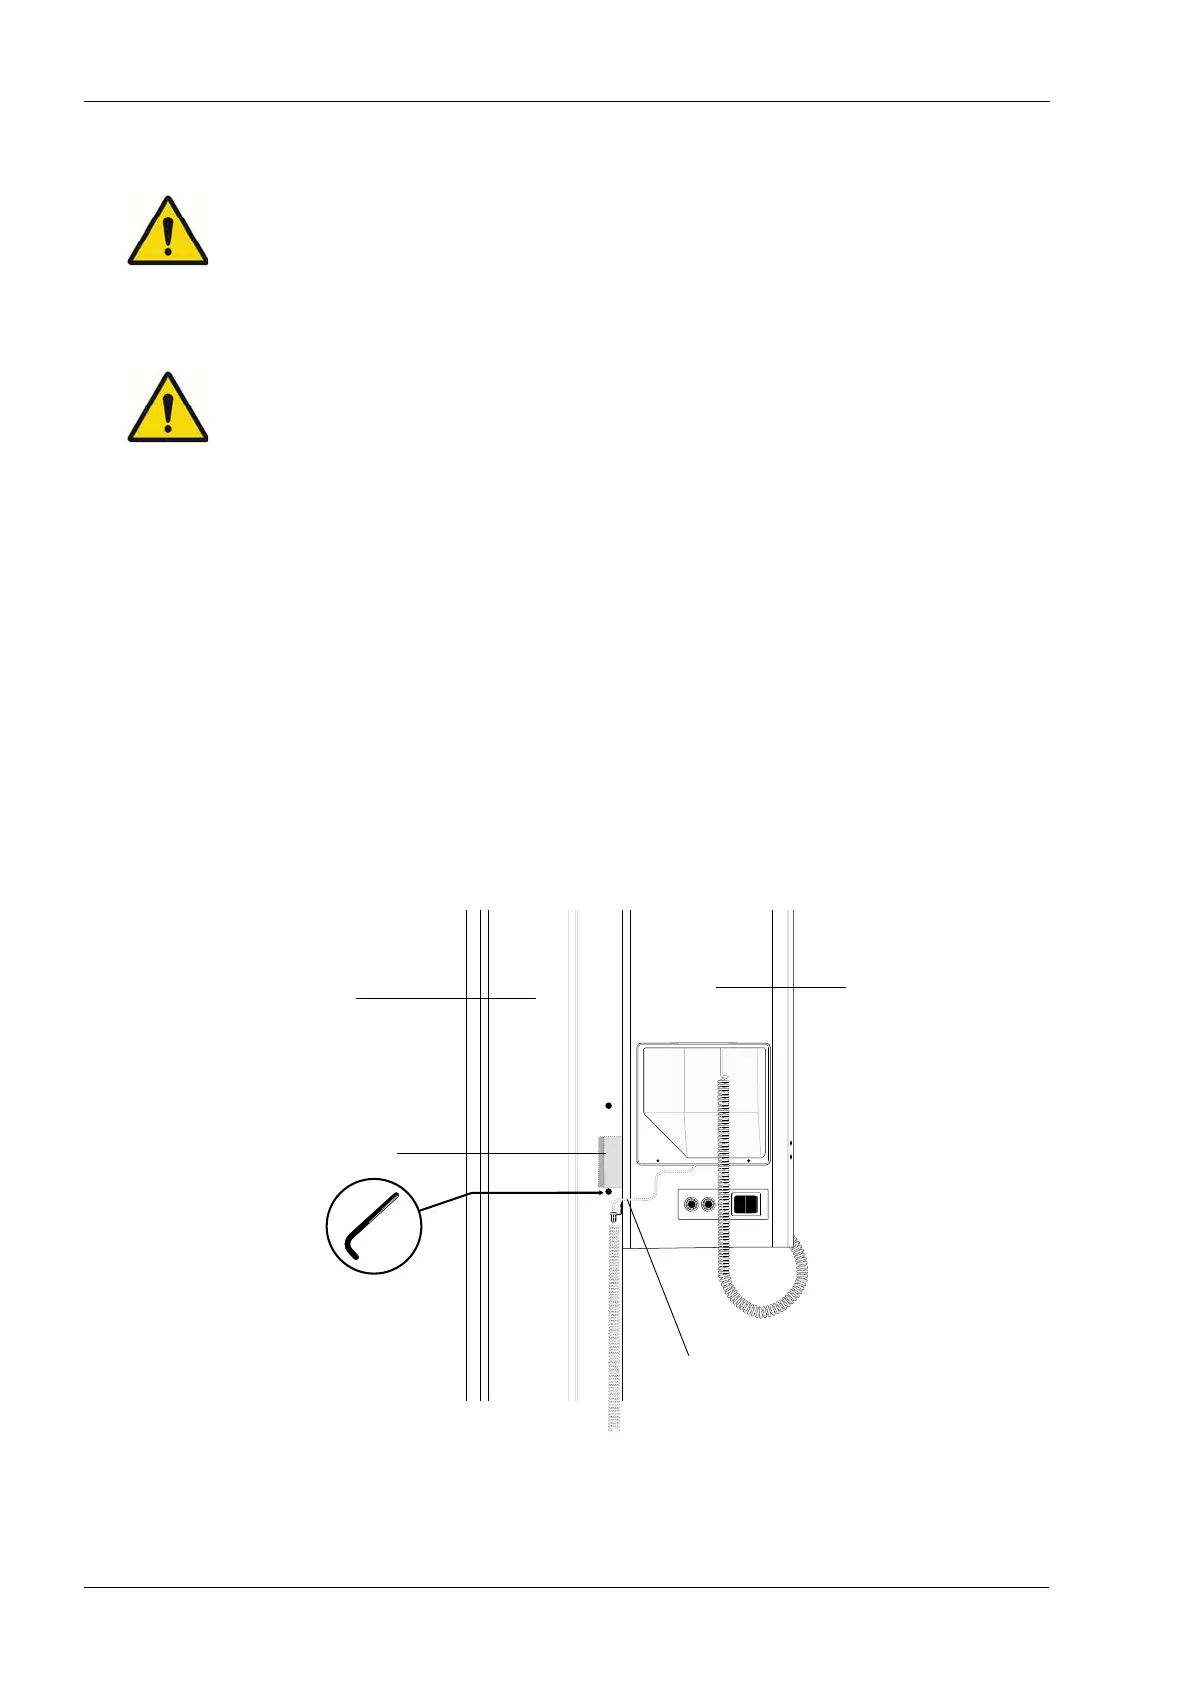
Lock the moving column in position by inserting a locking pin in the back of the column.
If the lift motor is functional, carefully drive the moving column up/down until the lower
locking pin hole is in the correct position (see figure below). Insert the locking pin into the
hole. Then drive the lift motor down an additional 10 mm (0.4 in.) to slacken the lift motor
steel cable. Now switch the X-ray unit off and disconnect it from the mains.
If the lift motor is not functional, you will need a second person for assistance. One person
will have to hold the column in position while the other one inserts the locking pin into the
hole. Remove the spindle shaft (see figures on next page) and lift/lower the moving
column until the lower locking pin hole is in the correct position (see figure below). Make
sure that the moving column is safely supported during this procedure; failure to support
the moving column properly might make the column fall causing a dangerous situation
and/or damage to the X-ray unit.
Be careful not to damage the mains cable while inserting a locking pin into the lower locking
pin hole.
Open the front panel of the moving column as described in section 1.1 "Opening the front
panel" on page 117.
Lower
slide block
Locking pin
Do not damage the cable!
Back of
stationary
column
Back of
moving
column