Crankshaft, Main Bearings, and Flywheel
02
040
34
RG,RG34710,179 –19–05SEP02–1/6
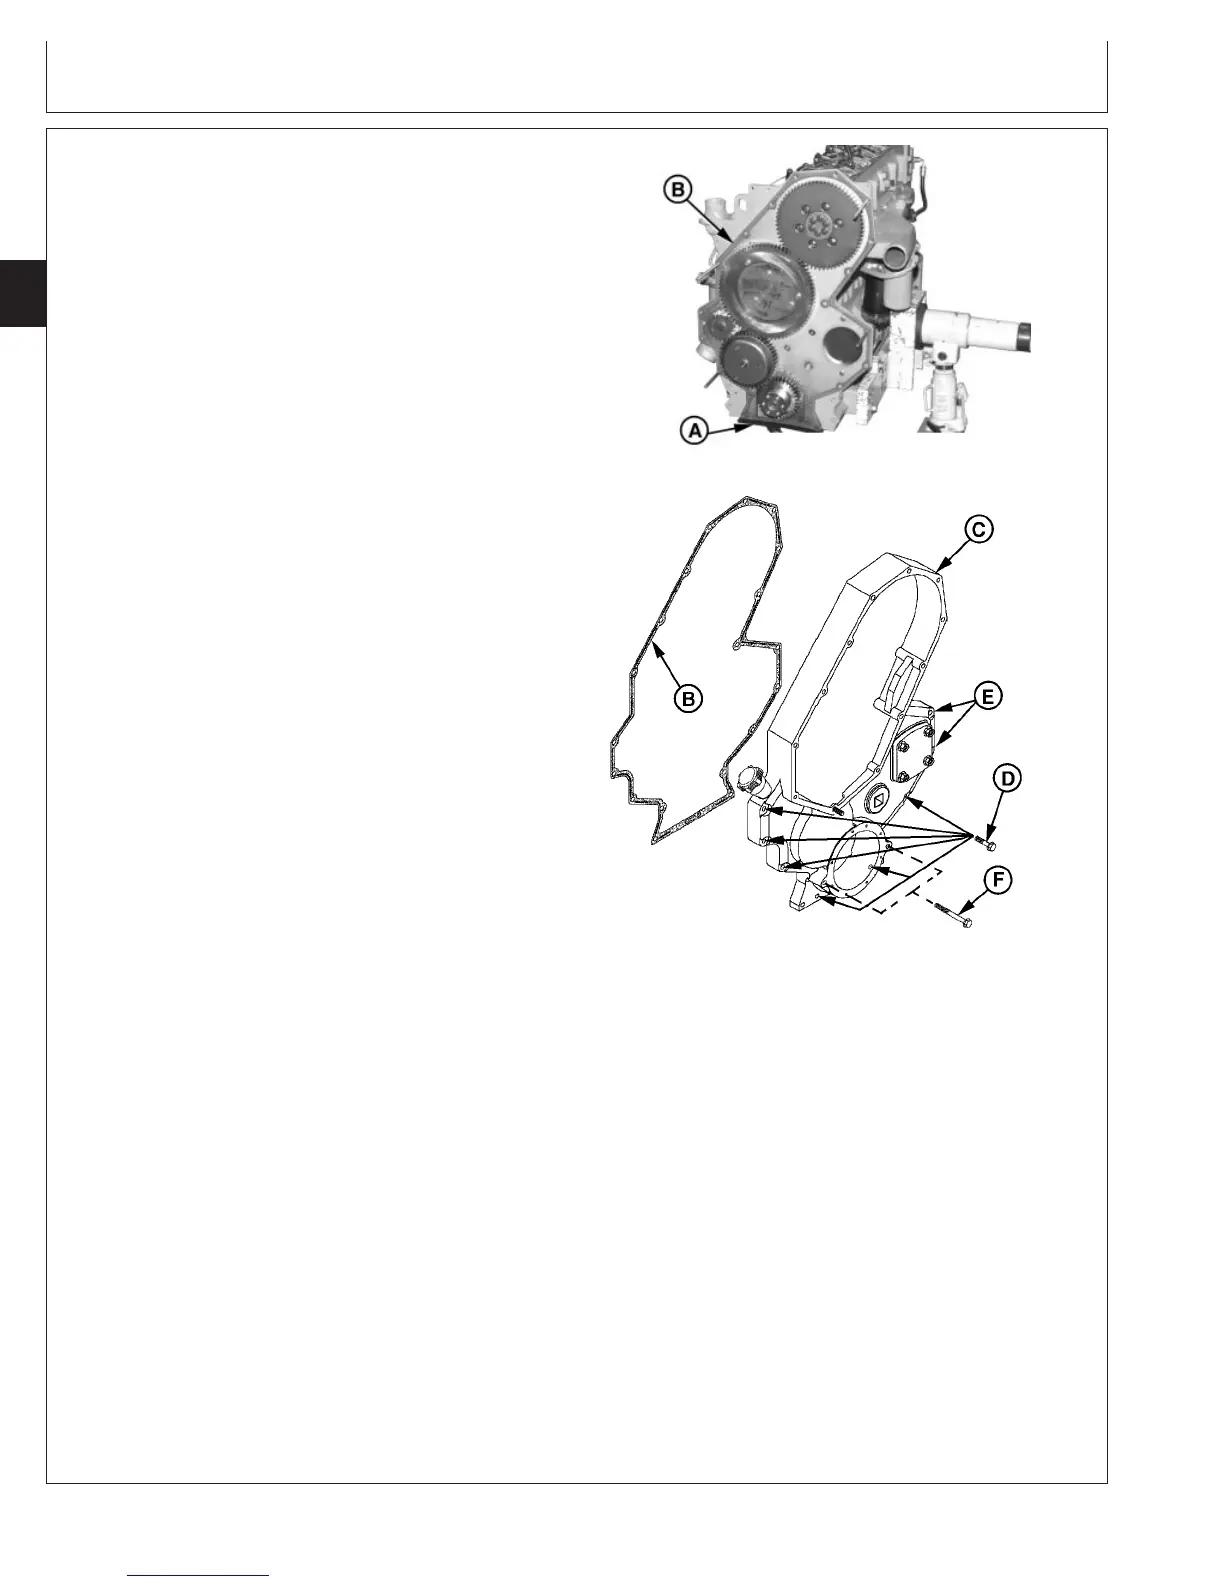
Install Timing Gear Cover
RG8788 –UN–10DEC97
JDG977 Pan Rail Aligner Installed
RG8786 –UN–10DEC97
Timing Gear Cover Cap Screw Locations
A—JDG977 Pan Rail Aligner
B—Gasket (Fel-Pro Gasket Shown)
C—Timing Gear Cover
D—M10 x 55 mm (2.17 in.)—6 Used
E—M10 x 65 mm (2.56 in.)—2 Used
F—M10 x 110 mm (4.33 in.)—2 Used
NOTE: New service timing gear covers and camshaft
gear access covers have pressed-in-place gasket
grooves. These covers use silicon rubber gaskets.
DO NOT apply any sealant to rubber gaskets.
Fel-Pro gaskets are still available for service on
older covers without gasket grooves.
1. Clean timing gear cover gasket mating surfaces.
2. Clean all gasket material and sealant (if applied) from
oil pan gasket rail.
3. Install JDG977 Pan Rail Aligner (A) onto front pan rail
(as shown) using cap screws provided. Tighten cap
screws securely.
NOTE: If necessary, guide pins may be used to ensure
correct gasket (B, earlier engines) and timing gear
cover (C) alignment with mounting holes.
IMPORTANT: On earlier engines where sealant was
applied, clean front plate and timing
gear cover surfaces with TY16285 Clean
and Cure Primer prior to assembly.
Follow instructions on label.
4. On earlier engines with Fel-Pro gaskets only, soak
both sides of new timing gear cover gasket with
LOCTITE
242 Thread Lock and Sealant and let dry
for 15 minutes or until dry to the touch.
Applya3mm(1/8 in.) wide bead of LOCTITE
515
Flexible Sealant to timing gear cover side of gasket.
5. Carefully install gasket on timing gear cover.
On later engines with press-in-place silicon rubber
gaskets, ensure gasket is properly seated in grooves
of timing gear cover.
6. Install timing gear cover and wipe off excess sealant, if
used.
LOCTITE is a registered trademark of Loctite Corp.
CTM100 (06APR04)
02-040-34
P
OWER
T
ECH
10.5 L & 12.5 L Diesel Engines
040604
PN=230
Continued on next page