Setting up peripherals • 175
English
17-10-05-353-002g_10-2020 B
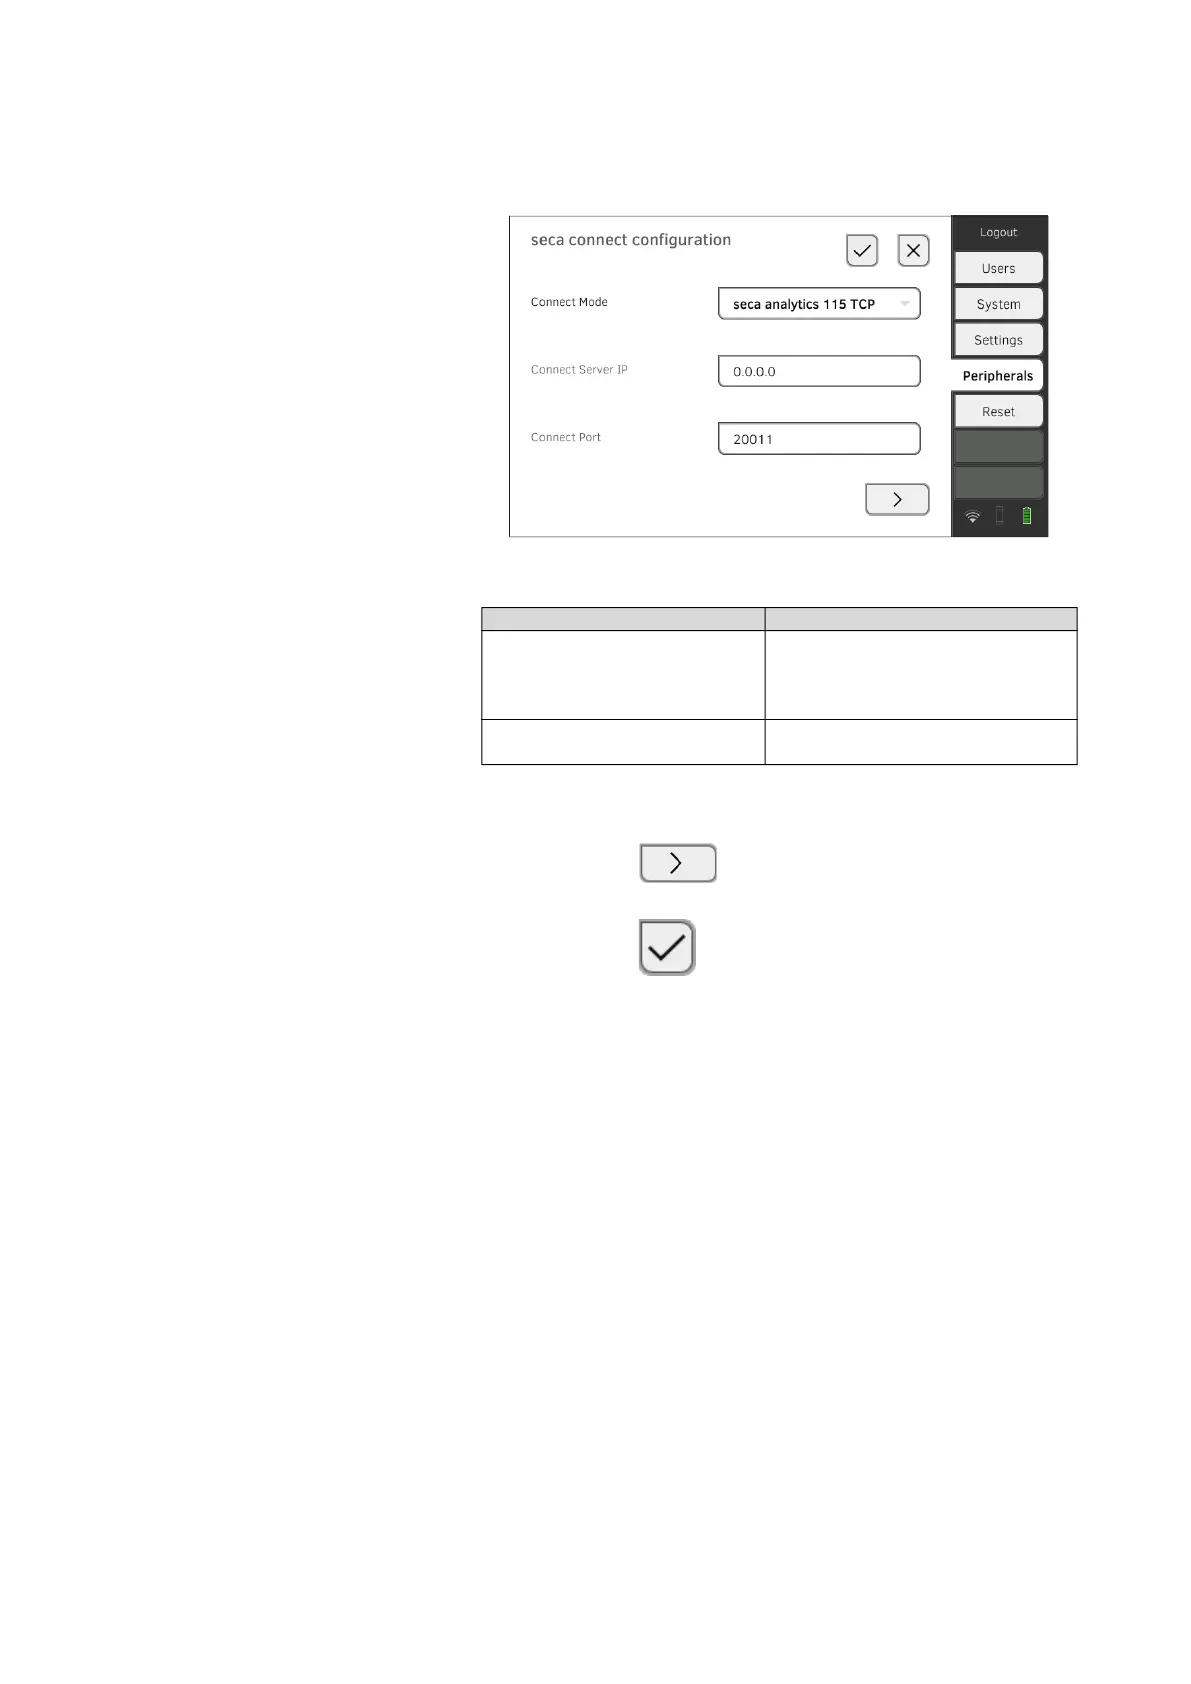
3. In the Connect Mode drop-down menu, select the option
seca analytics 115 TCP.
The recommended presets are displayed.
4. Adapt the presets if necessary.
5. In the Connect Server IP line, enter the appropriate IP address.
6. In the Connect Port line, enter the port of the PC selected under 5. (de-
fault setting: 20010).
You have the following options for continuing:
► Press the button:
➔ Activating automatic synchronization
► Press the button:
Confirm settings, exit dialog
Activating automatic
synchronization
If you are using the device in combination with the seca analytics 115 PC
software, you should activate automatic synchronization. The following data
are then synchronized as soon as they are changed either on the device or in
the PC software:
• seca patient files
• User accounts and passwords
• Automatic export settings
NOTICE!
Malfunction
In order to be able to use automatic synchronization, a connection to
the PC software must be set up ➔ Setting up a connection to the
seca analytics 115 PC software.
► Ensure that the connection to the PC software is set up before you
activate automatic synchronization.
Configuration IP address
seca analytics 115 PC software
as client/server solution
The IP address of the PC on which
the seca analytics 115 PC software
was installed with the Server or
Complete options
seca analytics 115 PC software
as a standalone solution
IP address of the PC workstation