Starting up the device • 35
English
17-10-05-353-002g_10-2020 B
NOTICE!
Damage to device, malfunction
The temperature probe can only be pushed right into the probe holder
if it does not have a probe cover on.
► Ensure that there is no probe cover on the temperature probe.
NOTE
The storage compartment on the probe connection provides space
for two packs of probe covers.
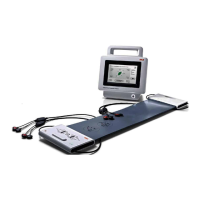
Connecting the in-ear thermometer
1. Put the connector for the in-ear thermometer in the socket on the Smart-
Bucket until you feel the connector engage.
NOTE
The magazine holder in the thermometer compartment provides
space for two probe cover magazines.
2. Place the in-ear thermometer in the thermometer compartment as shown
in the illustration below.
Connecting the seca SpO
2
sensor NOTICE!
Damage to device, malfunction
The SpO
2
sensor must be compatible with the seca SpO
2
measuring
equipment fitted.
► Ensure that the SpO
2
sensor is compatible with the SpO
2
measuring
equipment fitted in your device ➔ Optional accessories and spare
parts.
► Follow the user documentation from the sensor manufacturer.
1. If necessary, connect a patient cable to the SpO
2
sensor as described in
the user documentation from the sensor manufacturer.