Cirklon Sequencer User Manual
If you have created and assigned your instrument correctly (remembering to connect an
instrument to the correct MIDI port and channel), it should start playing notes on the active
steps.
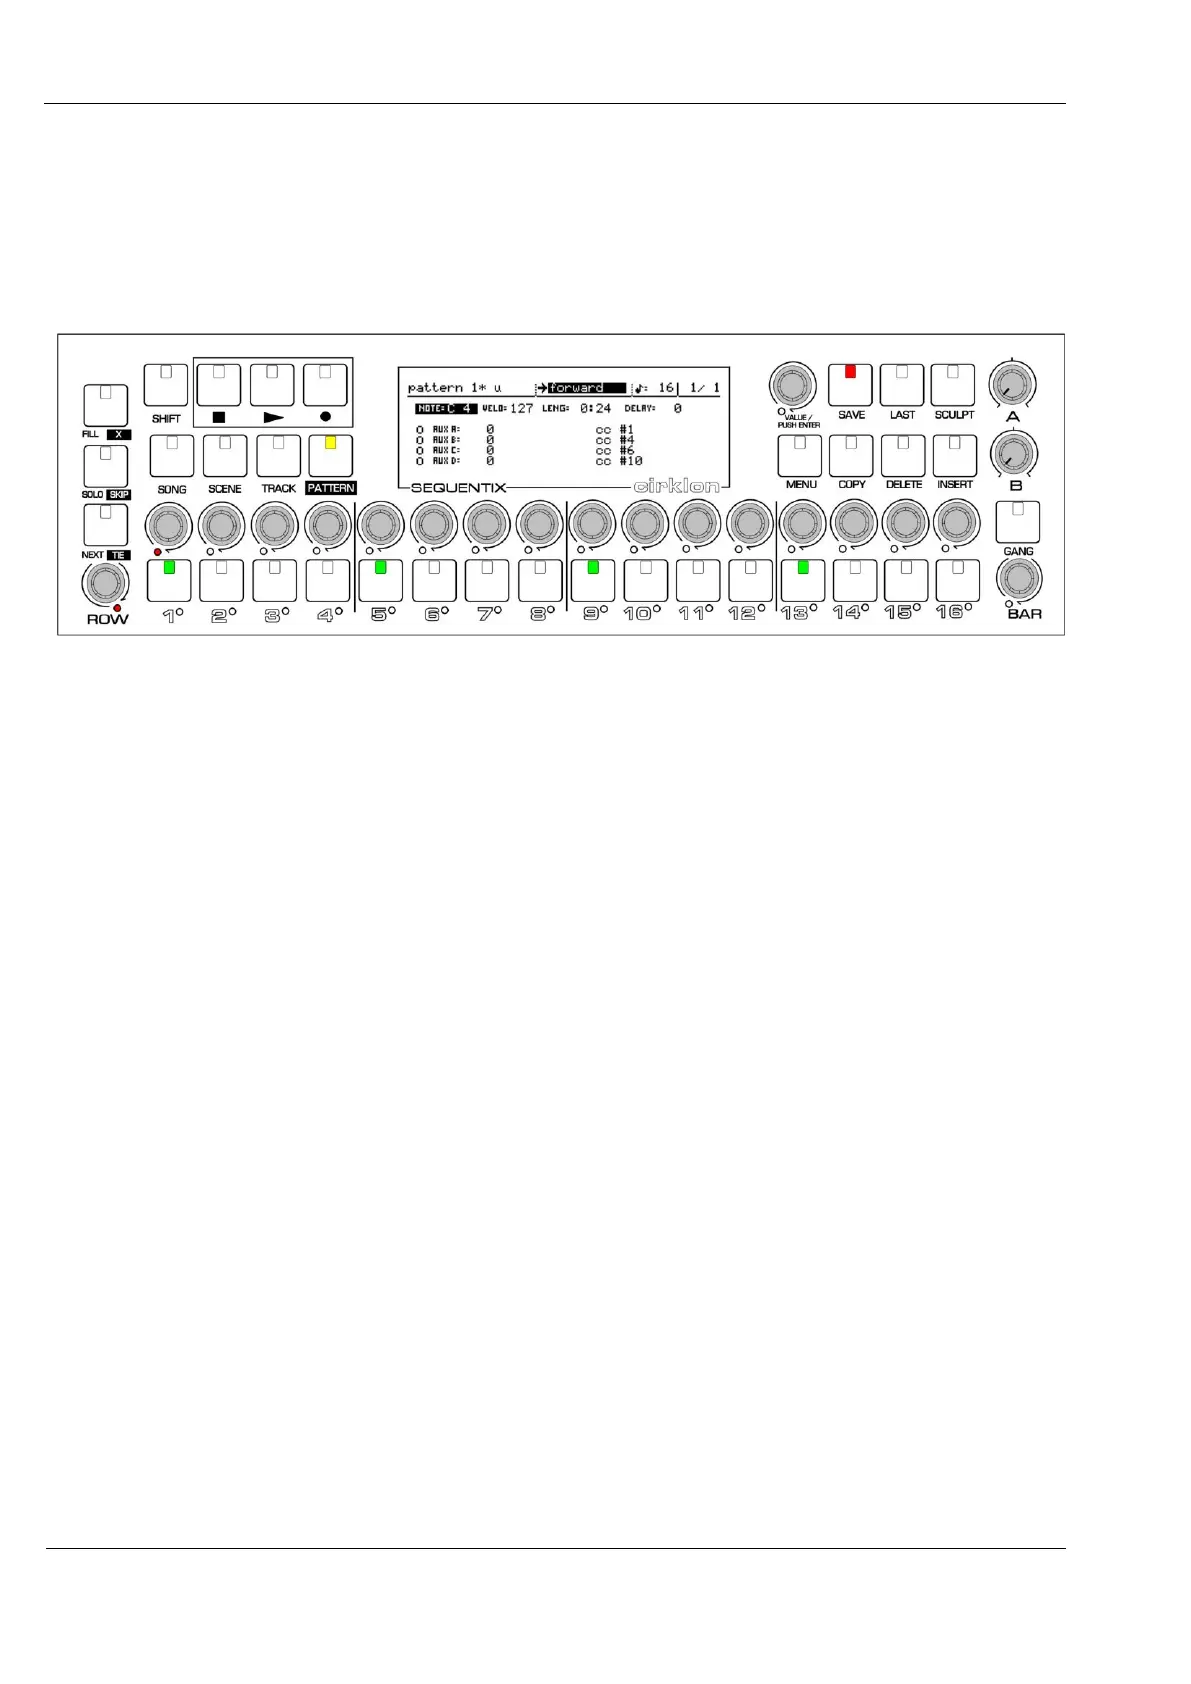
For example, if you press steps 1, 5, 9 and 13, the front panel should look like this:
You can then turn some of the step encoders, to adjust the note values.
As the encoder above a step is turned to edit the value on that step, the display position will
change to show all the values for the edited step, with the newly changed value updated.
A red LED below one step encoder indicates the current step.
You can switch to view the other steps without editing their values by pressing the step
encoders.
To select which row value you wish to edit, turn the ROW encoder.
In step view, you will see this moves the selection highlight through the different values.
Normally the step keys are assigned to the gate flags.
These control whether a note is triggered on each step.
If you select one of the four auxiliary rows, the step keys will be assigned to the status flags
for that aux row.
These control whether a CC message will be sent, or an aux event triggered on each step.
The selection of gate and the four auxiliary flags is therefore linked to the row selection.
To access the remaining three flag values – tie, skip and X, there are dedicated keys on the far
left of the front panel.
When one of these keys is pressed, its LED will light.
The LEDs in the step keys will now show the status for the selected flag.
The current gate status will appear on the LEDs just below the step keys, so you can still see
which steps are active as you decide where to apply ties, skips and X’s.