S2 User Handbook
81
S2CT TELCO CHANNEL WITH EQ
S2CT TELCO CHANNEL WITH EQ
11
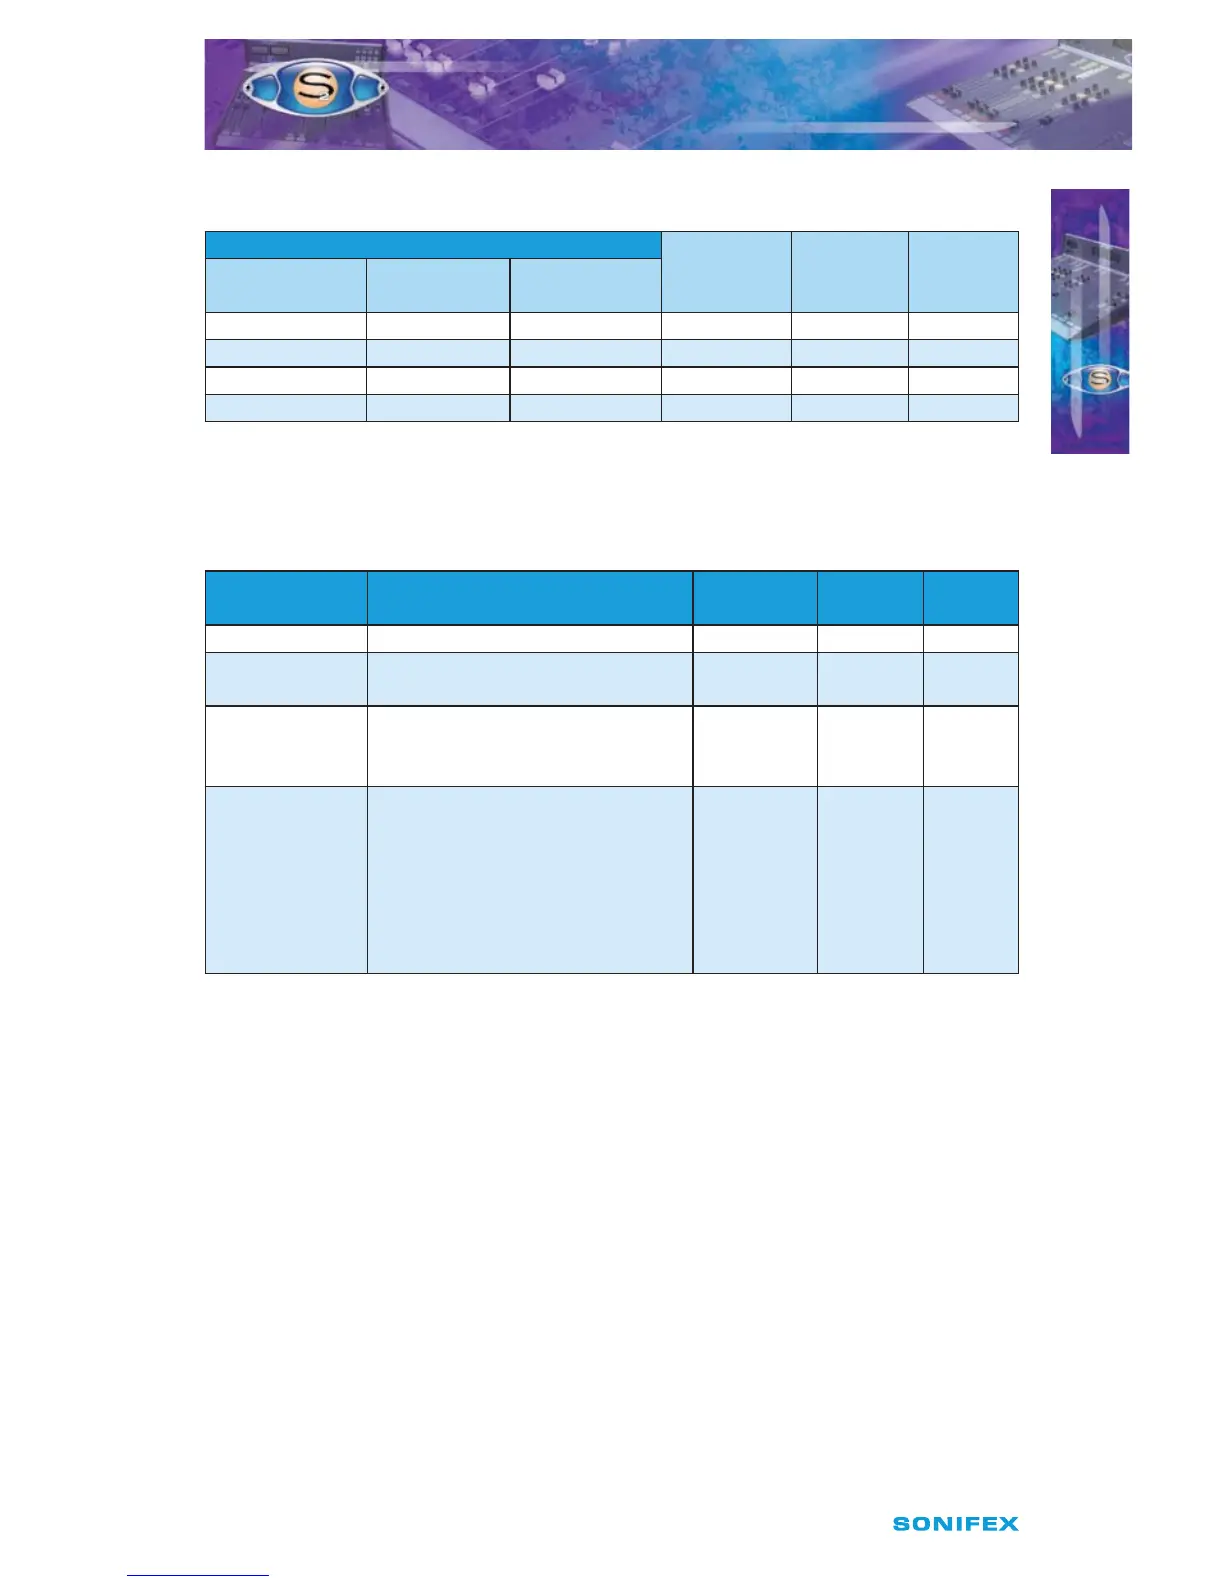
General Purpose Input Function Options
GPIO Function
ON Button
Cue/PFL
Button
AUD
Button
Input/Output
Latching/
Momentary
Active Low/
Active High
I L AL OFF OFF OFF
I M AL ON OFF OFF
I L AH OFF ON OFF
I M AH ON ON OFF
t /PXTFMFDUUIFBDUJPOVTJOHUIF1(.CVUUPOBTCFGPSF
General Purpose Input Action Options
The functions available are described below.
GPIO Action Description ON
Button
Cue/PFL
Button
AUD
Button
None - OFF OFF OFF
Talkback
Enable
The remote pin controls Talkback
enable to the C/F outputs.
ON OFF OFF
Fader ON
The remote pin controls the fader
open function. When active, the
fader is fully open.
OFF ON OFF
TBU Indicator
The remote pin controls the
indicators within the ON button.
When this control is active, the
ON button will be green. When
it is not active it will be red. The
ON button mode must be set to
Mode 3 when this is used.
ON ON OFF
t 1SFTTUIF0/CVUUPOUPBQQMZUIFTFUUJOH
t 5IFNPEVMFXJMMFYJUUIFTFUVQQSPDFEVSFBOEUIFNPEVMFDBOOPXCFVTFEBTOPSNBM
Button Mode Settings
To make the S2 modules as exible as possible, every button on each channel can be set
to a number of dierent modes. These will aid in the use of the mixer and allow for extra
functionality. To make use of these modes, you must enter a setup mode which is exactly
the same for every module. It is only necessary to perform this procedure once.
To enter the setup mode, hold down the PGM and AUD buttons together for 5 seconds.
After which all the buttons will start a recurring ashing sequence, at this point it is ok to
release the PGM and AUD buttons. This sequence indicates the mode which each button is
currently set to. One ash equals mode one, two ashes equals mode two etc. To change the
mode for a particular button simply press it once and watch the number of ashes increase.
Once the maximum mode number has been reached it will simply wrap around to mode
one and continue as before. To exit this setup procedure press and hold both the PGM and