CS8C © Stäubli 2009 – D28070504A
91 / 248
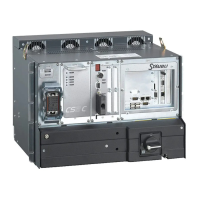
Chapter 5 - Integration
5.6. FIELD BUS
5.6.1. CHARACTERISTICS
There are various types of field bus (DeviceNet, Profibus, CANopen, ModBus TCP client).
Each of these options consists of a PCI format board located in the computer and a CD-ROM for installation of the
PC configuration software program.
The elements making up the bus as such are not supplied.
The characteristics and wiring for the field bus are specific to the equipment selected. See the constructor's
recommendations, especially for the terminal resistances at the end of the lines.
Wiring is described in the "Electric Wiring" manual.
5.6.2. CONFIGURATION
The CS8C controller is configured for a field bus using a PC ApplicomIO software application supplied on a
specific CD-ROM.
This tool enables you to configure the field bus board on the one hand, and to generate a ConfigTag.xml file on
the other hand. The file must be copied by Ftp in the /usr/applicom/io directory of the CS8C controller. If this file
is present on start-up, the Inputs/Outputs of the field bus are displayed on the control panel and are directly
accessible via a VAL3 application.
The Ethernet configuration procedure using the ApplicomIO console 2.2 software is as follows:
1) Preparation of the configuration
(CS8C)
• The field bus board cannot be configured while it is operating. If the field bus board has already been
configured in the CS8C, press the "Init" menu on the MCP (Control Panel > I/O > Fieldbus). Restart the
CS8C. The field bus board is stopped and ready to be reconfigured.
• Give the CS8C an IP address and check that it is accessible via the network from the PC on which the
ApplicomIO software has been installed.
2) Remote creation of a configuration
(ApplicomIO)
• Create a new field bus configuration (File > Configuration Manager > New).
• Enter the name of the new configuration.
• Select "On remote computer (LAN TCP/IP)","IP address" and enter the IP address for the CS8C. Leave
the port on 5001, with the "Automatic transfer" menu selected.
3) Defining the field bus configuration
(ApplicomIO)
• Configure the board via the network (Description > Add board).
• Detect the equipment ("Network detection" tab and then Network > Read network configuration).
• Insert the equipment and configure the corresponding Inputs/Outputs.
• The analog Inputs/Outputs can have an unsigned format (default configuration) or a signed one. The
other ApplicomIO formats are not supported. The min/max value and processing configurations are
supported. The "off time" value is ignored. During writing on analog outputs, the linear transformation
y=a.x+b is applied and then the result is saturated with the min/max values, and finally sent to the field
bus. During reading of an analog Input or Output, the value read from the field bus is first saturated with
the min/max values, and then the linear transformation x=(y-b)/a is applied.
• Save the configuration (File > Save).
CAUTION:
The Profibus board requires a straight connector on the field bus cable. It is not possible to
fit a 90° right angle connector.