Earth Leakage Current Test (Covers Removed)
1. Plug the rover into the safety analyzer.
2. Turn on both the Smoke Evacuator and Vacuum Control (for the small and large
canister) and set both to maximum. (Canister suction and smoke evacuator to 100%)
NOTE: To ensures that the measurement is taken with all functions at maximum, the
technician will need to measure and record the values in step 5 - while performing
step 4.
NOTE: it is normal for the rover to turn off momentarily when the neutral switch is in
the open position. The rover functions may turn off with changes between each
setting below. Verify that required functions are running before recording the maximum
value for each combination requiring the neutral switch being placed in the closed
position.
3. Turn the analyzer dial to the LEAKAGE CURRENT position. The LEAKAGE switch
must be depressed toward the EARTH label to record the values in step 5.
4. Extend the IV pole by pressing the IV pole up button. (Hold through step 5)
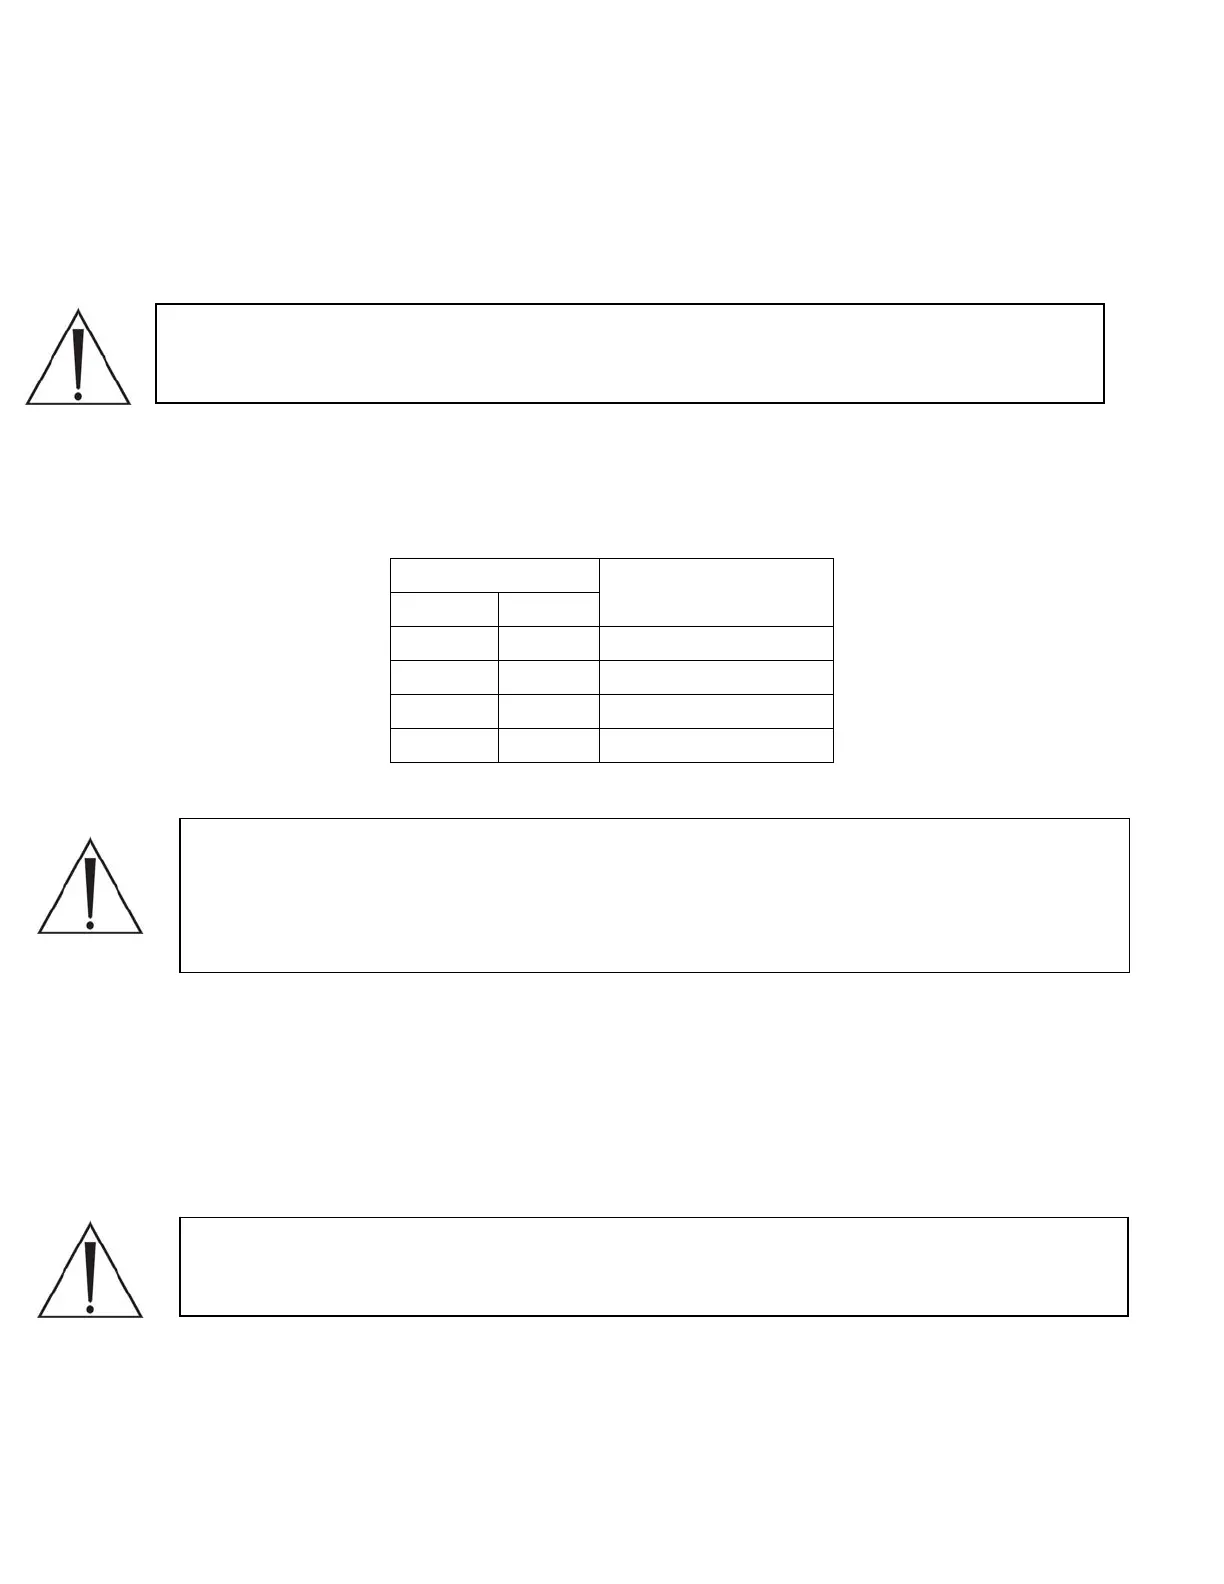
5. Measure and record the earth leakage in all combinations listed in table 6.5.1.
Analyzer Settings
Leakage Current Limit
Polarity Neutral
Normal Closed 20 uA < X < 300 uA
Reverse Closed 20 uA < X < 300 uA
Normal Open 20 uA < X < 1000 uA
Reverse Open 20 uA < X < 1000 uA
Table 6.5.1 Analyzer Settings and Earth Leakage Current Limit for Rover
Patient Leakage (Covers Removed)
1. Plug the rover into the safety analyzer.
2. Attach the test lead to the fluid level transducer just above the plastic where it attaches
to the small canister cap.
3. Turn on both the Smoke Evacuator and Vacuum Control (for the small and large
canister) and set both to maximum. (Canister suction and smoke evacuator to 100%)
NOTE: To ensure that the measurement is taken with all functions at maximum, the
technician will need to measure and record the values in step 6 - while performing
step 5.
4. Configure the safety analyzer to measure PATIENT LEAKAGE.
5. Extend the IV pole by pressing the IV pole up button. (Hold through step 6)
6-20

 Loading...


