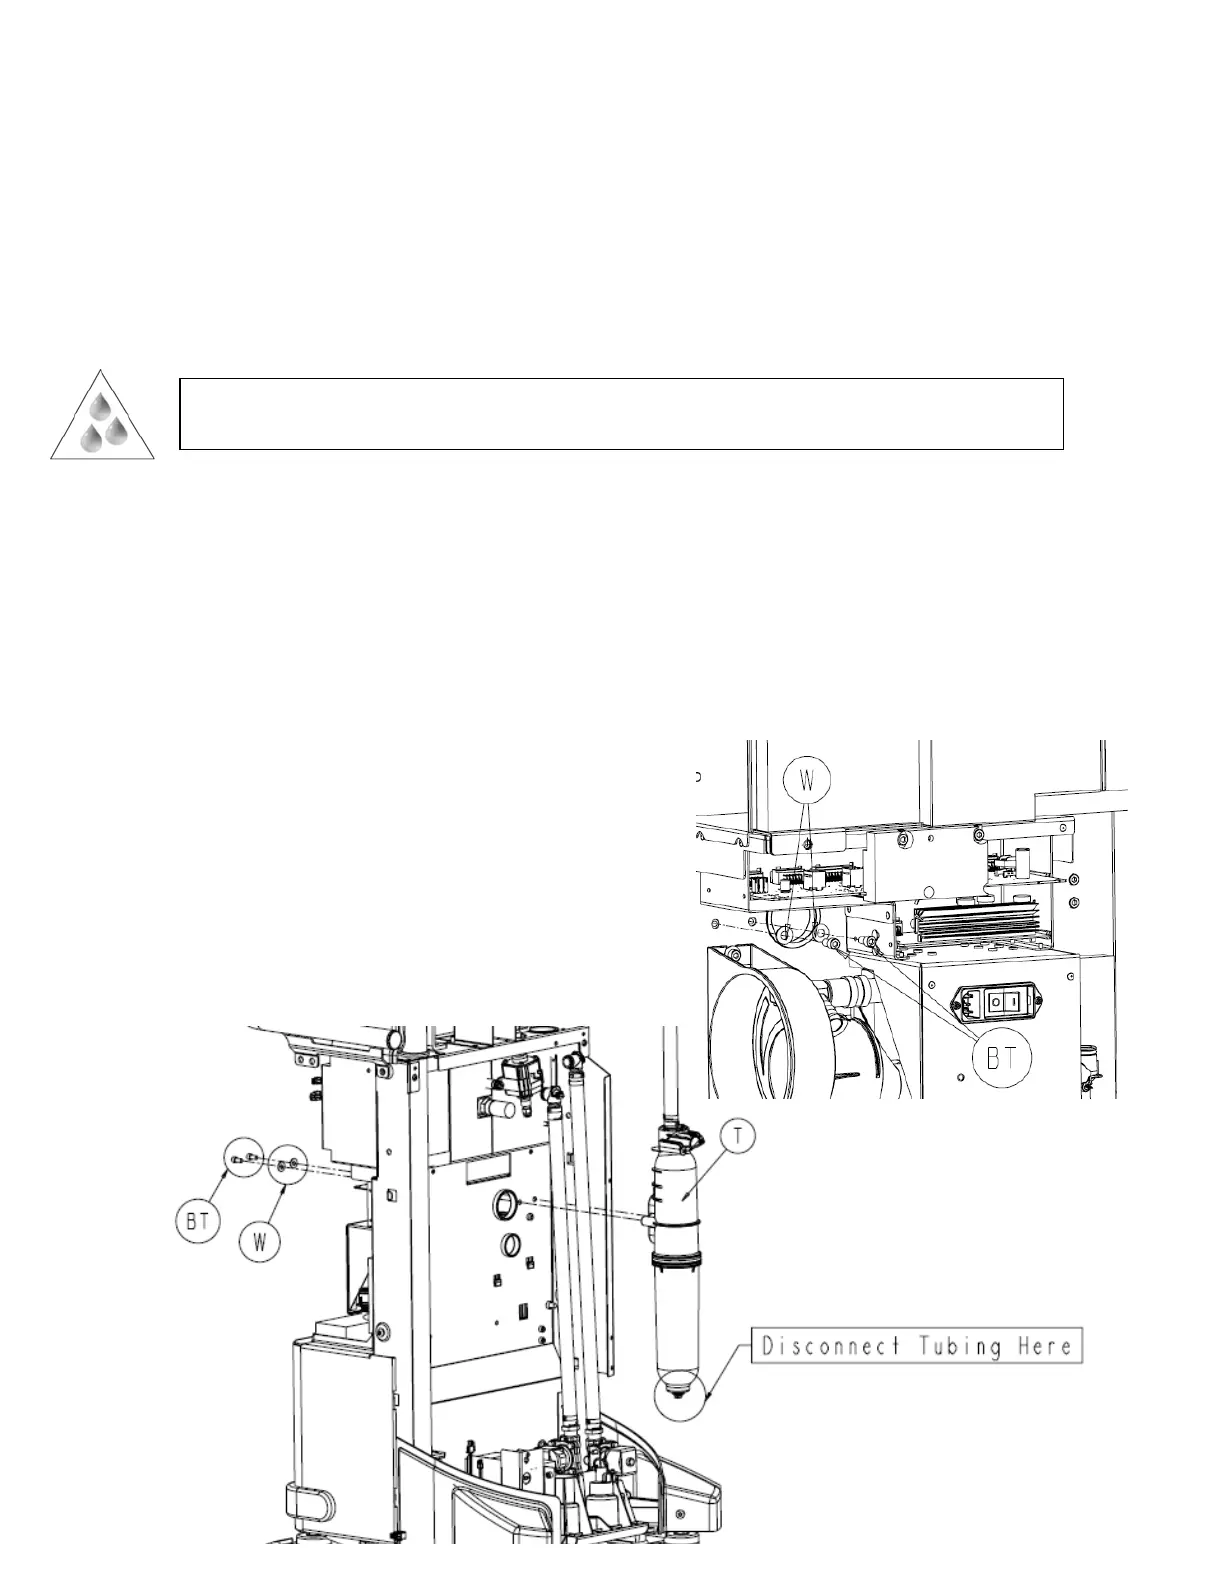
Prefill Tank P/N 702-007-370
Removing the prefill tank can only be accomplished once the fluid collection assemblies
have been removed. The removal procedure for the fluid collection assemblies is detailed in
Removal of Large and Small Canisters on page 2.25. Make sure to manually run the prefill
pump to drain the fluid from the prefill tank prior to removing the canister assemblies.
Note: When disconnecting tubing for the prefill tank and prefill pump, be aware
of water and detergent that may be present the tubing.
1. Disconnect the nylon tubing from the bottom of the prefill tank assembly (P/N 702-
007-370) (T). The prefill tank outlet hose assembly will already be disconnected at this
point.
2. Using a 3/16” allen wrench, remove the two socket head cap screws (P/N 0004-645-
000) (BT) and two ¼” flat washers (P/N 0011-507-000) (W) that secure the prefill tank
to the rover chassis. Note that the hardware for the prefill tank is on the opposite side of
the chassis.
3. Remove the prefill tank assembly (P/N 702-007-370) (T) and set aside.
2-46

 Loading...


